Love this? Save it for later!
Share the inspiration with your friends
“The power went out halfway through baking my first-ever loaf,” I confessed to my friend the next day, cradling a brick-like piece of bread that was supposed to be fluffy and golden. Honestly, I thought my bread-making dreams were dashed for good that chilly Saturday afternoon. But as frustrating as that dense loaf was, it sparked a determination in me to figure out why my homemade bread kept turning out heavy and uninviting. Maybe you’ve been there too—excited to bake fresh bread only to end up with something that feels more like a doorstop than a meal.
I remember staring at the cracked bowl on my countertop (because yes, I managed to drop it mid-knead) and thinking, “There has to be a way to fix this.” Over time, through trial, error, and a few flour-covered late nights, I learned some simple fixes that transformed my baking game entirely. Now, I’m sharing these straightforward troubleshooting tips so you don’t have to waste another loaf on guesswork.
This guide isn’t just about avoiding dense bread—it’s about making baking less intimidating and more rewarding. So, if you’ve struggled with dough that won’t rise properly or crumb that’s too tight, stick around. Let me tell you, there’s hope for your homemade loaves yet, and you’ll soon be slicing into soft, airy bread that makes you want to close your eyes and savor every bite.
Why You’ll Love This Recipe
Through countless batches and some floury messes, I’ve honed a troubleshooting approach that’s both practical and easy to follow. This guide is more than just a list of do’s and don’ts—it’s a collection of tested tips that come from real kitchen adventures.
- Quick & Easy Fixes: Most solutions can be applied without starting over, saving you time and ingredients.
- Simple Ingredients: No fancy additives or special flours required—just the basics you likely already have.
- Perfect for Home Bakers: Whether you’re tackling your first loaf or your hundredth, these tips will improve your results.
- Crowd-Pleaser: Fluffy, soft bread that impresses friends and family without stress.
- Unbelievably Delicious: Fixing density means a lighter crumb and better flavor—trust me, it’s a game changer.
What sets this guide apart is the focus on practical, no-nonsense fixes—like adjusting hydration, tweaking kneading times, or understanding yeast behavior—that you can implement immediately. It’s not just theory; it’s the kind of advice I wish someone handed me when I first got frustrated with dense bread. Plus, the emotional payoff of finally cutting into a perfect loaf? Totally worth it.
What Ingredients You Will Need
This troubleshooting guide revolves around the classic bread ingredients that form the foundation of any good loaf. Understanding each one’s role can help you spot where things might be going off track.
- Flour: Bread flour or all-purpose flour, preferably fresh. I usually reach for King Arthur bread flour for that perfect protein content that helps gluten develop.
- Yeast: Active dry yeast or instant yeast—make sure it’s fresh and within its expiration date. Expired yeast is a common culprit behind dense loaves.
- Water: Lukewarm, about 100°F (38°C), to activate yeast properly without killing it.
- Salt: Fine sea salt or kosher salt. Salt controls yeast activity and strengthens gluten.
- Sugar: A small amount to feed the yeast (optional, but helpful for beginners).
- Fat: Unsalted butter or olive oil can add tenderness, though not always necessary.
For substitutions, if you’re aiming for gluten-free, almond or oat flour can work with the right binding agents, but expect a different texture. Also, if you’re out of active dry yeast, instant yeast can be used directly in the flour. Just remember, fresh ingredients are your best friends in this process.
Equipment Needed
To troubleshoot dense bread, having the right tools can make a world of difference.
- Mixing Bowls: Large and sturdy, ideally glass or stainless steel.
- Kitchen Scale: For accurate measurement of flour and water—trust me, eyeballing leads to dense disasters.
- Thermometer: To check water temperature and dough temperature; yeast is sensitive to heat.
- Dough Scraper: Helps with kneading and transferring dough without sticking.
- Proofing Basket or Bowl: For letting your dough rise evenly. A banneton is great but a bowl lined with a clean towel works fine too.
- Baking Sheet or Dutch Oven: For baking your loaf. A Dutch oven traps steam and can improve crust and crumb.
If you don’t have a kitchen scale, measuring cups will do but weigh ingredients where possible. I once baked a dense loaf because I accidentally doubled the flour when measuring cups slipped—lesson learned! Also, keep your tools clean and dry; leftover residue can affect yeast performance.
Preparation Method
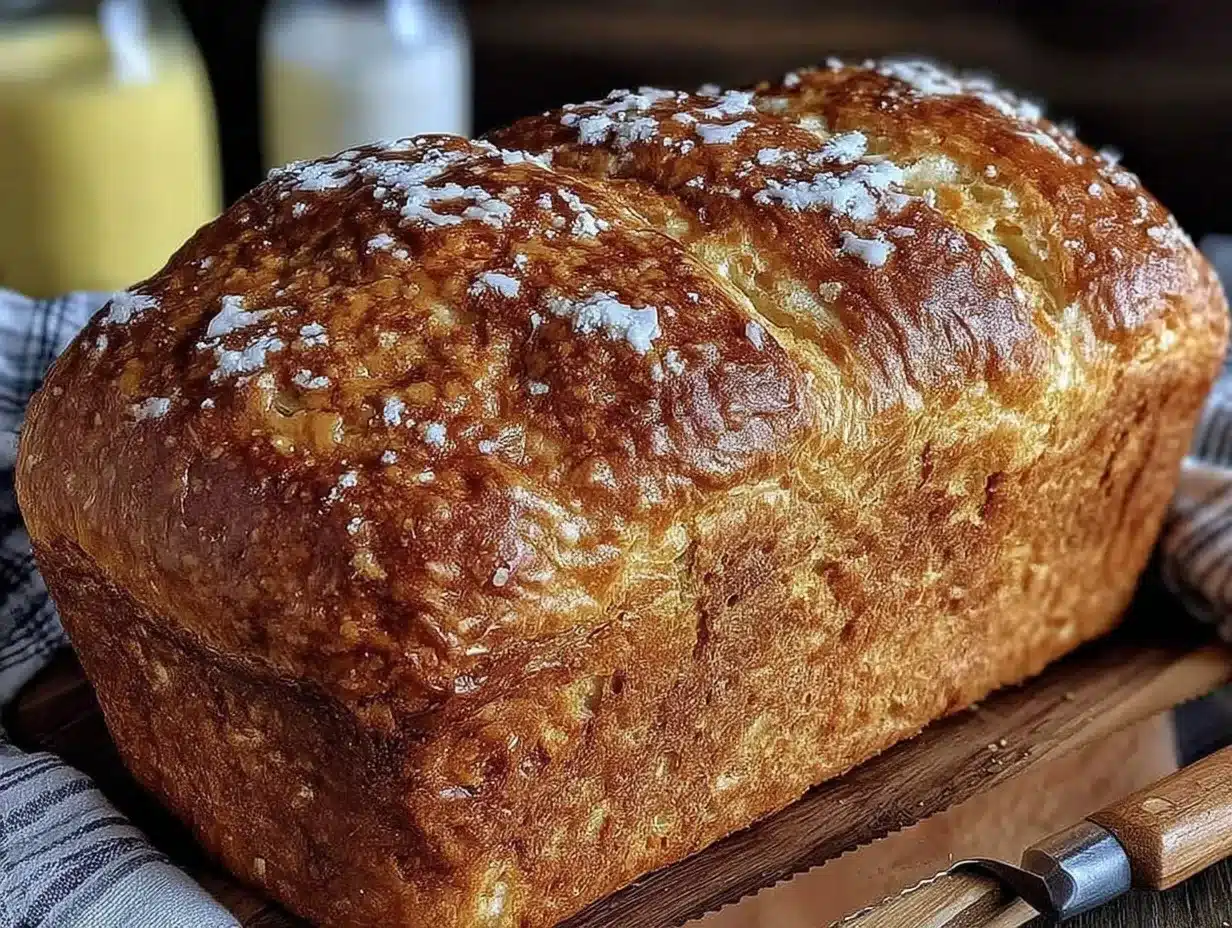
- Measure Ingredients Precisely (10 minutes): Use a kitchen scale to weigh your flour (450g / 3 ¾ cups) and water (300ml / 1 ¼ cups). Precise measurements are key to avoid dense bread.
- Activate Yeast (5 minutes): Dissolve 2 tsp (7g) of active dry yeast in lukewarm water (100°F / 38°C) with 1 tsp (4g) sugar. Let it sit until foamy—if it doesn’t foam, your yeast might be dead.
- Mix Ingredients (10 minutes): In a large bowl, combine the flour, salt (2 tsp / 12g), and fat (2 tbsp / 30g softened butter or oil). Add the yeast mixture and stir until a shaggy dough forms.
- Knead the Dough (10-15 minutes): Turn dough onto a floured surface and knead until smooth and elastic. The dough should spring back when pressed—if it feels stiff or tears easily, add a bit more water, a tablespoon at a time.
- First Rise (1-1.5 hours): Place dough in a lightly oiled bowl, cover with a damp towel, and let it rise in a warm spot until doubled in size. Avoid cold drafts, which slow yeast activity.
- Shape the Loaf (5 minutes): Gently deflate the dough and shape it into a loaf. Avoid pressing too hard, which can compress air pockets needed for a light crumb.
- Second Rise (45 minutes): Place the shaped dough on a baking sheet or in a loaf pan, cover, and let it rise again until puffy but not doubled.
- Bake (30-35 minutes): Preheat oven to 375°F (190°C). Bake until the crust is golden and the loaf sounds hollow when tapped. Use a thermometer if you want to be sure—the internal temp should hit 190-200°F (88-93°C).
- Cool Completely (at least 1 hour): Let the bread cool on a rack before slicing. Cutting too early can squish the crumb and make it seem denser.
Pro tip: If your dough feels sticky during kneading, resist the urge to add too much flour—sticky dough often leads to softer bread. Instead, dust lightly and use a dough scraper to manage stickiness. This guide helped me avoid a second dense loaf after a sticky dough disaster!
Cooking Tips & Techniques
Making bread without ending up with a dense result is part science, part feel. Here are some tips I picked up through trial and error:
- Hydration Balance: Too little water makes the dough tight and dense. Too much, and it becomes unmanageable. Aim for a slightly tacky dough that holds together.
- Don’t Rush Rising: Yeast needs time to work its magic. I once cut the rising time short because I was impatient—hello, heavy loaf! Use a warm spot or proofing box if your kitchen is chilly.
- Kneading Matters: Proper gluten development traps gas bubbles, creating airy bread. If you’re new, try the stretch and fold method to avoid overworking your dough.
- Watch Your Yeast: Old or improperly stored yeast can kill your loaf’s rise. Store it in the fridge and check expiration dates.
- Oven Temperature: A too-cool oven can cause dense bread. Preheat fully, and if possible, use a baking stone or Dutch oven to hold steady heat.
From personal flops to wins, I learned that patience and attention to detail are your best friends in baking. Don’t be discouraged if it’s not perfect at first; every loaf teaches you something new.
Variations & Adaptations
Here are a few ways to tweak this approach to suit your tastes and dietary needs:
- Whole Wheat Version: Swap half of the bread flour with whole wheat flour for a nuttier flavor. Expect a slightly denser crumb—add a bit more water to compensate.
- Gluten-Free Adaptation: Use a gluten-free flour blend with xanthan gum. The kneading step changes—mix gently and let rise longer.
- Herb & Garlic Twist: Add 2 tbsp fresh chopped herbs (like rosemary or thyme) and 2 minced garlic cloves to the dough for extra flavor.
- Overnight Cold Rise: Let the dough rise covered in the fridge overnight. This slow fermentation develops deeper flavor and can improve texture.
Once, I tried adding roasted pumpkin puree to the dough for a seasonal spin. It added moisture and a subtle sweetness but also required reducing the added water slightly. Experimenting with flavors keeps bread baking fun and fresh!
Serving & Storage Suggestions
Freshly baked bread is best enjoyed at room temperature or slightly warm. I like to slice mine and toast it lightly with butter for breakfast. It pairs beautifully with soups, salads, or just a smear of your favorite jam.
Store leftover bread in a paper bag at room temperature for up to two days to keep the crust crisp. For longer storage, slice and freeze the bread in airtight bags. Toast slices straight from the freezer for a quick fresh taste.
Reheating in a 350°F (175°C) oven for 5-10 minutes can revive the crust beautifully. Avoid microwaving, which tends to make bread gummy.
Flavors often deepen after resting a day, so if you can resist, let your loaf sit wrapped in a towel before slicing. Trust me, it’s worth the wait.
Nutritional Information & Benefits
This classic bread recipe is a wholesome source of complex carbohydrates, providing energy and dietary fiber—especially if you incorporate whole wheat flour. The simple ingredients mean no added preservatives or artificial additives, making it a cleaner option than many store-bought breads.
Be mindful of sodium content from salt, which is essential for flavor and yeast control but should be balanced in your diet. For gluten-sensitive individuals, adaptations with gluten-free flours are available.
From a wellness perspective, baking your own bread allows you to control ingredients and avoid unwanted additives, which can make meals more satisfying and nourishing. Honestly, nothing beats the pride of slicing into homemade bread you made with your own hands.
Conclusion
Dense bread can be frustrating, but with this simple fix guide, you’re equipped to turn those heavy loaves into light, tender homemade bread. Remember, baking is a journey filled with learning curves and little wins. Customize this method to your kitchen’s quirks and your personal taste, and soon you’ll be sharing loaves that everyone asks for again and again.
I love this troubleshooting guide because it took me from baking bricks to baking smiles, and I hope it does the same for you. Got your own tips or a baking story? Drop a comment below—I’d love to hear how your bread baking adventure goes!
Happy baking, and may your next loaf be perfectly airy and oh-so-delicious!
FAQs
Why is my homemade bread so dense?
Dense bread usually results from insufficient yeast activity, too little water, over-kneading, or not allowing the dough to rise enough. Using old yeast or baking in a cool kitchen can also cause density.
How can I fix bread dough that’s too sticky or wet?
Add flour gradually, a tablespoon at a time, while kneading to reach a tacky but manageable dough. Avoid adding too much flour to prevent dryness and density.
Can I use instant yeast instead of active dry yeast?
Yes, instant yeast can be mixed directly with flour without proofing. Use about 25% less instant yeast than active dry yeast for best results.
How long should I let my dough rise?
Typically, the first rise takes 1 to 1.5 hours until doubled in size, and the second rise about 45 minutes. Warmer environments speed up rising, while cooler ones slow it down.
What’s the best way to store homemade bread?
Keep bread in a paper bag at room temperature for up to two days. For longer storage, slice and freeze it in airtight bags, then toast slices straight from the freezer.
Pin This Recipe!

Dense Bread Troubleshoot Guide Easy Fixes for Perfect Homemade Loaves

This guide provides practical troubleshooting tips to fix dense homemade bread, helping you achieve soft, airy loaves with simple ingredients and easy methods.
- Prep Time: 25 minutes
- Cook Time: 30-35 minutes
- Total Time: 2 hours 40 minutes
- Yield: 1 loaf (about 8 servings) 1x
- Category: Bread
- Cuisine: American
Ingredients
- 450g (3 ¾ cups) bread flour or all-purpose flour
- 2 tsp (7g) active dry yeast or instant yeast
- 300ml (1 ¼ cups) lukewarm water (about 100°F / 38°C)
- 2 tsp (12g) fine sea salt or kosher salt
- 1 tsp (4g) sugar (optional)
- 2 tbsp (30g) unsalted butter or olive oil (softened)
Instructions
- Measure Ingredients Precisely (10 minutes): Use a kitchen scale to weigh your flour and water to avoid dense bread.
- Activate Yeast (5 minutes): Dissolve 2 tsp of active dry yeast in lukewarm water with 1 tsp sugar. Let it sit until foamy.
- Mix Ingredients (10 minutes): Combine flour, salt, and fat in a large bowl. Add yeast mixture and stir until a shaggy dough forms.
- Knead the Dough (10-15 minutes): Knead on a floured surface until smooth and elastic. Add water tablespoon by tablespoon if dough feels stiff.
- First Rise (1-1.5 hours): Place dough in a lightly oiled bowl, cover with a damp towel, and let rise in a warm spot until doubled.
- Shape the Loaf (5 minutes): Deflate dough gently and shape into a loaf without pressing too hard.
- Second Rise (45 minutes): Place shaped dough on baking sheet or loaf pan, cover, and let rise until puffy but not doubled.
- Bake (30-35 minutes): Preheat oven to 375°F (190°C). Bake until crust is golden and loaf sounds hollow when tapped. Internal temp should be 190-200°F (88-93°C).
- Cool Completely (at least 1 hour): Let bread cool on a rack before slicing to avoid squishing the crumb.
Notes
Use fresh yeast and flour for best results. Avoid adding too much flour during kneading to prevent dryness. Let bread cool completely before slicing. For gluten-free, use gluten-free flour blends with xanthan gum and adjust rising times.
Nutrition
- Serving Size: 1 slice (1/8 of loaf
- Calories: 150
- Sugar: 1
- Sodium: 300
- Fat: 4
- Saturated Fat: 1.5
- Carbohydrates: 26
- Fiber: 1
- Protein: 5
Keywords: dense bread, homemade bread, bread troubleshooting, bread baking tips, easy bread recipe, yeast bread, soft bread, bread fixes