Love this? Save it for later!
Share the inspiration with your friends
“I swear, I had this perfect weekend all planned—a backyard barbecue with friends, laughter, and great food. But then the charcoal just wouldn’t cooperate. I mean, who knew getting charcoal to stay lit could be such a challenge? I was standing there, poking at those stubborn coals that kept dying out like they had a personal vendetta against me. Honestly, it was almost funny—except my guests were starting to eye the takeout menus.”
That frustrating afternoon, I realized there had to be a better way to keep charcoal burning steady for backyard cooking. Maybe you’ve been there too—lighting the grill, only to have the fire sputter and fade just when you’re ready to cook. It’s a classic grilling nightmare, especially when you’re short on time or patience.
Let me tell you, after several trial-and-error weekends (and a few singed eyebrows), I’ve nailed down some quick fixes that really work. No more standing around blowing on charcoal as if I were trying to revive a campfire ghost. This isn’t about fancy gadgets or complicated setups—it’s the simple, practical tricks you can do to get those coals glowing and staying lit.
So, if you’ve ever wrestled with charcoal that just won’t keep its flame, stick around. I’m sharing what I learned so you can get back to the fun part of grilling without the hassle. Plus, I promise, no more last-minute scramble for matching lighter fluid or frantic dashes to the hardware store.
Why You’ll Love This Recipe
Getting charcoal to stay lit can feel like a mystery, but with these quick fixes, you’ll be a grill master in no time. I’ve tested these tips over countless cookouts, and here’s why they stand out:
- Fast & Reliable: You can get your charcoal burning right in under 20 minutes, which is a lifesaver when hunger strikes unexpectedly.
- Easy Ingredients & Tools: No need for special equipment—just household items you probably already have on hand.
- Perfect for Any Grill Session: Whether it’s a casual weeknight dinner or a weekend cookout, these fixes work every time.
- Kid- and Guest-Approved: Everyone loves a warm grill ready to go—no more excuses for cold hot dogs or half-cooked burgers.
- Proven Techniques: These aren’t just random tips; they’ve been tested through my own grilling mishaps and successes.
This quick fix isn’t just about keeping coals lit; it’s about saving your cookout and making grilling less stressful. Plus, once you get the hang of these tricks, you’ll find yourself enjoying the process more—kind of like having a secret handshake with your grill.
What Ingredients You Will Need
This quick fix relies on a few simple items that play key roles in coaxing charcoal into a steady burn. Nothing fancy, just smart choices.
- Charcoal Briquettes or Lump Charcoal: Choose quality charcoal like Royal Oak or Kingsford for consistent burning. Lump charcoal lights faster but burns hotter, while briquettes last longer.
- Natural Fire Starters: Look for non-toxic, unscented fire starters (like Duraflame or homemade egg carton starters) that help ignite without chemical odors.
- Newspaper or Cardboard: Crumpled paper or small pieces of untreated cardboard help with airflow and kindling. Avoid glossy or colored print.
- Cooking Oil Spray (Optional): A light spritz can help coals catch flame, especially if they’re damp from storage.
- Matches or a Lighter: Long matches or a butane lighter with an extended nozzle work best for safety and ease.
- Chimney Starter (Optional but Recommended): If you don’t have one, no worries—you can still get the job done with the other tools.
Remember, the key is to keep things dry and well-ventilated. Damp charcoal is a common culprit behind stubborn fires, so storing your charcoal in a dry place makes all the difference.
Equipment Needed
- Grill: Any standard charcoal grill works, whether it’s a kettle, barrel, or rectangular style.
- Chimney Starter (Optional): This classic tool speeds up lighting and promotes even heat distribution. It’s worth the small investment.
- Long-Handled Tongs: For safely moving and arranging hot coals without burning yourself.
- Heat-Resistant Gloves: Helps protect your hands while adjusting charcoal or adding logs.
- Metal Scoop or Shovel: Handy for transferring charcoal into the grill and adjusting the pile.
If you don’t have a chimney starter, try using a metal bucket or a makeshift funnel to concentrate heat around the coals. Over the years, I’ve found that even a sturdy piece of aluminum foil fashioned into a cone can help—though it’s not as durable as the real deal.
Preparation Method
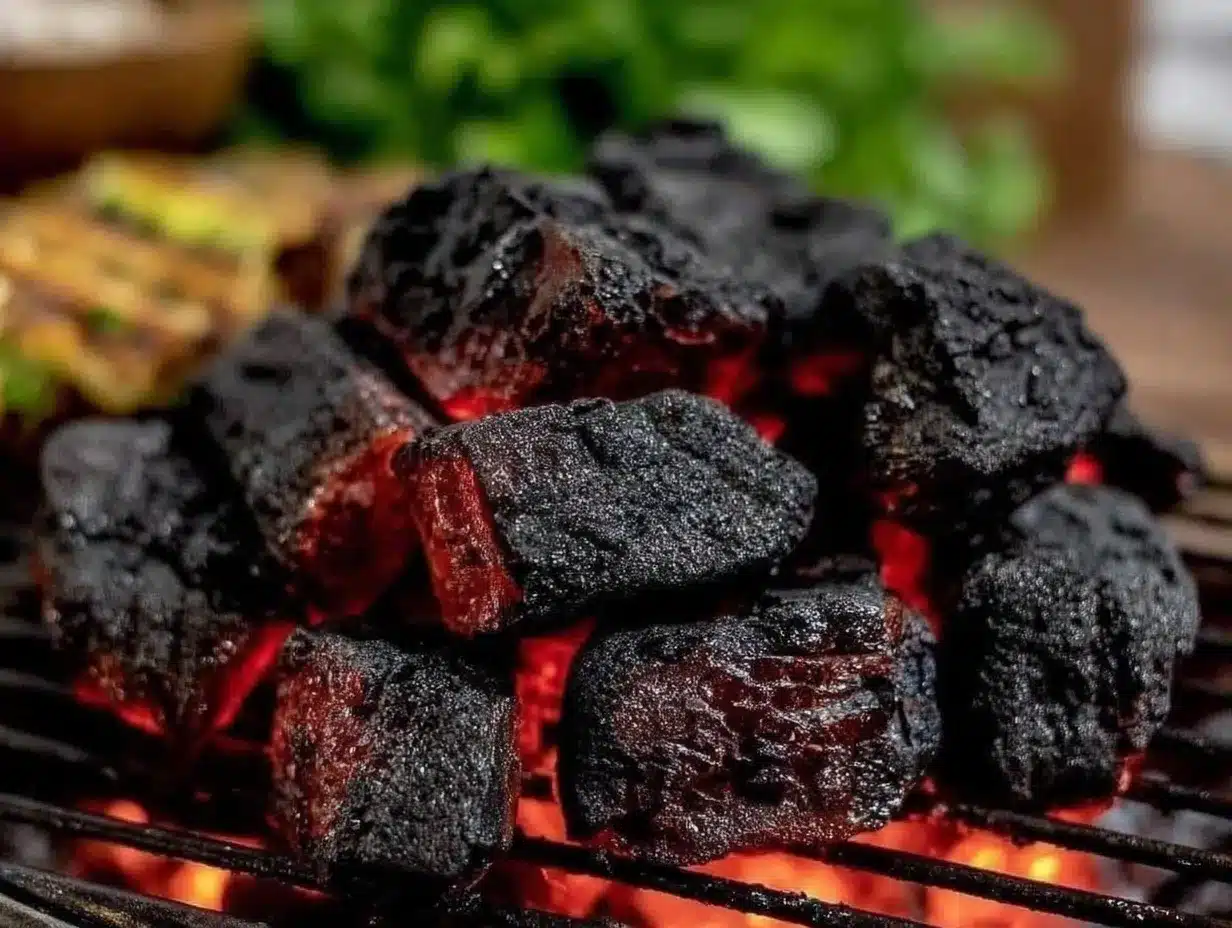
- Check Your Charcoal: Before lighting, spread out the briquettes or lump charcoal. Look for any dampness or clumps stuck together. Break up any pieces so they’re loose and airy. This usually takes 3–5 minutes.
- Arrange Your Fire Starters: In the center of your grill, place two or three natural fire starters or crumpled newspaper balls. Make sure they’re dry and easy to light. If you’re using a chimney starter, fill the bottom third with charcoal and place the fire starter underneath.
- Build the Charcoal Pyramid: Surround your fire starters with loosely stacked charcoal in a pyramid shape. This allows air to flow up through the coals, feeding the flames. Avoid packing the charcoal tightly, or it will suffocate the fire.
- Light It Up: Light the fire starters with a long match or lighter. Watch for the flames to catch on the surrounding charcoal. If it’s windy, shield the grill to keep the flames steady.
- Let the Fire Grow: Allow the charcoal to ignite fully. You’ll see the edges turn grayish-white and start glowing red underneath—this usually takes 15–20 minutes. Resist the urge to stir or add more charcoal too soon; the fire needs time to establish.
- Stir and Spread: Once your coals are glowing and mostly covered with ash, use tongs or a scoop to spread them evenly for cooking. If any coals look like they’re dying out, carefully move them to the center to reignite.
- Maintain Airflow: Adjust the grill vents to balance oxygen flow. More air means hotter flames, less air slows the burn. If your charcoal keeps dying, opening vents a bit more usually helps.
- Optional Oil Spray: If you notice the charcoal is slow to catch, a light spray of cooking oil on the edges can encourage ignition. Don’t overdo it, or the grill will get smoky.
Note: I once forgot to open the vents properly and ended up with a sad pile of mostly unlit charcoal. You know that feeling when you think it’s going well but really it’s just smoldering? Trust me, checking those vents early is a lifesaver.
Cooking Tips & Techniques
Keeping charcoal lit consistently is an art and a bit of a science. Here are some tips from my grilling trials:
- Don’t Overload the Grill: Too much charcoal packed in tight will choke the fire. Start with a manageable amount and add more once the first batch is fully lit.
- Use Dry Charcoal: Store your charcoal in a sealed container or plastic bin to prevent moisture absorption—damp charcoal is the enemy.
- Keep Airflow Open: Vents are your best friends. Adjust them gradually to control heat and oxygen. Too little air and the fire dies; too much and it burns out too fast.
- Layer Your Coals: For longer cooking, build a two-zone fire—hot coals on one side and fewer or no coals on the other. This gives you control over direct and indirect heat.
- Patience Pays Off: Let the coals reach the perfect gray ash coating before cooking. Rushing this step often leads to uneven heat and flare-ups.
- Don’t Douse With Water: If your fire sputters, avoid the temptation to spray water. Instead, add a few dry coals or adjust vents for better airflow.
One time, I tried to speed things up by using lighter fluid but ended up with a chemical taste that ruined the ribs. Since then, I stick to natural starters and the pyramid method—much tastier and safer.
Variations & Adaptations
This quick fix can be tweaked to suit different grilling setups and preferences:
- Using a Chimney Starter: If you have one, this is hands-down the easiest way to get charcoal lit evenly without lighter fluid. Just fill, light the paper underneath, and pour when ready.
- Wet or Windy Conditions: For damp weather, try storing charcoal indoors before use. On windy days, create a windbreak with foil or position your grill strategically to avoid gusts.
- Alternative Fire Starters: Try homemade starters using egg cartons filled with dryer lint and wax. They burn slow and are eco-friendly.
- Flavor Boost: Add wood chips soaked in water on top of hot coals for smoky flavor—just keep the fire steady first.
- Allergen-Free Tip: If you’re sensitive to certain fire starters, plain newspaper and natural charcoal work great without chemicals.
Personally, I sometimes swap lump charcoal for briquettes when I want a longer, steadier burn during slow cooking. Both have their perks, and knowing how to get them started quickly makes a huge difference.
Serving & Storage Suggestions
Once your charcoal is reliably lit and your grill is cooking, here’s how to make the most of it:
- Serving Temperature: Aim to start cooking when the coals are covered in white-gray ash and glowing red underneath—that’s prime heat.
- Presentation: Arrange food with a mix of direct and indirect heat zones to avoid flare-ups and burnt spots.
- Storage: Keep leftover charcoal in a sealed container or heavy-duty bag, stored in a cool, dry place. Avoid damp basements or garages.
- Reheating Coals: If coals have cooled but you want to keep cooking, gather them into a pile, add a fire starter or some dry newspaper, and relight carefully.
- Flavor Over Time: Charcoal flavor intensifies slightly as the coals burn down, so adjust your cooking time to get the best smoky taste.
When I serve grilled food, I like having a cold beverage nearby—nothing pairs better with the scent of a steady charcoal fire and fresh-cooked burgers or grilled veggies.
Nutritional Information & Benefits
While this quick fix is all about grilling technique, the end result is healthier cooking compared to gas or electric grills when done right:
- Lower Fat Cooking: Charcoal grilling lets excess fat drip away, reducing calories in your meal.
- Natural Flavor: Charcoal imparts a smoky aroma without added preservatives or artificial flavors.
- Control Over Ingredients: You decide what goes on the grill—fresh meats, veggies, and marinades.
- Allergy-Friendly: Using natural fire starters avoids chemicals that can irritate sensitive individuals.
Just a note: charred food should be enjoyed in moderation, and maintaining proper grill temperatures helps avoid over-charring.
Conclusion
So there you have it—a straightforward, practical quick fix for charcoal that won’t stay lit. I’ve been where you are: frustrated, impatient, and hungry. These tips help turn that around so you can get back to the joy of grilling instead of fighting with your coals.
Whether you’re a casual griller or someone who takes pride in perfect barbecue, understanding how to coax your charcoal into a steady burn makes all the difference. Feel free to tweak these methods to fit your setup and taste, because honestly, grilling is as much about personal style as it is technique.
Give these tips a try next time you fire up the grill, and don’t be shy—share your own quick fixes or questions in the comments. Let’s keep that fire burning strong!
FAQs About Quick Fix for Charcoal That Won’t Stay Lit
Why does my charcoal keep going out after lighting?
Usually, it’s because of poor airflow, damp charcoal, or too tightly packed briquettes. Make sure your vents are open and the charcoal is dry and loosely arranged.
Can I use lighter fluid safely on charcoal?
While lighter fluid works, it can add chemical flavors and flare-ups. Natural fire starters or a chimney starter are safer and tastier options.
How long does it take for charcoal to be ready for cooking?
Typically, 15-20 minutes until the coals are covered in gray ash and glowing red underneath.
What’s the difference between lump charcoal and briquettes?
Lump charcoal burns hotter and faster with less ash, while briquettes burn longer and more consistently but with more ash.
Can I relight charcoal that’s gone out?
Yes! Gather the coals, add dry newspaper or fire starters, and carefully relight. Adjust airflow to help the fire catch.
Pin This Recipe!
Quick Fix for Charcoal That Won’t Stay Lit
A practical guide with easy tips and techniques to keep charcoal burning steadily for backyard grilling, ensuring a hassle-free cookout.
- Prep Time: 5 minutes
- Cook Time: 20 minutes
- Total Time: 25 minutes
- Yield: N/A
- Category: Grilling Tips
- Cuisine: American
Ingredients
- Charcoal briquettes or lump charcoal (e.g., Royal Oak or Kingsford)
- Natural fire starters (non-toxic, unscented, e.g., Duraflame or homemade egg carton starters)
- Newspaper or untreated cardboard (crumpled)
- Cooking oil spray (optional)
- Matches or a lighter (preferably long matches or butane lighter with extended nozzle)
Instructions
- Check your charcoal for dampness or clumps and break up any pieces to ensure they are loose and airy (3–5 minutes).
- Arrange two or three natural fire starters or crumpled newspaper balls in the center of your grill. If using a chimney starter, fill the bottom third with charcoal and place the fire starter underneath.
- Build a loosely stacked charcoal pyramid around the fire starters to allow airflow.
- Light the fire starters with a long match or lighter, shielding the grill if windy.
- Allow the charcoal to ignite fully until edges turn grayish-white and coals glow red underneath (15–20 minutes).
- Use tongs or a scoop to spread the coals evenly for cooking; move any dying coals to the center to reignite.
- Adjust grill vents to balance oxygen flow for consistent burning.
- Optionally, spray a light mist of cooking oil on the edges of charcoal if ignition is slow, avoiding excess to prevent smoke.
Notes
Keep charcoal dry and loosely arranged for best airflow. Avoid using lighter fluid to prevent chemical flavors. Adjust grill vents to control oxygen and heat. For damp or windy conditions, store charcoal indoors and create windbreaks as needed. Use natural fire starters for safer ignition.
Nutrition
- Serving Size: N/A
Keywords: charcoal, grilling, barbecue, fire starters, charcoal lighting, backyard cooking, grill tips, charcoal maintenance



