Love this? Save it for later!
Share the inspiration with your friends
Introduction
“I never saw the appeal of homemade ice cream,” my friend Claire had insisted for years. The whole process seemed like a hassle—churning machines, waiting around, and somehow never getting that perfect creamy texture. Then last summer, on a slow Tuesday afternoon when the power flickered off and I was stuck without my usual freezer gadgets, I decided to try a no-churn vanilla bean ice cream with berry swirl just for myself, mostly out of stubbornness. Honestly, I figured it’d be a pale imitation of the real deal.
But there she was, a few hours later, caught red-handed sneaking spoonfuls from the container, eyes wide with surprise. Claire, the one who’d sworn off homemade ice cream forever, was hooked. The texture was dreamy—rich and creamy without that icy grit—and the fresh vanilla bean flavor paired with the vibrant berry swirl felt like summer in a bowl. Maybe you’ve been there, doubting something simple could taste this good. I mean, I sure did.
What stuck with me was how this recipe felt effortless but still special. No fancy machines, no complicated steps—just pure, honest ingredients that come together in a way that makes you close your eyes and savor each bite. It’s become my go-to for impressing friends without breaking a sweat, and honestly, it’s the kind of dessert that makes you question why you ever thought ice cream had to be complicated.
Why You’ll Love This Recipe
After testing dozens of no-churn recipes, this creamy vanilla bean ice cream with berry swirl stood out for a bunch of reasons. I’m not just saying that because Claire finally gave up her ice cream skepticism. Here’s why this one’s a keeper:
- Quick & Easy: Ready in under 15 minutes of prep, then just a few hours in the freezer—perfect for those spontaneous cravings or last-minute gatherings.
- Simple Ingredients: You’ll find everything in your pantry or fridge—heavy cream, sweetened condensed milk, real vanilla bean, and fresh or frozen berries.
- Perfect for Summer Treats: Whether it’s a backyard BBQ, birthday party, or just a quiet night craving something sweet, this ice cream fits the bill.
- Crowd-Pleaser: Kids, adults, even the skeptical guests—everyone loves the creamy texture and the tangy berry twist.
- Unbelievably Delicious: The natural vanilla bean specks and fresh berry swirls make it feel like a gourmet treat without the fuss.
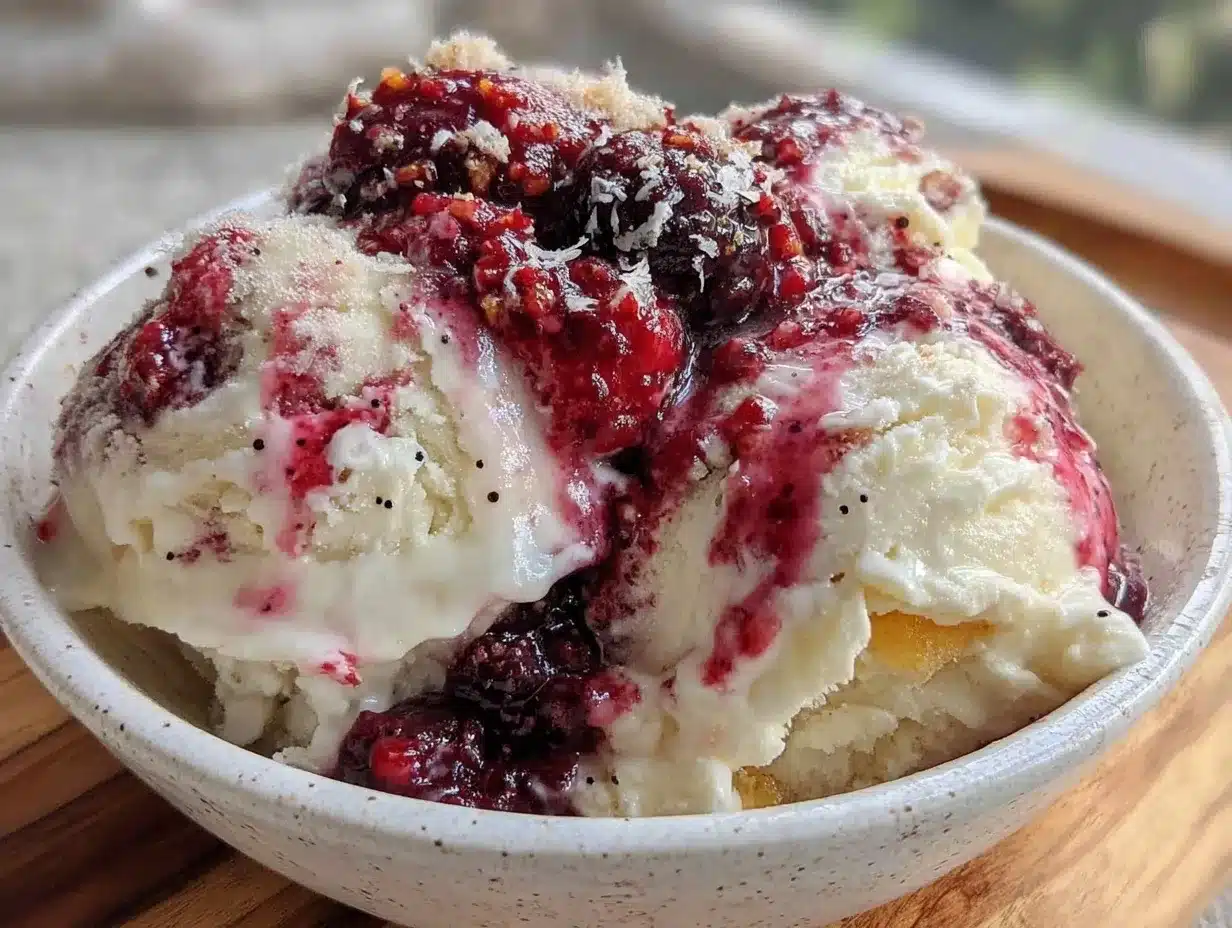
This isn’t your run-of-the-mill no-churn vanilla. I use a real vanilla bean for depth, not just extract, and the berry swirl is gently folded in rather than mixed, so each spoonful has those bursts of flavor. Plus, the sweetened condensed milk keeps it smooth and creamy without the need for an ice cream maker.
If you’re tired of bland, icy no-churn versions, this recipe proves you don’t need fancy equipment or hours of churning to get something truly special.
What Ingredients You Will Need
This recipe uses simple, wholesome ingredients to deliver bold flavor and satisfying texture without the fuss. Most are pantry staples, and the berry swirl adds a fresh, fruity pop that feels seasonal but can be adjusted year-round.
- Heavy cream (2 cups / 475 ml) – the key to that rich, creamy texture. Make sure it’s cold for best whipping results.
- Sweetened condensed milk (1 can, 14 oz / 396 g) – adds sweetness and helps the ice cream stay smooth and scoopable.
- Vanilla bean (1 whole bean) – split and scraped for fresh vanilla flavor. If you can’t find one, high-quality pure vanilla extract (1 tbsp) works as a substitute but the bean adds those beautiful black specks.
- Fresh or frozen mixed berries (1 cup / 150 g) – I like a mix of blueberries, raspberries, and strawberries for color and flavor variety.
- Sugar (2 tbsp) – to sweeten the berry swirl.
- Lemon juice (1 tsp) – brightens the berry flavor and balances the sweetness.
Ingredient tips: For the berries, if using frozen, thaw and drain excess liquid before making the swirl to avoid watery ice cream. I usually grab fresh berries from the farmers market in season, but frozen work well any time. If you prefer a dairy-free version, swap heavy cream with full-fat coconut cream and use sweetened condensed coconut milk.
Equipment Needed
- Mixing bowls: One large for whipping cream and one medium for berry swirl.
- Electric hand mixer or stand mixer: For whipping the cream to soft peaks. A whisk works if you have strong arms, but it’s a workout!
- Spatula: For folding the whipped cream and berries gently.
- Fine mesh sieve or strainer: Optional, for smoothing the berry puree if you prefer no seeds.
- Loaf pan or freezer-safe container: To freeze the ice cream. I like a metal loaf pan because it freezes faster, but any airtight container works.
- Plastic wrap or airtight lid: To cover the ice cream during freezing and prevent ice crystals.
If you don’t have a mixer, a whisk and some patience can do the trick, but be ready for a bit of an arm workout. Also, a sharp knife and cutting board are handy for splitting the vanilla bean. For cleaning, soaking the sieve immediately after straining berries makes life easier.
Preparation Method
- Prepare the berry swirl: In a small saucepan, combine 1 cup (150 g) of fresh or thawed berries, 2 tablespoons sugar, and 1 teaspoon lemon juice. Cook over medium heat, stirring occasionally, until the berries break down and the mixture thickens slightly, about 8–10 minutes. Let cool completely. For a smoother texture, push through a fine mesh sieve to remove seeds, or leave as is for a rustic feel.
- Scrape the vanilla bean: Split the vanilla bean lengthwise with a sharp knife. Using the back of the knife, scrape out the tiny seeds. Set seeds aside; you won’t need the pod for this recipe.
- Whip the cream: In a large chilled mixing bowl, pour 2 cups (475 ml) of cold heavy cream. Using an electric mixer, beat on medium-high speed until soft peaks form, about 3-4 minutes. The cream should hold shape but still be smooth and pillowy.
- Mix the condensed milk and vanilla: In a separate bowl, combine 1 can (14 oz / 396 g) of sweetened condensed milk with the vanilla bean seeds (or 1 tablespoon vanilla extract). Stir until smooth.
- Fold the mixtures: Gently fold the condensed milk mixture into the whipped cream using a spatula. Be careful not to deflate the cream; use slow, deliberate strokes until fully combined.
- Layer the ice cream: Pour half of the ice cream base into your freezer container. Spoon half of the cooled berry swirl over it in dollops. Use a knife or skewer to swirl the berries through the ice cream gently. Repeat with the remaining ice cream base and berry swirl, creating a marbled effect.
- Freeze: Cover the container tightly with plastic wrap or a lid. Freeze for at least 6 hours, preferably overnight, until firm enough to scoop.
- Serve: Let ice cream sit at room temperature for about 5 minutes before scooping to soften slightly. Enjoy the creamy texture and bursts of berry flavor!
Pro tip: When swirling, don’t overmix—you want visible ribbons of berry for the best visual and taste experience. Also, if you forget the vanilla bean seeds, the ice cream still tastes great, but it won’t have those charming black specks that say “homemade.”
Cooking Tips & Techniques
Getting that perfect creamy texture without an ice cream maker can feel tricky, but a few tricks make all the difference. First, always chill your mixing bowl and whisk attachments if possible—the cold helps the cream whip faster and hold better.
When folding the condensed milk into whipped cream, use a light hand. It’s tempting to mix vigorously, but you want to keep as much air as possible trapped in the cream; that’s what gives you that dreamy mouthfeel.
For the berry swirl, cooking the berries down concentrates their flavor and reduces water content, which helps prevent ice crystals. If you skip this step and add raw berries, the ice cream can get icy and watery.
I learned the hard way that over-swirl means you lose those gorgeous berry ribbons, so I always stop as soon as I see pretty marbling. Also, letting the ice cream soften briefly before scooping is key—too frozen and it’s hard to serve, too soft and it melts quickly.
Lastly, if you want to multitask, whip the cream and prepare the berry swirl simultaneously to save time. Just keep an eye on the berries so they don’t burn.
Variations & Adaptations
- Dairy-Free Version: Swap heavy cream for full-fat coconut cream and use sweetened condensed coconut milk. The berry swirl stays the same for a tropical twist.
- Chocolate Berry Swirl: Add 2 tablespoons of cocoa powder to the ice cream base and mix well before folding in the berries for a chocolate-vanilla-berry combo.
- Seasonal Fruit Swirls: In summer, try swapping berries with peach or mango puree. In winter, use spiced cranberry sauce for a festive touch.
- Nutty Crunch Addition: Fold in 1/2 cup of toasted chopped pecans or almonds for texture contrast.
- Less Sweet Option: Reduce the sugar in the berry swirl by half, and use unsweetened condensed milk for a less sugary treat.
Once, I tried adding fresh mint to the berry swirl—it was surprisingly refreshing and added a nice herbal note. Feel free to experiment with your favorite flavors to make it your own.
Serving & Storage Suggestions
This ice cream is best served slightly softened—about 5 minutes at room temp—to get that perfect scoopable texture. Serve it in bowls or cones, and if you want to impress, garnish with fresh mint leaves or a few whole berries.
It pairs wonderfully with a warm chocolate brownie or a slice of classic apple pie for a comforting dessert combo. For drinks, a glass of sparkling rosé or a simple iced coffee complements the creamy sweetness.
Store leftovers in an airtight container in the freezer for up to 2 weeks. To avoid ice crystals, press a piece of parchment or plastic wrap directly on the surface before sealing. When reheating, let it sit out for a few minutes to soften, or microwave in 10-second bursts if you’re in a hurry.
Flavors deepen the longer it sits, especially the berry swirl, which becomes more intense after a day or two. This means it tastes even better the next day—if you can wait that long!
Nutritional Information & Benefits
Each serving (about 1/2 cup / 120 ml) of this creamy no-churn vanilla bean ice cream with berry swirl contains approximately:
| Calories | 250 kcal |
|---|---|
| Fat | 16 g |
| Saturated Fat | 10 g |
| Carbohydrates | 24 g |
| Sugar | 22 g |
| Protein | 3 g |
The recipe features real vanilla bean, which offers antioxidants, and the berry swirl provides vitamin C and fiber. Using heavy cream and sweetened condensed milk means it’s on the richer side, so it’s a treat best enjoyed in moderation. For those with lactose intolerance, the dairy-free adaptation with coconut cream offers a tasty alternative without the discomfort.
Conclusion
This creamy no-churn vanilla bean ice cream with berry swirl is proof that homemade ice cream doesn’t have to be complicated or time-consuming. It’s straightforward, delicious, and has that special homemade charm that store-bought just can’t match. I love it because it surprises people—skeptics like Claire included—and makes dessert feel like a celebration, even on ordinary days.
Feel free to play around with the berry swirl or try different mix-ins to truly make it yours. And hey, if you do tweak it, I’d love to hear about your version in the comments below. Sharing these little kitchen victories is what keeps cooking fun.
So grab a spoon, dig in, and enjoy the kind of ice cream that makes you want to lick the bowl clean.
FAQs
Can I use frozen berries for the berry swirl?
Yes! Just thaw them completely and drain excess liquid before cooking to avoid a watery swirl.
How long can I store this no-churn ice cream in the freezer?
It’s best within 2 weeks for optimal texture and flavor, stored in an airtight container.
Can I make this without a mixer?
You can, but whipping heavy cream by hand takes time and effort. An electric mixer makes it easier and more consistent.
What if I don’t have a vanilla bean?
Use 1 tablespoon of pure vanilla extract instead. The flavor won’t be quite as intense, but still delicious.
How do I prevent ice crystals in no-churn ice cream?
Using sweetened condensed milk helps, but also cover the surface tightly with plastic wrap to keep out air and freeze the ice cream quickly.
Pin This Recipe!
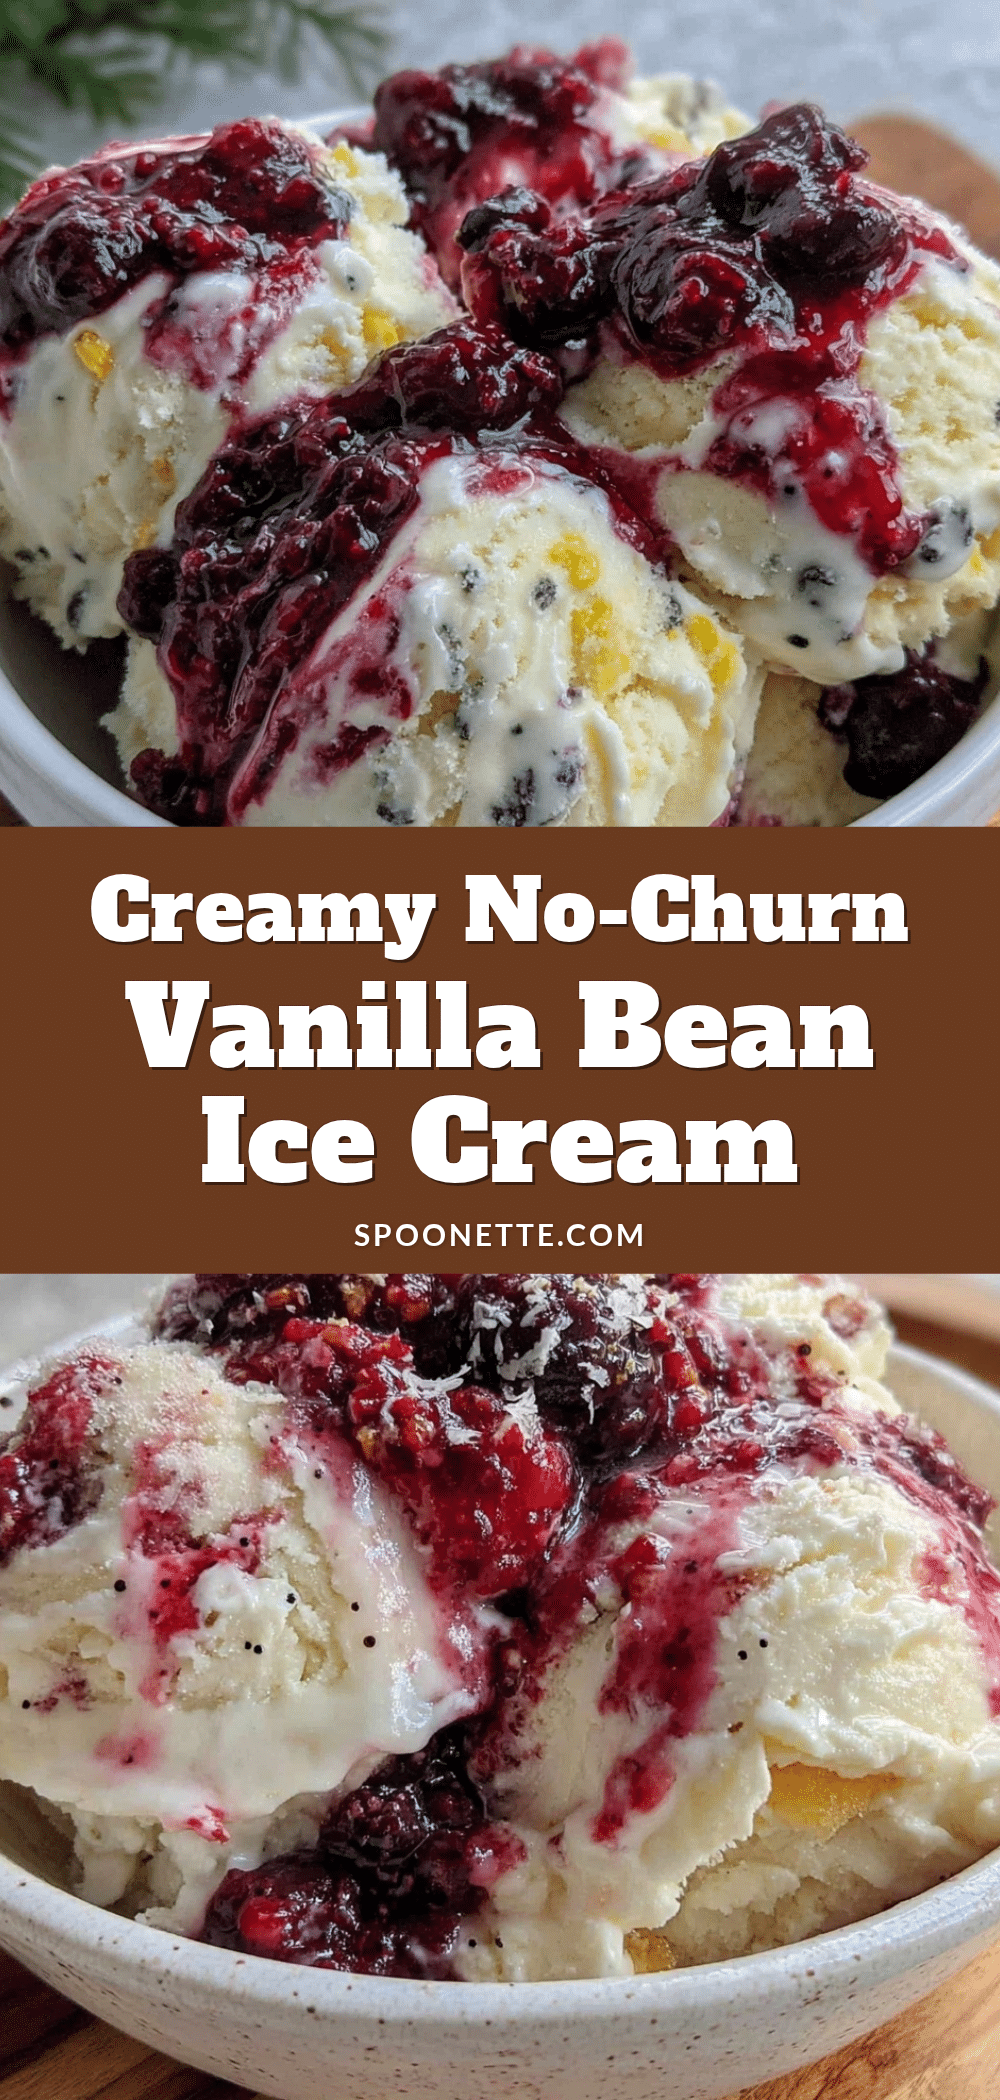
Creamy No-Churn Vanilla Bean Ice Cream with Berry Swirl
A rich and creamy no-churn vanilla bean ice cream with a vibrant berry swirl, perfect for a quick and easy homemade summer treat without the need for an ice cream maker.
- Prep Time: 15 minutes
- Cook Time: 10 minutes
- Total Time: 6 hours 25 minutes
- Yield: 8 servings 1x
- Category: Dessert
- Cuisine: American
Ingredients
- 2 cups (475 ml) cold heavy cream
- 1 can (14 oz / 396 g) sweetened condensed milk
- 1 whole vanilla bean, split and scraped (or 1 tbsp pure vanilla extract as substitute)
- 1 cup (150 g) fresh or frozen mixed berries (blueberries, raspberries, strawberries)
- 2 tbsp sugar
- 1 tsp lemon juice
Instructions
- Prepare the berry swirl: In a small saucepan, combine 1 cup of fresh or thawed berries, 2 tablespoons sugar, and 1 teaspoon lemon juice. Cook over medium heat, stirring occasionally, until the berries break down and the mixture thickens slightly, about 8–10 minutes. Let cool completely. Optionally, push through a fine mesh sieve to remove seeds.
- Scrape the vanilla bean: Split the vanilla bean lengthwise with a sharp knife and scrape out the seeds. Set seeds aside.
- Whip the cream: In a large chilled mixing bowl, pour 2 cups of cold heavy cream. Using an electric mixer, beat on medium-high speed until soft peaks form, about 3-4 minutes.
- Mix the condensed milk and vanilla: In a separate bowl, combine 1 can of sweetened condensed milk with the vanilla bean seeds or vanilla extract. Stir until smooth.
- Fold the mixtures: Gently fold the condensed milk mixture into the whipped cream using a spatula, being careful not to deflate the cream.
- Layer the ice cream: Pour half of the ice cream base into a freezer-safe container. Spoon half of the cooled berry swirl over it in dollops. Use a knife or skewer to swirl the berries gently through the ice cream. Repeat with the remaining ice cream base and berry swirl to create a marbled effect.
- Freeze: Cover the container tightly with plastic wrap or a lid. Freeze for at least 6 hours or preferably overnight until firm.
- Serve: Let ice cream sit at room temperature for about 5 minutes before scooping to soften slightly. Enjoy!
Notes
Chill mixing bowl and whisk attachments for better whipping results. Use a light hand when folding to keep air in the cream. Cook berries to reduce water content and prevent ice crystals. Do not over-swirl berry mixture to maintain visible ribbons. Let ice cream soften 5 minutes before serving for best texture. For dairy-free version, substitute heavy cream with full-fat coconut cream and sweetened condensed coconut milk.
Nutrition
- Serving Size: 1/2 cup (120 ml)
- Calories: 250
- Sugar: 22
- Fat: 16
- Saturated Fat: 10
- Carbohydrates: 24
- Protein: 3
Keywords: no-churn ice cream, vanilla bean ice cream, berry swirl, easy ice cream recipe, homemade ice cream, summer dessert