Love this? Save it for later!
Share the inspiration with your friends
The other day, I was waiting in line at the grocery store when the unmistakable crunch of an Oreo cookie being twisted apart hit me — and suddenly I was eight years old again, perched on the vinyl-topped stool in my Aunt Marcy’s kitchen. She had this cracked glass bowl that somehow made everything taste better, and she was making what she called “those little cheesecake cups” that I swear tasted like magic. The creamy layers, the sweet, crunchy cookie bits — all of it stuck with me, even though Aunt Marcy moved across the country years ago, and that cracked bowl vanished in the shuffle.
Honestly, I never thought I’d be able to recreate that exact feeling, but after a few messy tries (and a kitchen counter that looked like a cookie tornado hit it), I nailed the recipe for these Easy No-Bake Oreo Cheesecake Cups with Creamy Layers. Maybe you’ve been there — chasing a taste or texture that’s just out of reach, trying to pin down a memory that flits away the moment you think you’ve got it. For me, these cheesecake cups are that delicious, nostalgic anchor.
And let me tell you, these aren’t just a quick fix dessert. They come together in a snap without heating up the kitchen, so they’re perfect for those sticky summer afternoons when the last thing you want is to turn on the oven. Plus, they pack that perfect Oreo crunch with a smooth, dreamy filling that’s honestly hard to resist. I keep making these not just because they’re tasty, but because in every bite, I get a little closer to that kitchen stool and that cracked bowl — and to those quiet moments that made dessert feel like a secret gift.
Why You’ll Love This Recipe
After countless experiments to get these Easy No-Bake Oreo Cheesecake Cups just right, I’m confident you’ll appreciate everything they bring to the table (or picnic blanket!). Here’s what makes this recipe stand out:
- Quick & Easy: Ready in under 20 minutes, no oven required — perfect for last-minute dessert cravings or carefree summer nights.
- Simple Ingredients: Just a handful of pantry staples and those iconic Oreos you probably already have hiding in the cupboard.
- Perfect for Summer Desserts: Light, cool, and creamy — a refreshing treat when the heat is on.
- Crowd-Pleaser: Kids love the fun layers, and adults appreciate the balance of sweet and crunchy textures.
- Unbelievably Delicious: The creamy cheesecake layers melt in your mouth, contrasted by the cookie crumble that adds just the right bite.
What sets this Easy No-Bake Oreo Cheesecake Cups recipe apart? It’s the layering technique that gives each bite a perfect blend of creaminess and crunch. Instead of mixing everything in one bowl, the layers create a little dessert story in every cup — and that makes it feel special without extra fuss. Plus, I’ve tweaked the sweetness so it’s indulgent but never overwhelming, which is my personal touch after years of tasting and tweaking.
This recipe isn’t just about dessert; it’s about capturing that moment when a simple bite transports you somewhere else. If you’re looking for an easy, no-fail way to impress guests or just treat yourself without the stress, these cheesecake cups are your new go-to. They’re the kind of summer dessert that makes you close your eyes and savor the creamy, crunchy goodness — and isn’t that what we all want from a sweet treat?
What Ingredients You Will Need
This recipe uses straightforward, everyday ingredients that come together to create those luscious Easy No-Bake Oreo Cheesecake Cups with Creamy Layers. You’ll find most of these in any kitchen, and the Oreos are the star — no fancy substitutions necessary, though I’ll share a few options if you want to mix things up.
- Oreos: about 20 cookies, crushed (reserve some whole or halved for topping) — I like Nabisco Oreos for their classic crunch.
- Cream Cheese: 8 ounces (225 grams), softened to room temperature (this is the creamy base, so make sure it’s soft for smooth blending).
- Heavy Whipping Cream: 1 cup (240 ml), chilled (whipped to fluffy peaks for that light texture).
- Powdered Sugar: ½ cup (60 grams), sifted (adds sweetness without graininess).
- Vanilla Extract: 1 teaspoon, pure (a little flavor magic that brings everything together).
- Unsalted Butter: 3 tablespoons (43 grams), melted (binds the crushed cookies for the base).
Optional additions:
- Mini chocolate chips or white chocolate chunks for extra texture.
- A pinch of salt in the crust for balance.
- For a dairy-free twist, swap cream cheese and whipping cream with coconut cream-based alternatives.
Pro tip: When picking your cream cheese, I usually go for brands like Philadelphia because it blends effortlessly and keeps the texture silky smooth. Also, if Oreos are your jam, try using the Golden Oreo variety for a fun twist on color and flavor — especially nice for summer picnics.
Equipment Needed
Making these Easy No-Bake Oreo Cheesecake Cups doesn’t require anything fancy, but here’s what I find helpful:
- Mixing Bowls: One large for the cream cheese and another for whipping cream. Glass or stainless steel works best.
- Electric Mixer or Hand Mixer: Essential for whipping the cream to fluffy peaks and achieving a smooth cheesecake filling.
- Spatula: For folding the whipped cream gently into the cream cheese mixture.
- Measuring Cups and Spoons: Accurate measurements keep your layers balanced.
- Serving Cups or Jars: Small clear cups, mason jars, or dessert glasses to show off those beautiful layers.
- Food Processor or Plastic Bag and Rolling Pin: To crush the Oreos finely — I’ve used both, and the rolling pin method is a handy budget-friendly option.
In case you don’t have an electric mixer, whipping cream by hand is doable but expect a bit more arm work — honestly, it’s a good workout! For the serving vessels, I’ve found that clear cups add a lovely visual appeal, especially if you’re sharing these at a party or potluck.
Preparation Method
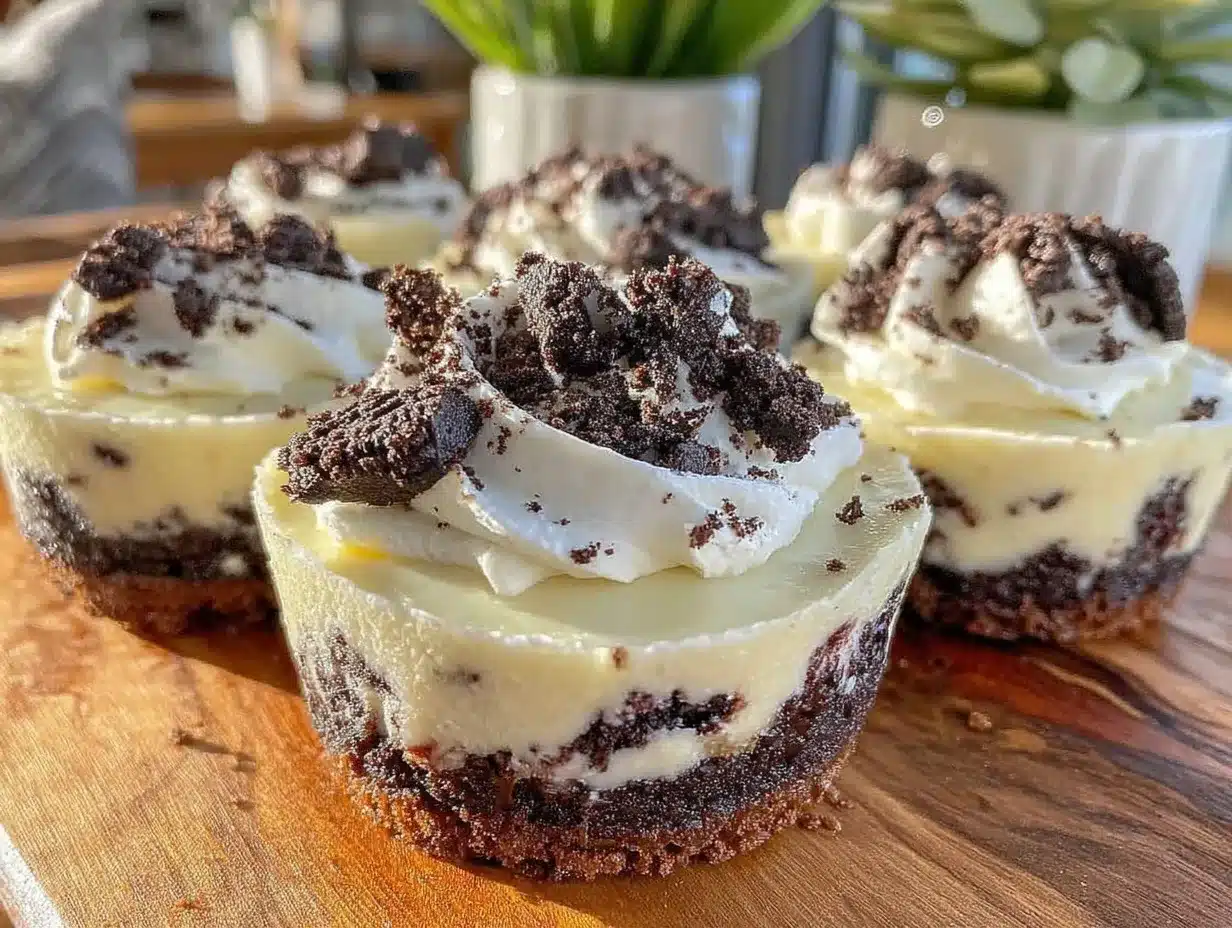
- Crush the Oreos: Place about 20 Oreos (reserve 4-5 for topping) into a food processor and pulse until fine crumbs form. If you don’t have a processor, pop them into a sturdy plastic bag and crush them with a rolling pin until you get a sandy texture. Set aside.
- Make the crust layer: In a medium bowl, mix the crushed Oreos with 3 tablespoons (43 g) melted unsalted butter. Stir until the crumbs are evenly coated and hold together when pressed. This should take about 3 minutes.
- Press the crust: Spoon a tablespoon or two of the crumb mixture into each serving cup or jar. Press down firmly with the back of a spoon or your fingers to form a solid base. Chill in the fridge while you prepare the filling (about 10 minutes).
- Whip the cream: In a chilled bowl, pour 1 cup (240 ml) heavy whipping cream and beat on medium-high speed until soft peaks form, roughly 3-5 minutes. Be careful not to overwhip — you want fluffy, not butter.
- Prepare the cream cheese mixture: In a separate large bowl, beat 8 ounces (225 g) softened cream cheese with ½ cup (60 g) powdered sugar and 1 teaspoon vanilla extract until smooth and creamy, about 2-3 minutes. No lumps allowed here!
- Fold in whipped cream: Gently fold the whipped cream into the cream cheese mixture using a spatula. Do this carefully to keep the airy texture — no rushing! It should look light and fluffy.
- Assemble the cups: Spoon a generous layer of the cream cheese mixture over the crust in each cup. Then sprinkle a thin layer of crushed Oreos on top. Repeat layering once more if your cups allow, finishing with crushed Oreos and a few reserved Oreo halves for garnish.
- Chill: Refrigerate the cups for at least 2 hours to let the cheesecake set and the flavors meld. If you’re in a hurry, a quick 1-hour chill works, but longer is better.
Some quick tips: If your cream cheese isn’t soft enough, the mixture can get lumpy — I learned this the hard way! Also, pressing the crust firmly helps keep the layers intact when you dig in. When folding in the whipped cream, don’t overmix — it should stay fluffy, not runny.
Cooking Tips & Techniques
Making no-bake cheesecake cups might sound straightforward, but a few insider tips can make a big difference in the final dessert:
- Softening cream cheese properly: Leave it out at room temperature for at least 30 minutes before mixing. Cold cream cheese resists blending and makes lumps.
- Whipping cream to the right consistency: Watch closely and stop when you see soft peaks. Overwhipping turns it grainy and eventually into butter — not what you want! I set a timer to remind myself because it’s easy to get distracted.
- Folding technique: Use a gentle folding motion with a spatula rather than stirring vigorously. This keeps the air in the whipped cream, giving the filling that light mouthfeel.
- Crust pressing: Firmly press the Oreo crust into the base of the cups to prevent it from falling apart when serving. I sometimes use the bottom of a small glass for even pressing.
- Layering for presentation: Alternating creamy layers with visible cookie crumbs makes the dessert more inviting and adds textural contrast.
One time, I rushed through the folding step and ended up with a dense filling — lesson learned! Patience here pays off. Also, chilling time is crucial — the longer you wait, the better the texture and flavor meld. If you want a fuss-free dessert that’s consistently delicious, this method is a keeper.
Variations & Adaptations
While the classic Easy No-Bake Oreo Cheesecake Cups are a crowd favorite, switching things up can keep your dessert game fresh:
- Seasonal fruit twist: Add fresh raspberries or sliced strawberries between layers for a pop of color and tang.
- Chocolate Lovers’ version: Mix mini chocolate chips into the cream cheese filling or drizzle melted chocolate on top before chilling.
- Gluten-free option: Use gluten-free chocolate sandwich cookies instead of Oreos to make it safe for gluten-sensitive guests.
- Vegan adaptation: Swap cream cheese and heavy cream with vegan cream cheese and coconut cream. Use dairy-free Oreos or similar cookies.
- Peanut Butter Oreo: Add a swirl of peanut butter into the cream cheese layer for a nutty surprise.
Personally, I once tried layering crushed peppermint Oreos around Christmas, which brought a festive twist to this summer classic — surprisingly good! You can also experiment with different serving containers, like mini tart shells or brownie cups, for variety.
Serving & Storage Suggestions
These Easy No-Bake Oreo Cheesecake Cups are best served chilled. I recommend taking them out of the fridge about 10 minutes before eating so the creamy layers soften slightly for the best texture.
For a simple presentation, garnish with a few whole or halved Oreos on top and maybe a mint leaf if you’re feeling fancy. Pair these cups with a cold glass of milk or a light coffee for a perfect dessert experience.
Storage is straightforward: keep the cups covered with plastic wrap or lids in the refrigerator for up to 3 days. They don’t freeze well because the creamy layers can separate, but if pressed, freeze for up to a week and thaw overnight in the fridge.
As they sit, the flavors meld and the crust softens just a bit, so you get a slightly different but equally delicious experience if you make them a day ahead — which is a lifesaver when hosting!
Nutritional Information & Benefits
Each serving of these Easy No-Bake Oreo Cheesecake Cups contains approximately 320 calories, with about 22 grams of fat, 28 grams of carbohydrates, and 5 grams of protein. They’re an indulgent treat, but keep in mind that using real cream cheese and heavy cream provides calcium and some vitamin A.
For those watching carbs, you can make a lighter version by swapping full-fat cream cheese with a lower-fat variety and using fewer Oreos. Just remember, that will slightly change the texture.
This recipe contains dairy and gluten (from Oreos), so it’s important to check for allergies. However, using gluten-free cookies and dairy-free cream cheese options can make this dessert accessible to more people.
From a wellness perspective, I think of these cheesecake cups as a special occasion treat — one that brings joy and comfort, which matters just as much as nutrition sometimes.
Conclusion
Easy No-Bake Oreo Cheesecake Cups with Creamy Layers are the kind of dessert that feels effortless but tastes like you’ve spent hours in the kitchen. Whether you’re chasing a childhood memory or just craving a cool, sweet treat, this recipe delivers every time.
Feel free to customize the layers, swap ingredients, or add your own twist — that’s part of the fun in making this your signature dessert. I love how this recipe brings people together, whether it’s a backyard gathering or a quiet night in.
If you try these cheesecake cups, I’d love to hear how you made them your own. Drop a comment sharing your experiences or tweaks, and don’t forget to share the joy with friends and family. Here’s to many creamy, crunchy bites ahead!
Frequently Asked Questions
- Can I make these cheesecake cups ahead of time? Yes! They taste even better after chilling for a few hours or overnight, making them perfect for prepping in advance.
- What if I don’t have heavy cream? You can try whipping chilled coconut cream for a dairy-free option, but heavy cream gives the best texture.
- Can I use other cookies besides Oreos? Absolutely! Chocolate sandwich cookies or gluten-free versions work well, just adjust the sweetness accordingly.
- How long do these cheesecake cups last in the fridge? They keep fresh for up to 3 days when stored in airtight containers.
- Is it possible to make these vegan? Yes, by using vegan cream cheese, coconut cream, and dairy-free cookies, you can create a delicious vegan version.
Pin This Recipe!
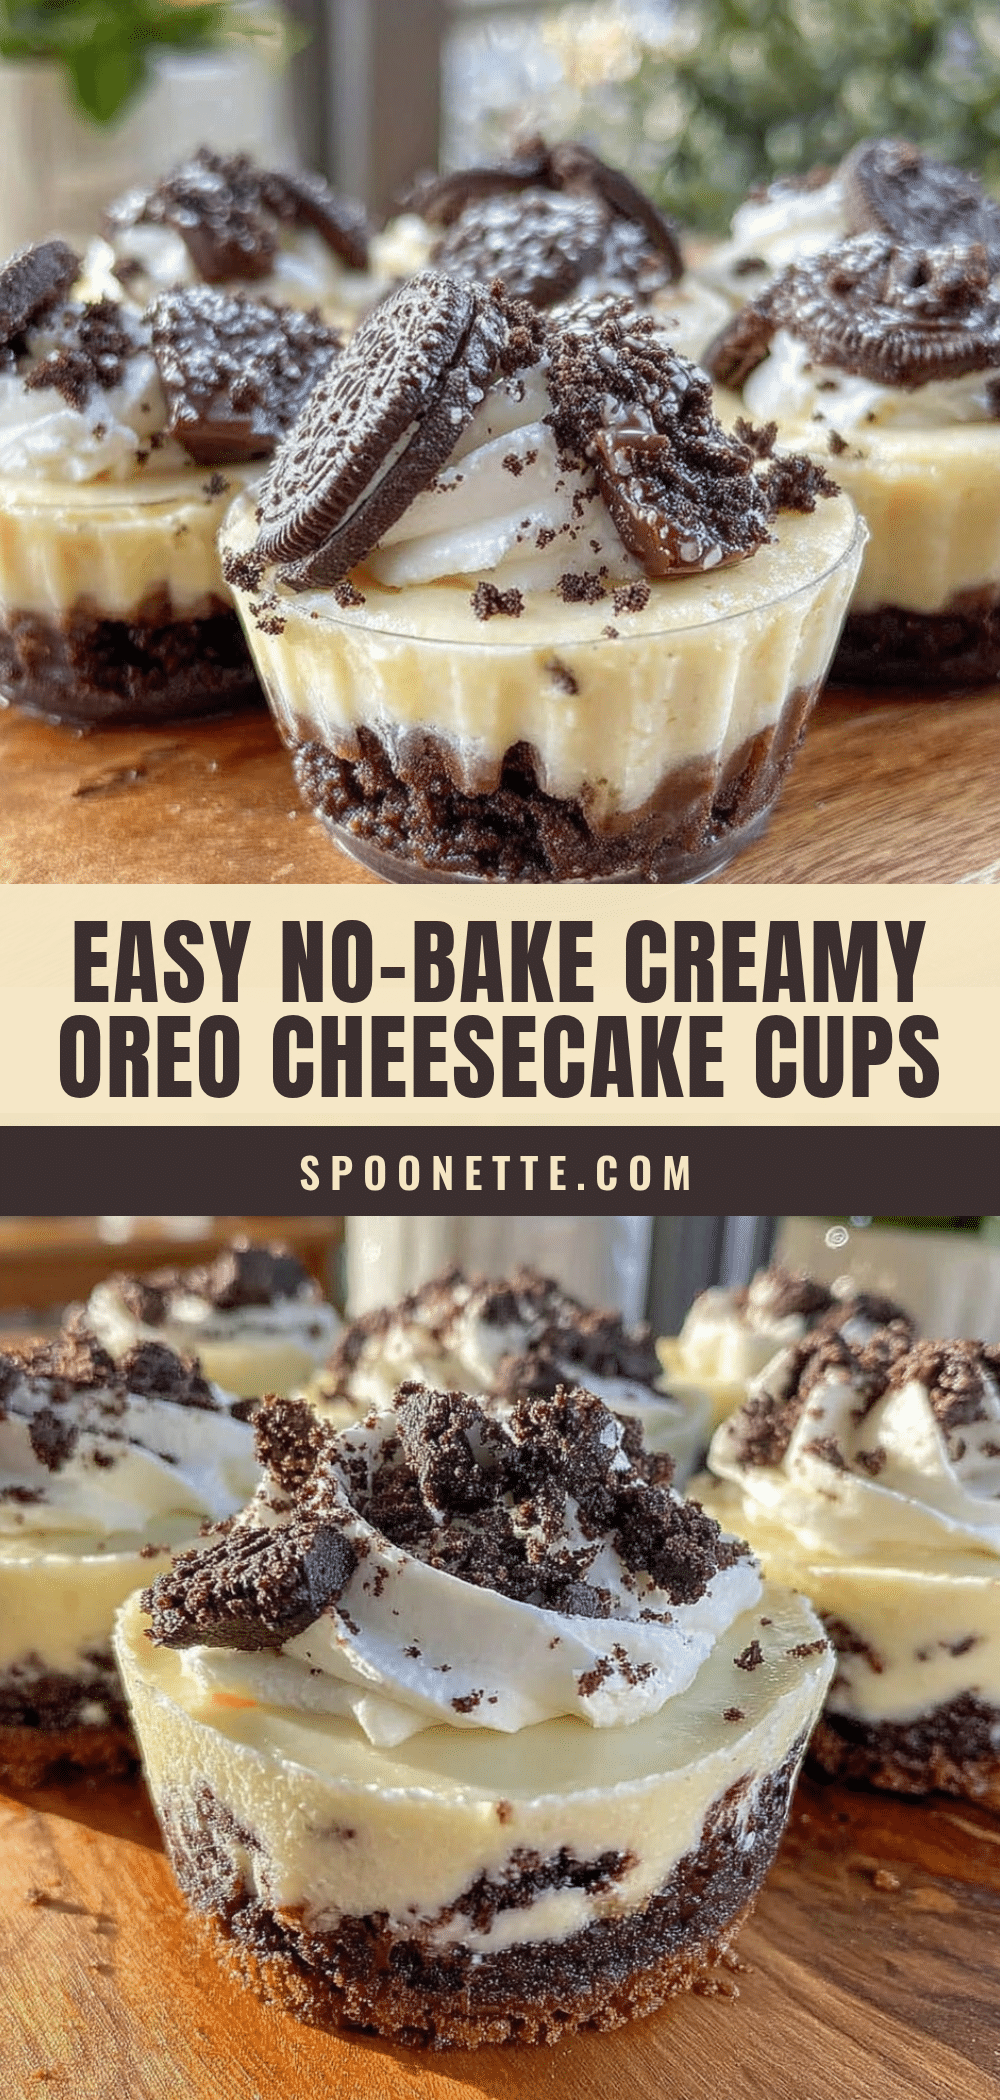
Easy No-Bake Oreo Cheesecake Cups Recipe with Creamy Layers Perfect for Summer Desserts
These no-bake Oreo cheesecake cups combine creamy layers with crunchy cookie bits for a quick, easy, and refreshing summer dessert that requires no oven.
- Prep Time: 15 minutes
- Cook Time: 0 minutes
- Total Time: 2 hours 15 minutes
- Yield: 6 servings 1x
- Category: Dessert
- Cuisine: American
Ingredients
- About 20 Oreos, crushed (reserve some whole or halved for topping)
- 8 ounces (225 grams) cream cheese, softened to room temperature
- 1 cup (240 ml) heavy whipping cream, chilled
- ½ cup (60 grams) powdered sugar, sifted
- 1 teaspoon vanilla extract
- 3 tablespoons (43 grams) unsalted butter, melted
- Optional: mini chocolate chips or white chocolate chunks
- Optional: a pinch of salt in the crust
- Optional dairy-free twist: swap cream cheese and whipping cream with coconut cream-based alternatives
Instructions
- Crush the Oreos: Place about 20 Oreos (reserve 4-5 for topping) into a food processor and pulse until fine crumbs form. Alternatively, crush in a plastic bag with a rolling pin until sandy texture forms. Set aside.
- Make the crust layer: In a medium bowl, mix the crushed Oreos with 3 tablespoons melted unsalted butter until crumbs are evenly coated and hold together when pressed, about 3 minutes.
- Press the crust: Spoon 1-2 tablespoons of the crumb mixture into each serving cup or jar. Press down firmly to form a solid base. Chill in the fridge for about 10 minutes.
- Whip the cream: In a chilled bowl, beat 1 cup heavy whipping cream on medium-high speed until soft peaks form, about 3-5 minutes. Avoid overwhipping.
- Prepare the cream cheese mixture: In a separate large bowl, beat 8 ounces softened cream cheese with ½ cup powdered sugar and 1 teaspoon vanilla extract until smooth and creamy, about 2-3 minutes.
- Fold in whipped cream: Gently fold the whipped cream into the cream cheese mixture using a spatula to keep the airy texture light and fluffy.
- Assemble the cups: Spoon a generous layer of cream cheese mixture over the crust in each cup. Sprinkle a thin layer of crushed Oreos on top. Repeat layering once more if cups allow, finishing with crushed Oreos and reserved Oreo halves for garnish.
- Chill: Refrigerate the cups for at least 2 hours to let the cheesecake set and flavors meld. A minimum 1-hour chill works in a hurry.
Notes
Softening cream cheese properly is crucial to avoid lumps. Whip cream to soft peaks without overwhipping to prevent turning into butter. Gently fold whipped cream into cream cheese mixture to keep it airy. Press crust firmly to keep layers intact. Chill at least 2 hours for best texture and flavor melding. Can be made ahead and stored up to 3 days in fridge.
Nutrition
- Serving Size: 1 cup serving
- Calories: 320
- Fat: 22
- Carbohydrates: 28
- Protein: 5
Keywords: no-bake, Oreo, cheesecake, summer dessert, easy dessert, creamy layers, quick dessert, no oven