Love this? Save it for later!
Share the inspiration with your friends
I was standing in the baking aisle of our local grocery store last Tuesday — just staring at the sprinkles. Not the fancy ones, not the seasonal ones, but the classic rainbow jimmies in that plastic shaker jar. And suddenly I was seven years old, sitting cross-legged on my aunt Rita’s linoleum kitchen floor, watching her shake those same sprinkles over a pan of frosted cookie bars. She’d let me press the sprinkles into the frosting with my finger if I promised not to eat them all first. I always broke that promise, and she always pretended not to notice. Rita passed away a few years back, and honestly, I hadn’t thought about those cookie bars in forever. But there I was, crying a little in the sprinkles aisle. Maybe you’ve been there — where a random grocery store moment just hits you right in the chest.
I grabbed two jars of sprinkles, a stick of butter I didn’t really need, and drove home determined to figure out those cookie bars. The thing is, I never got the recipe from Rita. She was one of those cooks who just knew — a pinch of this, a handful of that. So I spent the rest of that week making batch after batch of sugar cookie bars, trying to get that soft, buttery base just right. The first batch was too cakey. The second one spread into a flat, crispy mess. By batch three, I had flour in my hair and sprinkles stuck to my elbow, and I was laughing at myself. But batch four? Batch four was the one. That soft, chewy texture with the slight crackle on top, the sweet buttercream frosting, and those rainbow sprinkles that made everything feel a little bit magical. I mean, I actually texted my sister a photo with the caption “Rita would approve.”
That’s why I’m so excited to share these Rainbow Sprinkle Back-to-School Sugar Cookie Bars with you. They’re the kind of treat that makes the first day of school feel special — or really any day that needs a little extra color. Whether you’re packing lunchbox surprises, making an after-school snack, or just want something cheerful on your kitchen counter, these bars deliver. They’re soft, they’re buttery, they’re topped with the creamiest vanilla frosting, and they’ve got those rainbow sprinkles that honestly make everything better. I’ve tested this recipe more times than I care to admit, so trust me when I say — this is the version that works.
Why You’ll Love These Rainbow Sprinkle Sugar Cookie Bars
Let me tell you what makes these cookie bars different from every other recipe you’ve tried. I’ve tested this one about seven times (not exaggerating) to get the texture exactly right — soft in the middle, slightly golden around the edges, and sturdy enough to hold a generous layer of frosting without falling apart. Here’s why they keep getting rave reviews from everyone who tries them:
- Quick & Easy: From start to finish, these come together in about 35 minutes. No chilling the dough, no rolling and cutting — just press, bake, and frost. Perfect for busy school mornings or last-minute bake sale needs.
- Simple Ingredients: You probably have most of these in your pantry right now. Butter, sugar, eggs, flour, vanilla — the usual suspects. The only special thing is the sprinkles, and those are easy to find.
- Perfect for Back-to-School: These bars scream “first day of school” energy. They’re colorful, fun, and easy to pack in lunchboxes or serve at after-school playdates. The kids go absolutely wild for them.
- Crowd-Pleaser: I brought these to a neighborhood gathering last weekend, and I watched a grown man eat three of them before his wife noticed. Kids and adults both love them — there’s something about that soft cookie base and sweet frosting that just works.
- Unbelievably Delicious: The texture is what gets me every time. It’s not quite a cookie and not quite a cake — it’s this perfect in-between thing that’s soft and tender but holds its shape beautifully. The buttercream frosting is silky and sweet, and the sprinkles add that little crunch and pop of color.
What makes this recipe my best version is the technique. I use melted butter instead of softened butter, which gives the bars a denser, chewier texture that’s closer to a classic sugar cookie. I also add a touch of cream cheese to the frosting — not enough to taste it, but just enough to give it that silky, not-too-sweet finish that makes you want to eat the frosting by the spoonful. This isn’t just another sugar cookie bar recipe. It’s the one I kept tweaking until I could almost hear Rita saying “that’s it, kid.”
What Ingredients You Will Need
This recipe uses simple, everyday ingredients that work together to create the perfect soft-baked cookie bar. Most of these are pantry staples, which makes this recipe perfect for those moments when you need a cheerful treat without a special trip to the store. Let me walk you through each one so you know exactly what to look for.
For the Cookie Bars
- 1 cup (2 sticks) unsalted butter, melted and slightly cooled — Melting the butter is the secret to that dense, chewy texture. I use Land O’Lakes butter for consistent results, but any good-quality unsalted butter works. Let it cool for about 5 minutes after melting — you don’t want it hot enough to cook the eggs when you mix them in.
- 1 ½ cups granulated sugar — Regular white sugar gives these bars their classic sweetness and helps create that slightly crackly top. I’ve tried reducing the sugar, and honestly, the texture suffers. This is a treat, so lean into it.
- 2 large eggs, at room temperature — Room temperature eggs mix more evenly into the batter, creating a smoother, more consistent texture. If you forgot to take them out ahead of time, place them in a bowl of warm water for 5 minutes.
- 2 teaspoons vanilla extract — Use pure vanilla extract if you can. The flavor difference is noticeable, especially in a simple recipe like this where vanilla is a star player. I’m partial to Nielsen-Massey, but any pure vanilla works beautifully.
- 2 ½ cups all-purpose flour — Spoon and level your flour for the most accurate measurement. Scooping directly from the bag can pack in too much flour, which makes the bars dry. I use Gold Medal unbleached all-purpose flour for consistent results.
- 1 teaspoon baking powder — This gives the bars just enough lift to be tender without being cakey. Make sure your baking powder isn’t expired — it loses potency over time.
- ½ teaspoon salt — Salt balances the sweetness and enhances all the flavors. I use fine sea salt for baking because it dissolves evenly. Don’t skip it — your bars will taste flat without it.
- ½ cup rainbow jimmies sprinkles — These are the long, skinny sprinkles, not the round ball-shaped ones (those are nonpareils and they tend to bleed their color into the batter). Jimmies hold their shape and color during baking. I use the Betty Crocker brand rainbow sprinkles — they’re reliable and widely available.
For the Vanilla Buttercream Frosting
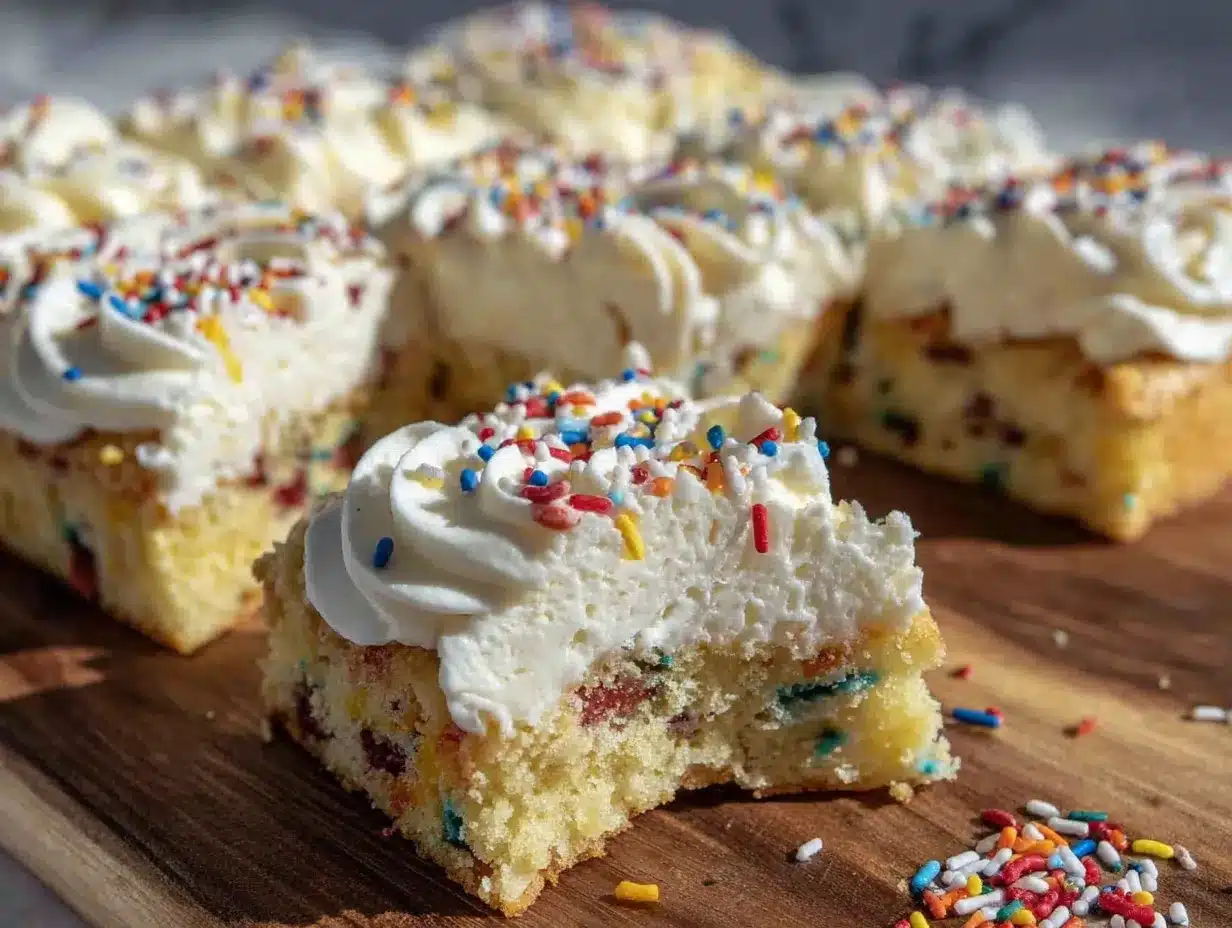
- ½ cup (1 stick) unsalted butter, softened to room temperature — Softened butter creams much better than cold butter, giving you a smooth, fluffy frosting. Leave it on the counter for about 30 minutes before you start.
- 2 ounces cream cheese, softened — This is my secret ingredient. It adds a subtle tang and makes the frosting silky without being overly sweet. Use full-fat cream cheese for the best texture. I use Philadelphia brand.
- 3 cups powdered sugar — Sift it if you have the patience — it prevents lumps. If you’re in a hurry (I usually am), just whisk it well before adding it to the butter mixture.
- 2 tablespoons heavy cream or whole milk — Heavy cream gives a richer, more luxurious frosting. Milk works fine in a pinch. Add it one tablespoon at a time until you reach your desired consistency.
- 1 teaspoon vanilla extract — More vanilla goodness. It reinforces the flavor in the cookie base and makes everything taste extra special.
- Pinch of salt — Just a tiny pinch to balance the sweetness. You won’t taste it directly, but you’ll notice the difference.
- Additional rainbow sprinkles for topping — About 2-3 tablespoons for decorating the top. Go generous — this is the fun part.
Equipment Needed
You don’t need any fancy equipment for these cookie bars, which is part of what makes them so approachable. Here’s what you’ll need:
- 9×13-inch baking pan — This is the perfect size for thick, generous bars. I use a metal pan because it conducts heat evenly and gives you those slightly golden edges. Glass pans work too, but you might need to add a few minutes to the baking time.
- Parchment paper or aluminum foil — Line your pan with parchment paper, leaving some overhang on the sides. This creates “handles” that let you lift the entire slab of cookie bars out of the pan for easy cutting. I learned this trick after destroying my first batch trying to dig them out of the pan.
- Electric hand mixer or stand mixer — You can mix the cookie dough by hand with a wooden spoon if you want a workout, but an electric mixer makes the frosting much easier. I use my KitchenAid stand mixer for the frosting and mix the cookie dough by hand — less cleanup that way.
- Large mixing bowls — One for the dry ingredients, one for the wet ingredients. I use glass bowls because they don’t retain odors or stains.
- Whisk and rubber spatula — A whisk for combining dry ingredients and a spatula for folding in the sprinkles and scraping every last bit of batter into the pan.
- Measuring cups and spoons — Accurate measurements matter in baking. I use metal measuring cups for dry ingredients and glass ones for liquids.
- Offset spatula or butter knife — For spreading the frosting evenly over the cooled bars. An offset spatula makes it look professional, but a regular butter knife works just fine.
- Cooling rack — Letting the bars cool completely on a wire rack prevents the bottom from getting soggy. If you don’t have one, just let them cool in the pan for longer.
Preparation Method
Alright, let’s make these Rainbow Sprinkle Back-to-School Sugar Cookie Bars. I’ve broken everything down into clear steps with all the little details I wish someone had told me the first time I made these. Take your time, and don’t stress — this is supposed to be fun.
Step 1: Preheat and Prep Your Pan
Preheat your oven to 350°F (175°C). While it’s heating up, line your 9×13-inch baking pan with parchment paper. Cut a piece of parchment that’s about 14 inches long — long enough to hang over the two long sides of the pan by about an inch on each side. Press it into the pan, smoothing out any wrinkles. If you’re using aluminum foil instead, lightly grease it with nonstick spray or butter. The overhang is crucial — it lets you lift the entire slab out of the pan later without any drama.
Step 2: Mix the Dry Ingredients
In a medium bowl, whisk together 2 ½ cups all-purpose flour, 1 teaspoon baking powder, and ½ teaspoon salt. Whisk for about 15 seconds to make sure everything is evenly distributed. Set this bowl aside. This step takes two minutes and prevents you from getting pockets of baking powder in your finished bars — trust me, nobody wants a bitter bite of baking powder.
Step 3: Make the Cookie Dough
In a large mixing bowl, combine 1 cup melted butter (cooled slightly) and 1 ½ cups granulated sugar. Whisk them together until they’re well combined — it’ll look like wet sand at this point. Add 2 room-temperature eggs and 2 teaspoons vanilla extract, and whisk until the mixture is smooth and glossy. It should look pale yellow and smell amazing already.
Now, pour the dry ingredients into the wet ingredients. Stir with a rubber spatula or wooden spoon until just combined. Stop as soon as you don’t see any more streaks of flour — overmixing will make the bars tough. The dough will be thick and slightly sticky, which is exactly what you want.
Gently fold in ½ cup rainbow jimmies sprinkles. Use a few gentle strokes — you want the sprinkles distributed throughout the dough, not smashed into oblivion. The dough will look cheerful and speckled with color at this point. I always stop and admire it for a second before moving on.
Step 4: Press the Dough into the Pan
Scoop the dough into your prepared pan. It’ll be thick and a little stubborn — don’t worry, that’s normal. Use your hands or the back of a spatula to press it evenly into the pan. Try to get it into the corners and make the surface as level as you can. If the dough sticks to your fingers, lightly dampen your hands with water. The dough layer should be about ¼ to ½ inch thick. Don’t press it too thin, or your bars will be flat and crispy instead of soft and thick.
Step 5: Bake the Cookie Bars
Place the pan in the preheated oven and bake for 18 to 22 minutes. Start checking at 18 minutes — you want the edges to be lightly golden and the center to look set and slightly puffed. A toothpick inserted into the center should come out with a few moist crumbs, not wet batter. The top should look pale golden and feel firm to a light touch.
Here’s the thing — these bars continue to bake a little in the hot pan after you take them out, so it’s better to pull them slightly early than to overbake them. Overbaked bars are dry and crumbly, and nobody wants that. I’ve made that mistake exactly once, and I still remember the disappointment. Learn from my pain.
Step 6: Cool Completely
Let the bars cool in the pan on a wire rack for about 20 minutes. Then, using the parchment paper overhang, lift the entire slab out of the pan and transfer it to the wire rack to cool completely. This usually takes about 1 to 1.5 hours. Do not — I repeat, do not — try to frost these while they’re still warm. The frosting will melt into a sad, greasy puddle, and you’ll be left with a mess instead of beautiful bars. I know it’s tempting, but patience pays off here.
Step 7: Make the Frosting
While the bars are cooling, make the frosting. In a large bowl (or the bowl of a stand mixer), beat ½ cup softened butter and 2 ounces softened cream cheese together on medium speed until smooth and creamy — about 2 minutes. Scrape down the sides of the bowl with a spatula. Add 1 teaspoon vanilla extract and a pinch of salt, and beat until combined.
Gradually add 3 cups powdered sugar, about 1 cup at a time, beating on low speed after each addition. The mixture will look dry and crumbly at first — that’s normal. Add 2 tablespoons heavy cream (or milk) and beat on medium-high speed for 2 to 3 minutes, until the frosting is light, fluffy, and spreadable. If it’s too thick, add another tablespoon of cream. If it’s too thin, add a little more powdered sugar. Taste it — I won’t judge you for eating a spoonful. Or two.
Step 8: Frost and Decorate
Once the bars are completely cool, spread the frosting evenly over the top using an offset spatula or butter knife. Go all the way to the edges for a finished look. Immediately sprinkle the remaining rainbow jimmies over the frosting — press them in very gently with your fingers so they stick. Don’t wait too long, or the frosting will start to set and the sprinkles won’t adhere as well.
Step 9: Cut and Serve
For clean cuts, refrigerate the frosted bars for about 20 to 30 minutes to firm up the frosting. Then use a sharp knife to cut into squares — I usually do 12 large bars or 24 smaller ones. Wipe the knife clean between cuts for the neatest edges. Serve at room temperature for the softest texture.
Cooking Tips & Techniques
After making these bars more times than I’d like to admit, I’ve picked up a few tricks that make a real difference. Let me share them so you can skip the trial-and-error part.
Don’t overmix the dough. This is probably the most important tip I can give you. Once you add the flour mixture to the wet ingredients, stir just until the flour disappears. Overmixing develops the gluten in the flour, which makes the bars tough and bread-like instead of soft and tender. I mix until I see one or two tiny streaks of flour left, then I fold two more times and stop. It feels under-mixed, but trust the process.
Use room temperature ingredients. I know it’s annoying to wait for eggs and butter to come to room temperature, but it really does matter. Room temperature ingredients emulsify better, which means a smoother, more uniform texture in both the cookie bars and the frosting. For the eggs, place them in a bowl of warm water for 5 minutes. For the butter, cut it into small cubes and let it sit on the counter for 20 to 30 minutes.
Watch your baking time carefully. All ovens run differently — mine runs about 25 degrees hot, so I always start checking at the lower end of the baking time range. The bars are done when the edges are just barely golden and the center looks set but still soft. A toothpick inserted in the center should come out with a few moist crumbs. If it comes out clean, you’ve overbaked them. I learned this the hard way when I made a batch for my son’s kindergarten class and ended up with crumbly bars that fell apart in the lunchboxes. Not my finest moment.
Let the bars cool completely before frosting. I know I said this already, but it bears repeating. Warm bars + cold frosting = a melty disaster. The frosting will slide right off, and you’ll end up with a sticky, uneven mess. Give the bars a full 1.5 hours to cool on a wire rack. If you’re in a rush, pop them in the refrigerator for 30 minutes after they’ve cooled on the counter for 20 minutes.
Use a sharp knife for cutting. A dull knife will drag through the frosting and create jagged, messy edges. Run your knife under hot water, dry it off, and make clean cuts. Wipe the blade clean between each cut for the prettiest presentation. If you’re making these for a party or bake sale, this little detail makes them look professionally made.
Toast your sprinkles for extra flavor. This is a weird tip, but hear me out. If you spread the sprinkles on a baking sheet and toast them in a 350°F oven for about 2 minutes, they develop a slightly nutty, caramelized flavor that’s surprisingly good. I tried this on a whim one day, and now I do it whenever I have extra time. It’s totally optional, but it adds a subtle depth that takes these bars to the next level.
Variations & Adaptations
One of the best things about this recipe is how customizable it is. Here are some of my favorite variations — I’ve tried most of them myself, and they all deliver delicious results.
Gluten-Free Version: Substitute the all-purpose flour with a 1:1 gluten-free baking flour blend. I’ve tested this with Bob’s Red Mill Gluten-Free 1-to-1 Baking Flour, and it works beautifully. The texture is slightly more tender than the original, but still soft and delicious. Make sure your sprinkles are certified gluten-free — some brands use wheat starch as a thickener.
Dairy-Free Version: Use vegan butter sticks (I like Earth Balance) and a dairy-free cream cheese alternative like Kite Hill. Replace the heavy cream with full-fat coconut milk or oat milk. The texture will be slightly different — vegan butter has a higher water content, so the bars might be a touch softer — but they’re still absolutely delicious.
Seasonal Sprinkle Variations: Swap the rainbow sprinkles for seasonal colors to match any holiday or occasion. Red and pink for Valentine’s Day, orange and black for Halloween, red and green for Christmas, pastels for Easter. I made a batch with red, white, and blue sprinkles for the Fourth of July last year, and they were a huge hit at the barbecue.
Chocolate Drizzle: For extra decadence, drizzle melted chocolate over the frosted bars. Melt ½ cup semi-sweet chocolate chips with 1 teaspoon coconut oil in the microwave (30-second intervals, stirring between each), then drizzle it over the frosting using a fork or a piping bag. Let it set for about 15 minutes before cutting. The combination of vanilla frosting and chocolate is absolutely irresistible.
Lemon Sugar Cookie Bars: Add the zest of one lemon to the cookie dough and replace 1 teaspoon of the vanilla extract in the frosting with fresh lemon juice. The bright, citrusy flavor pairs beautifully with the sweet buttercream. I made these for a spring brunch, and they disappeared faster than anything else on the table.
Confetti Cake-Inspired Bars: Add ½ teaspoon almond extract to the cookie dough along with the vanilla. Almond extract gives these bars a flavor similar to birthday cake or confetti cake. It’s subtle but distinct, and it makes the bars taste extra special. My kids request this version for their birthdays every single year.
Serving & Storage Suggestions
These Rainbow Sprinkle Back-to-School Sugar Cookie Bars are best served at room temperature, where the cookie base is soft and tender and the frosting is creamy and smooth. If you’ve refrigerated them, let them sit on the counter for about 15 to 20 minutes before serving. The texture really shines when it’s not straight from the fridge.
For presentation, I love arranging them on a white platter or cake stand — the rainbow sprinkles pop beautifully against a neutral background. For lunchboxes, wrap individual bars in wax paper or parchment paper and tie with a piece of kitchen twine. It adds a touch of homemade charm that store-bought treats just can’t match. For bake sales, place them in clear cellophane bags tied with a colorful ribbon. They sell out fast, I promise.
These bars pair wonderfully with a cold glass of milk, a warm cup of coffee, or a tall glass of iced tea. For an after-school treat, serve them alongside fresh fruit or a yogurt tube for a balanced snack. For dessert, a scoop of vanilla ice cream on top of a warm bar is pure heaven — just warm the bar in the microwave for 10 seconds before adding the ice cream.
Storage Instructions: Store the bars in an airtight container at room temperature for up to 3 days. If your kitchen is warm or humid, store them in the refrigerator to prevent the frosting from getting too soft. Layer them between sheets of wax paper to prevent sticking. They’ll keep in the refrigerator for up to 5 days.
Freezer Instructions: These bars freeze beautifully. Freeze them unfrosted for the best results — wrap the cooled, uncut slab tightly in plastic wrap, then in aluminum foil, and freeze for up to 3 months. When you’re ready to serve, thaw the slab in the refrigerator overnight, bring it to room temperature, then frost and decorate. You can also freeze frosted bars — place them in a single layer on a baking sheet and freeze until firm (about 1 hour), then transfer to an airtight container with parchment paper between layers. Thaw in the refrigerator overnight.
Flavor Development: These bars actually taste even better the next day. The flavors meld together overnight, and the texture becomes even more tender. I often make them a day ahead for parties or school events. Just wait to add the sprinkles on top until right before serving so they stay bright and crunchy.
Nutritional Information & Benefits
Let’s be real — these are a treat, not a health food. But here’s the estimated nutritional breakdown for one bar (based on 12 servings) so you can plan accordingly:
| Nutrient | Amount Per Serving |
|---|---|
| Calories | 420 |
| Total Fat | 20g |
| Saturated Fat | 12g |
| Cholesterol | 75mg |
| Sodium | 210mg |
| Total Carbohydrates | 58g |
| Sugars | 42g |
| Protein | 4g |
While these aren’t exactly a health food, they do have a few redeeming qualities. The butter and eggs provide some protein and fat that help keep you full. The sprinkles? Well, they bring joy, and I think that counts for something. If you want to make these a little more balanced, consider serving them as part of a snack that includes fruit or veggies — the sweetness of the bars pairs beautifully with the tartness of apple slices or the crunch of carrot sticks.
Allergen Information: These bars contain wheat (gluten), dairy (butter, cream cheese, heavy cream), and eggs. They are not suitable for those with celiac disease or dairy allergies unless you use the substitutions listed in the variations section. Some sprinkles may contain artificial dyes or be processed in facilities that handle nuts — check the label if you have specific allergies.
From a wellness perspective, I believe in the power of balance. These bars are for celebrations, first days of school, Tuesday afternoons that need a little pick-me-up, and moments when you just want to make something beautiful. They’re not everyday food, and that’s okay. Sometimes the best thing you can do for your wellbeing is bake something colorful, share it with people you love, and enjoy every single bite without guilt.
Conclusion
These Rainbow Sprinkle Back-to-School Sugar Cookie Bars are more than just a recipe — they’re a little piece of joy you can bake in your own kitchen. They’re soft and buttery, topped with silky vanilla frosting and a rainbow of sprinkles that make everything feel a bit more magical. Whether you’re making them for the first day of school, a bake sale, a birthday, or just because it’s Tuesday and you need a win, these bars deliver every single time.
I love that this recipe is forgiving enough for beginner bakers but delivers results that look like you spent hours in the kitchen. I love that the colors make kids’ eyes light up and adults feel like kids again. And I love that every time I make them, I think of Aunt Rita and her linoleum kitchen floor — even though these bars are completely my own creation now.
So go ahead — preheat that oven, grab those sprinkles, and make a batch. Customize them however you like. Swap the colors, add some lemon zest, drizzle on some chocolate. Make them yours. And when you do, I’d love to hear about it. Drop a comment below and tell me how they turned out, what variations you tried, or who you shared them with. Tag me in your photos on social media — I’m always looking for sprinkle inspiration. Happy baking, friend. You’ve got this.
Frequently Asked Questions
Can I use margarine instead of butter?
I don’t recommend it. Margarine has a higher water content than butter, which can make the bars spread too much and turn out flat and greasy. Butter gives these bars their signature soft, tender texture and rich flavor. If you need a dairy-free option, use a high-quality vegan butter stick instead of margarine.
Why did my cookie bars turn out dry?
Dry cookie bars are usually the result of overbaking or overmeasuring the flour. Make sure you’re spooning the flour into your measuring cup and leveling it off with a knife — scooping directly from the bag can add up to 25% more flour than the recipe calls for. Also, check your bars at the 18-minute mark. They should look set but still soft in the center when you pull them out.
Can I use a different size pan?
You can, but the baking time will change. If you use a 9×9-inch pan, the bars will be thicker and will need about 25 to 30 minutes of baking time. If you use a larger pan like an 11×17-inch sheet pan, the bars will be thinner and will bake in about 12 to 15 minutes. Keep an eye on them and use the visual cues — golden edges and a set center — as your guide.
How do I keep the sprinkles from bleeding into the dough?
Use rainbow jimmies (the long, skinny sprinkles) instead of nonpareils (the tiny round balls). Jimmies are designed to hold their shape and color during baking, while nonpareils tend to bleed and create streaks of color in the dough. Also, fold the sprinkles in gently and minimally — overmixing can cause the color to rub off into the dough.
Can I make these ahead of time for a party?
Absolutely! These bars are actually better when made a day ahead. Bake and cool the bars completely, then store them unfrosted in an airtight container at room temperature overnight. The next day, make the frosting, spread it on, and add the sprinkles. This method gives you the freshest frosting and the crunchiest sprinkles. You can also freeze the unfrosted bars for up to 3 months — just thaw, frost, and decorate when you’re ready to serve.
Pin This Recipe!
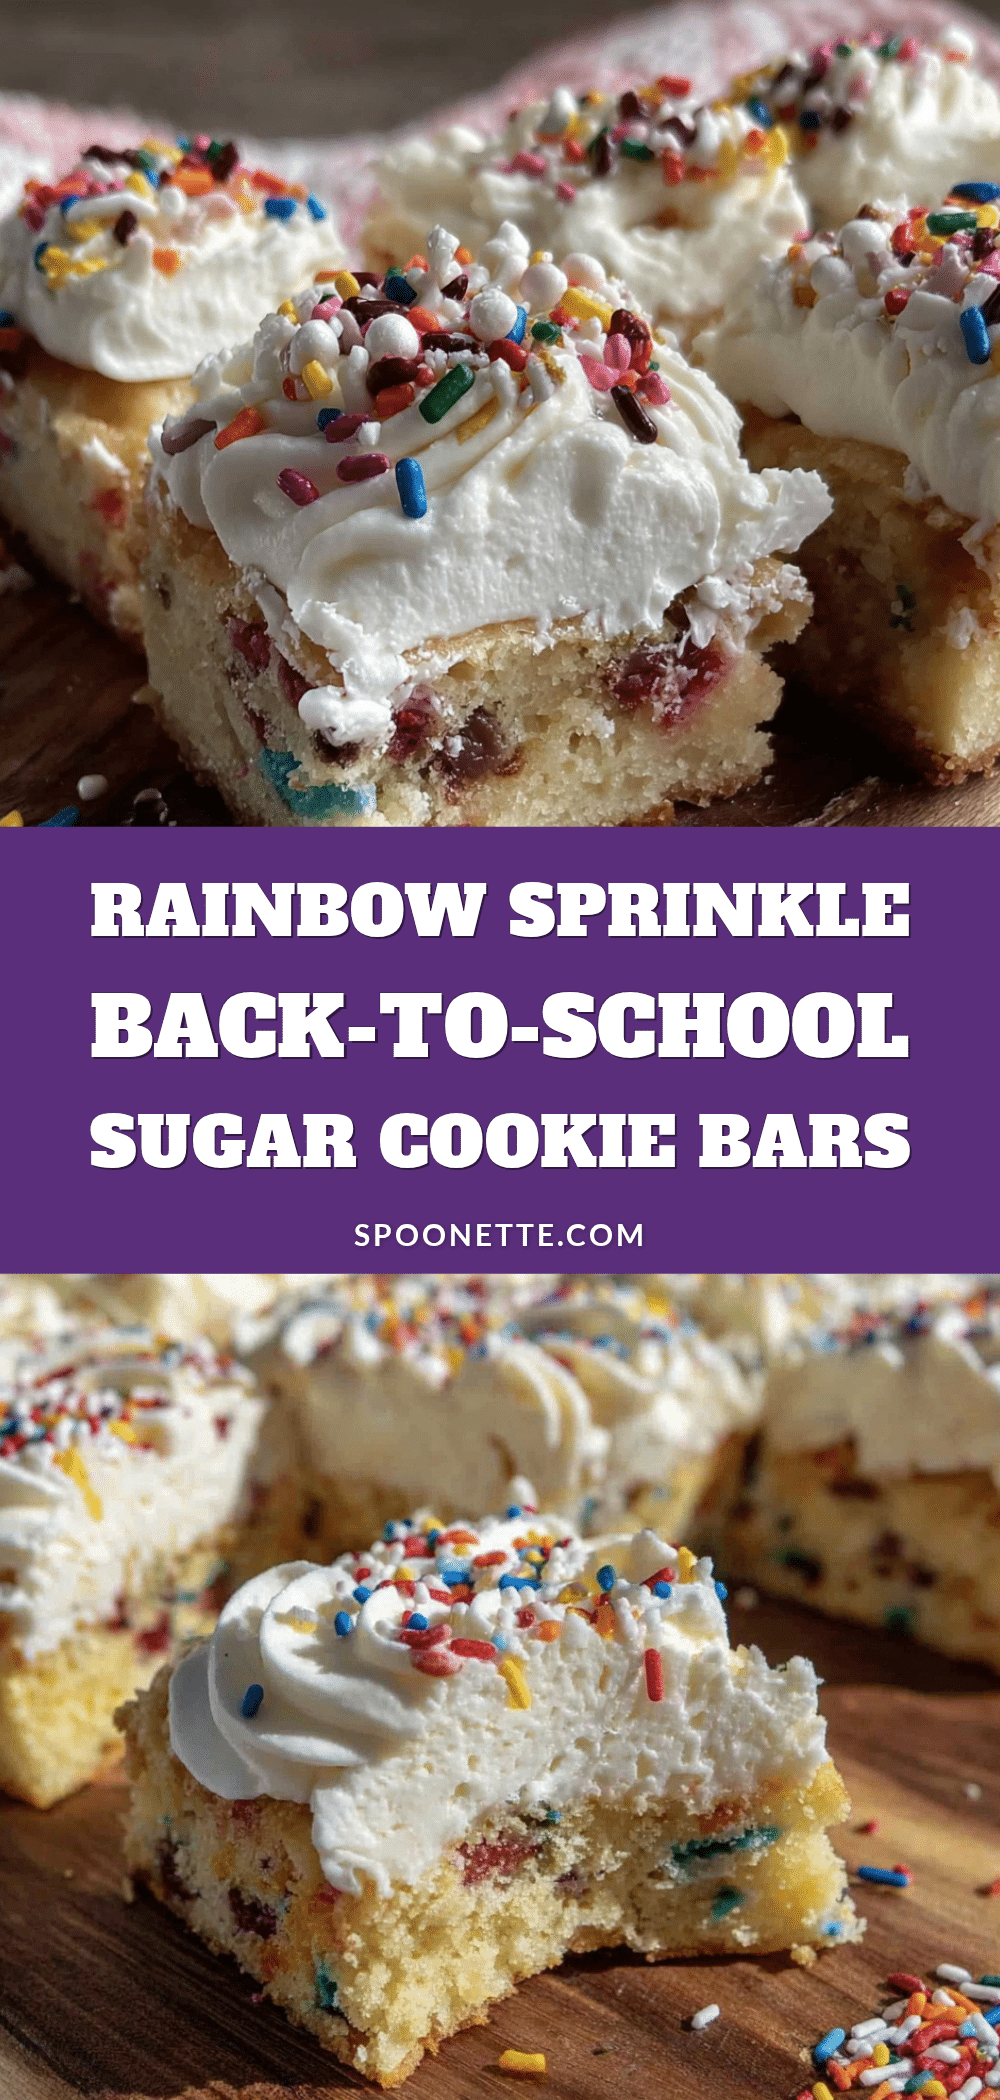
Rainbow Sprinkle Sugar Cookie Bars | Easy Back-to-School Treat
Soft, buttery sugar cookie bars topped with creamy vanilla buttercream and rainbow sprinkles. Perfect for back-to-school treats, bake sales, or any day that needs a little extra color.
- Prep Time: 15 minutes
- Cook Time: 20 minutes
- Total Time: 35 minutes
- Yield: 12 servings 1x
- Category: Dessert
- Cuisine: American
Ingredients
- 1 cup (2 sticks) unsalted butter, melted and slightly cooled
- 1 ½ cups granulated sugar
- 2 large eggs, at room temperature
- 2 teaspoons vanilla extract
- 2 ½ cups all-purpose flour
- 1 teaspoon baking powder
- ½ teaspoon salt
- ½ cup rainbow jimmies sprinkles
- ½ cup (1 stick) unsalted butter, softened to room temperature
- 2 ounces cream cheese, softened
- 3 cups powdered sugar
- 2 tablespoons heavy cream or whole milk
- 1 teaspoon vanilla extract
- Pinch of salt
- Additional rainbow sprinkles for topping (about 2-3 tablespoons)
Instructions
- Preheat oven to 350°F (175°C). Line a 9×13-inch baking pan with parchment paper, leaving overhang on the long sides.
- In a medium bowl, whisk together flour, baking powder, and salt.
- In a large bowl, whisk melted butter and sugar until combined. Add eggs and vanilla, whisk until smooth and glossy.
- Pour dry ingredients into wet ingredients. Stir with a rubber spatula until just combined. Fold in ½ cup rainbow jimmies.
- Press dough evenly into prepared pan. Dough layer should be about ¼ to ½ inch thick.
- Bake for 18 to 22 minutes, until edges are lightly golden and center is set. Cool in pan on wire rack for 20 minutes, then lift out and cool completely (about 1 to 1.5 hours).
- For frosting: Beat softened butter and cream cheese until smooth. Add vanilla and salt. Gradually beat in powdered sugar, then add cream and beat until fluffy.
- Spread frosting over cooled bars. Immediately sprinkle with additional rainbow jimmies, pressing gently.
- Refrigerate 20-30 minutes to firm frosting. Cut into squares and serve at room temperature.
Notes
Use rainbow jimmies (long sprinkles) not nonpareils to prevent color bleeding. Do not overmix dough. Cool bars completely before frosting. For clean cuts, refrigerate frosted bars 20-30 minutes before cutting. Bars taste even better the next day.
Nutrition
- Serving Size: 1 bar
- Calories: 420
- Sugar: 42
- Sodium: 210
- Fat: 20
- Saturated Fat: 12
- Carbohydrates: 58
- Protein: 4
Keywords: sugar cookie bars, rainbow sprinkles, back-to-school treats, easy dessert, cookie bars, buttercream frosting



