Love this? Save it for later!
Share the inspiration with your friends
This was supposed to be a simple, clean-out-the-fridge kind of night. I had a bag of frozen Hatch chiles from last summer’s farmers market haul, a block of cheddar that was starting to look a little lonely, and a stack of corn tortillas that were one day away from turning into croutons. The plan was just to throw it all together, you know, the usual weekday scramble. But I was distracted—honestly, I was trying to listen to a podcast and chop onions at the same time, which is a terrible idea. I grabbed the wrong can of enchilada sauce (red instead of green, which is a whole different vibe for Hatch chiles) and I accidentally dumped in way too much of the roasted chili puree. The filling was practically soup. I thought, well, this is going to be a mess. I rolled the enchiladas anyway, grumbling about wasted ingredients, and shoved the pan into the oven. What came out was nothing like the plan—and better. The filling had melded into this smoky, creamy, slightly spicy situation that was way more than the sum of its parts. It was the kind of dinner that makes you stop mid-chew and just look at your plate. I’ve made it every week since. Maybe you’ve been there—the happy accident that turns into your new favorite thing. This is that recipe.
Why You’ll Love This Recipe
Let me tell you, I’ve tested this one about six times now to make sure it wasn’t a fluke. It wasn’t. These roasted Hatch chili enchiladas are the real deal, and they solve the biggest problem most enchilada recipes have: they’re either too complicated for a Tuesday or too bland for a celebration. This one hits the sweet spot.
- Quick & Easy: Comes together in under 30 minutes, from start to finish. Perfect for those nights when you need dinner on the table before the kids start asking for snacks. Seriously, the oven does most of the work.
- Simple Ingredients: No fancy grocery trips needed. You likely already have the tortillas, cheese, and spices in your kitchen. The star is the roasted Hatch chiles, which you can find frozen or canned all year round.
- Perfect for Weeknights or Potlucks: This dish is a crowd-pleaser. I’ve brought it to a neighbor’s potluck and watched it disappear before the main course was even served. It’s also cozy enough for a quiet dinner at home.
- Unbelievably Delicious: The texture and flavor combo is next-level comfort food. The smokiness from the roasted chiles, the creaminess from the cheese, and that slight tang from the sauce—it all works together in a way that feels both familiar and exciting.
- What Makes This Different: Most enchilada recipes rely on canned sauce alone. Here, we’re using a double layer of flavor: a quick homemade chili sauce plus the actual roasted chiles in the filling. It’s not just another version—it’s your best version.
This recipe isn’t just good—it is the kind that makes you close your eyes after the first bite. It’s comfort food reimagined: faster, simpler, but with the same soul-soothing satisfaction. Perfect for impressing guests without stress, or turning a simple meal into something memorable.
What Ingredients You Will Need
This recipe uses simple, wholesome ingredients to deliver bold flavor and satisfying texture without the fuss. Most of these are pantry staples or easy to find at any grocery store.
- For the Roasted Hatch Chili Sauce:
- 2 tablespoons unsalted butter (adds richness)
- 2 tablespoons all-purpose flour
- 1 cup chicken or vegetable broth
- 1 cup roasted Hatch chiles, chopped (fresh, frozen, or canned—I prefer 505 Southwestern brand for consistent heat)
- 1/2 teaspoon ground cumin
- 1/2 teaspoon garlic powder
- Salt and black pepper to taste
- 1/2 cup sour cream or Mexican crema (adds creaminess)
- For the Filling:
- 2 cups cooked, shredded chicken (rotisserie chicken works great)
- 1 cup shredded cheddar cheese (or Monterey Jack for a milder flavor)
- 1/2 cup roasted Hatch chiles, chopped (reserve some for the sauce)
- 1/4 cup chopped fresh cilantro
- 1/4 cup diced onion (white or yellow)
- 1/2 teaspoon smoked paprika
- For Assembly:
- 8-10 corn tortillas (look for firm, pliable ones—I like Mission brand for durability)
- 1 cup shredded cheese for topping (cheddar or a Mexican blend)
- Optional: sliced jalapeños, extra cilantro, diced avocado for garnish
Ingredient Selection Tips: If you can find fresh Hatch chiles in the late summer, roast them yourself under the broiler until the skin blackens, then peel and chop. It’s a bit of work, but the flavor is incredible. For the rest of the year, frozen or canned roasted Hatch chiles work perfectly. Just make sure to drain them well so the filling doesn’t get watery. For a gluten-free option, use cornstarch instead of flour for the sauce.
Equipment Needed
You don’t need a fancy kitchen to pull this off. Here’s what you’ll need:
- 9×13-inch baking dish (or similar size)
- Medium saucepan for the sauce
- Small skillet or comal for warming tortillas
- Cutting board and sharp knife
- Measuring cups and spoons
- Mixing bowl for the filling
- Spatula or wooden spoon
- Oven mitts (trust me, you’ll need them)
Alternative Options: If you don’t have a 9×13 dish, use two smaller dishes or even a cast-iron skillet. Warming the tortillas in the microwave wrapped in a damp paper towel for 30 seconds works in a pinch, though a dry skillet gives them a better texture. I’ve also used a toaster oven for smaller batches—just adjust the cooking time down by a few minutes. Budget-friendly tip: skip the fancy enameled dish and use a basic glass baking dish. It works just as well.
Preparation Method
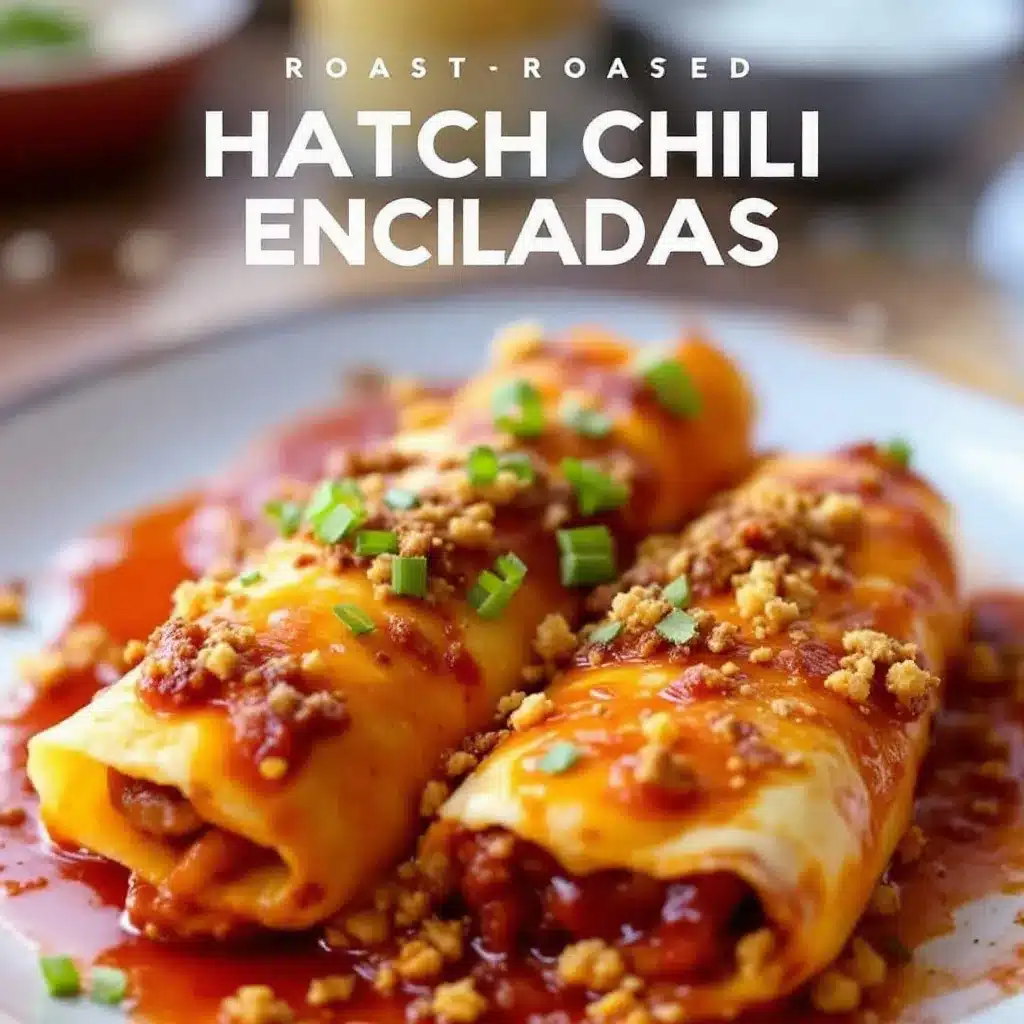
Alright, let’s get cooking. This is a straightforward process, but I’ve included a few notes from my own trial-and-error moments.
- Preheat your oven to 375°F (190°C). While it’s heating, start the sauce. In a medium saucepan over medium heat, melt the 2 tablespoons of butter. Once it’s bubbling, whisk in the flour and cook for about 1 minute, stirring constantly. This gets rid of the raw flour taste. The mixture should look like a thick paste.
- Slowly pour in the broth, whisking continuously to avoid lumps. Keep whisking until the sauce thickens slightly, about 2-3 minutes. It should coat the back of a spoon. Now, stir in the chopped Hatch chiles, cumin, garlic powder, salt, and pepper. Let it simmer for 2 minutes. The smell at this point is just incredible—smoky and warm.
- Remove the sauce from heat and stir in the sour cream or crema. Taste it. Adjust the salt or heat level if needed. If you want more kick, add a pinch of cayenne. Set the sauce aside. Pro tip: If the sauce seems too thick, add a splash more broth. If too thin, let it simmer a bit longer.
- Prepare the filling. In a mixing bowl, combine the shredded chicken, 1 cup of shredded cheese, the remaining 1/2 cup of chopped Hatch chiles, cilantro, diced onion, and smoked paprika. Mix well with a fork or your hands. The mixture should be cohesive but not wet. If it feels dry, add a tablespoon of the sauce.
- Warm the tortillas. This step is crucial. Cold tortillas crack when you roll them. Heat a dry skillet over medium-high heat and warm each tortilla for about 15-20 seconds per side, until they become pliable and slightly charred in spots. Stack them on a plate and cover with a clean kitchen towel to keep them warm. You can also microwave them as I mentioned, but the skillet method adds a subtle smokiness.
- Assemble the enchiladas. Spread about 1/2 cup of the sauce on the bottom of your baking dish. This prevents sticking and adds flavor from the start. Take a warm tortilla, place about 2-3 tablespoons of the filling in a line down the center, and roll it up tightly. Place it seam-side down in the dish. Repeat with the remaining tortillas, arranging them snugly in a single layer. You should get 8-10 enchiladas depending on how full you fill them.
- Pour the remaining sauce evenly over the rolled enchiladas. Use a spatula to make sure every nook gets some sauce. Sprinkle the remaining 1 cup of shredded cheese on top. Don’t skimp here—the cheese is what creates that beautiful, bubbly crust.
- Bake for 20-25 minutes, until the cheese is melted and bubbly and the edges are just starting to brown. If you want a deeper color, switch the oven to broil for the last 2 minutes, but watch it closely—it can go from perfect to burnt in seconds. Let the dish rest for 5 minutes before serving. This helps the enchiladas set and makes them easier to serve.
Sensory Cues: At step 2, the sauce should smell smoky and slightly sweet. At step 8, the cheese should be golden in spots and the sauce should be bubbling around the edges. The kitchen will smell like a cozy New Mexican restaurant.
Cooking Tips & Techniques
I’ve made this recipe enough times to know where things can go sideways. Here’s what I’ve learned:
- Don’t overfill the tortillas. I know it’s tempting to stuff them, but too much filling makes them impossible to roll and they’ll burst open in the oven. About 2-3 tablespoons is the sweet spot. Think of it as a generous line, not a mountain.
- Warm tortillas are non-negotiable. The first time I made these, I skipped this step because I was in a hurry. I ended up with a baking dish full of broken tortilla pieces and filling. It still tasted good, but it looked like a disaster. Just take the 2 minutes to warm them.
- Make the sauce ahead of time. You can prepare the sauce up to 3 days in advance and store it in the fridge. This makes assembly on a busy night almost too easy. Just reheat it gently on the stove before using.
- Use a mix of cheeses. Cheddar is great, but a blend of Monterey Jack and cheddar gives you better melt and more flavor. I’ve also used pepper jack for extra heat—highly recommended if you like spice.
- Let the enchiladas rest. I know you’ll want to dig in right away, but letting them sit for 5 minutes helps the sauce thicken slightly and the layers set. They’ll hold together better when you serve them.
One time, I forgot to add the sour cream to the sauce and only realized after I’d poured it over the enchiladas. I stirred it in on top and it worked fine—just a bit less creamy. So don’t panic if you make a mistake. Cooking is forgiving like that.
Variations & Adaptations
This recipe is a great base for experimentation. Here are some ways I’ve changed it up:
- Vegetarian Version: Swap the chicken for black beans, pinto beans, or roasted sweet potatoes. The smoky chiles pair beautifully with earthy beans. Add a handful of corn for sweetness.
- Dairy-Free Option: Use a dairy-free butter substitute and a plant-based sour cream. For the cheese, look for a good melting vegan cheese or skip it entirely and double up on the sauce and filling.
- Extra Spicy: Add a diced jalapeño to the filling or stir in a teaspoon of chipotle powder into the sauce. You can also top the finished enchiladas with fresh sliced serranos.
- Green Chile Chicken Enchiladas: If you can’t find Hatch chiles, use canned green chiles (the mild ones) and add a pinch of smoked paprika to mimic the smokiness. It’s not the same, but it’s still delicious.
- Breakfast Enchiladas: Use scrambled eggs, cheese, and roasted chiles for the filling. Pour the sauce over and bake. Serve with a side of refried beans. It’s a game-changer for brunch.
I once tried a version with shredded pork instead of chicken—it was amazing. The richness of the pork matched the smoky chiles perfectly. So feel free to get creative with whatever protein you have on hand.
Serving & Storage Suggestions
These enchiladas are best served hot, straight from the oven. The cheese should be stretchy and the sauce bubbling. I like to serve them with a dollop of sour cream, a sprinkle of fresh cilantro, and some diced avocado for creaminess. A side of Mexican rice and refried beans turns this into a full meal. For a lighter option, a simple green salad with lime vinaigrette works beautifully.
Storage: Leftover enchiladas keep well in the fridge for up to 4 days. Store them in an airtight container. The flavors actually meld together overnight, so they might taste even better the next day. To reheat, place them in a 350°F oven for 10-15 minutes, or microwave individual portions for 1-2 minutes. The oven method keeps the texture better.
Freezing: These enchiladas freeze beautifully. Assemble them completely but don’t bake. Cover the dish tightly with plastic wrap and then foil. Freeze for up to 3 months. When ready to bake, thaw in the fridge overnight, then bake as directed, adding 5-10 minutes to the cooking time. You can also bake from frozen—just add about 15 minutes and cover with foil for the first half to prevent burning.
I’ve found that the sauce thickens a bit after sitting, so if you’re reheating leftovers, a splash of broth or water can help loosen it up. The cheese might not be as perfectly melty as the first time, but it’s still darn good.
Nutritional Information & Benefits
While I’m not a nutritionist, here’s an approximate breakdown per serving (based on 2 enchiladas):
| Nutrient | Amount |
|---|---|
| Calories | ~450 |
| Protein | 28g |
| Fat | 22g |
| Carbohydrates | 35g |
| Fiber | 5g |
| Sugar | 4g |
Health Benefits: Hatch chiles are rich in vitamin C and capsaicin, which can boost metabolism and reduce inflammation. The chicken provides lean protein, and the corn tortillas offer complex carbohydrates for sustained energy. If you use low-fat cheese and sour cream, you can reduce the fat content significantly. This recipe is naturally gluten-free if you use corn tortillas and cornstarch instead of flour. It’s also a good source of calcium from the cheese.
From a wellness perspective, I love that this meal feels indulgent but is actually pretty balanced. It’s the kind of dinner that satisfies a craving without making you feel heavy afterward. Plus, the fiber from the chiles and onions helps with digestion.
Conclusion
These roasted Hatch chili enchiladas have become a staple in my kitchen for good reason. They’re quick, forgiving, and packed with flavor that feels both rustic and refined. Whether you’re cooking for a crowd or just yourself on a Tuesday night, this recipe delivers without the stress. I love how the smoky heat of the chiles mingles with the creamy sauce and melted cheese—it’s comfort food that actually makes you feel good.
I encourage you to make this recipe your own. Add more spice, swap the protein, or load it up with extra veggies. The beauty of enchiladas is that they’re endlessly adaptable. And if you mess up? That’s okay. Some of the best dishes come from happy accidents, remember?
I’d love to hear how yours turn out. Drop a comment below and let me know what variations you tried. Did you add something unexpected? Did you serve it with a side I haven’t thought of? Share your experience—I read every comment and I’m always looking for new ideas. Until next time, happy cooking!
Frequently Asked Questions
Can I use canned Hatch chiles instead of fresh?
Absolutely. Canned roasted Hatch chiles are a great time-saver. Just make sure to drain them well before adding to the sauce or filling. The flavor is slightly milder than fresh-roasted, so you might want to add a pinch of smoked paprika to boost the smokiness.
How do I prevent my tortillas from cracking?
Warm them first. This is the most important step. Heat them in a dry skillet for 15-20 seconds per side, or microwave them wrapped in a damp paper towel for 30 seconds. Warm tortillas are pliable and won’t crack when you roll them. Cold tortillas are brittle and will break.
Can I make these enchiladas ahead of time?
Yes! Assemble the enchiladas completely but don’t bake them. Cover and refrigerate for up to 24 hours. When you’re ready to eat, bake as directed, adding 5-10 minutes to the cooking time since the dish will be cold. You can also freeze them for up to 3 months.
What can I use instead of chicken?
Shredded pork, ground beef, or black beans all work beautifully. For a vegetarian version, try roasted sweet potatoes or a mix of black beans and corn. The smoky chiles pair well with almost any protein or hearty vegetable.
How spicy are these enchiladas?
That depends on the Hatch chiles you use. Mild Hatch chiles give a gentle warmth, while hot ones can pack a punch. If you’re sensitive to spice, use mild chiles and skip any extra jalapeños. You can also reduce the amount of chiles in the sauce. The recipe as written is medium-spicy—enough to notice but not overwhelming.
Pin This Recipe!
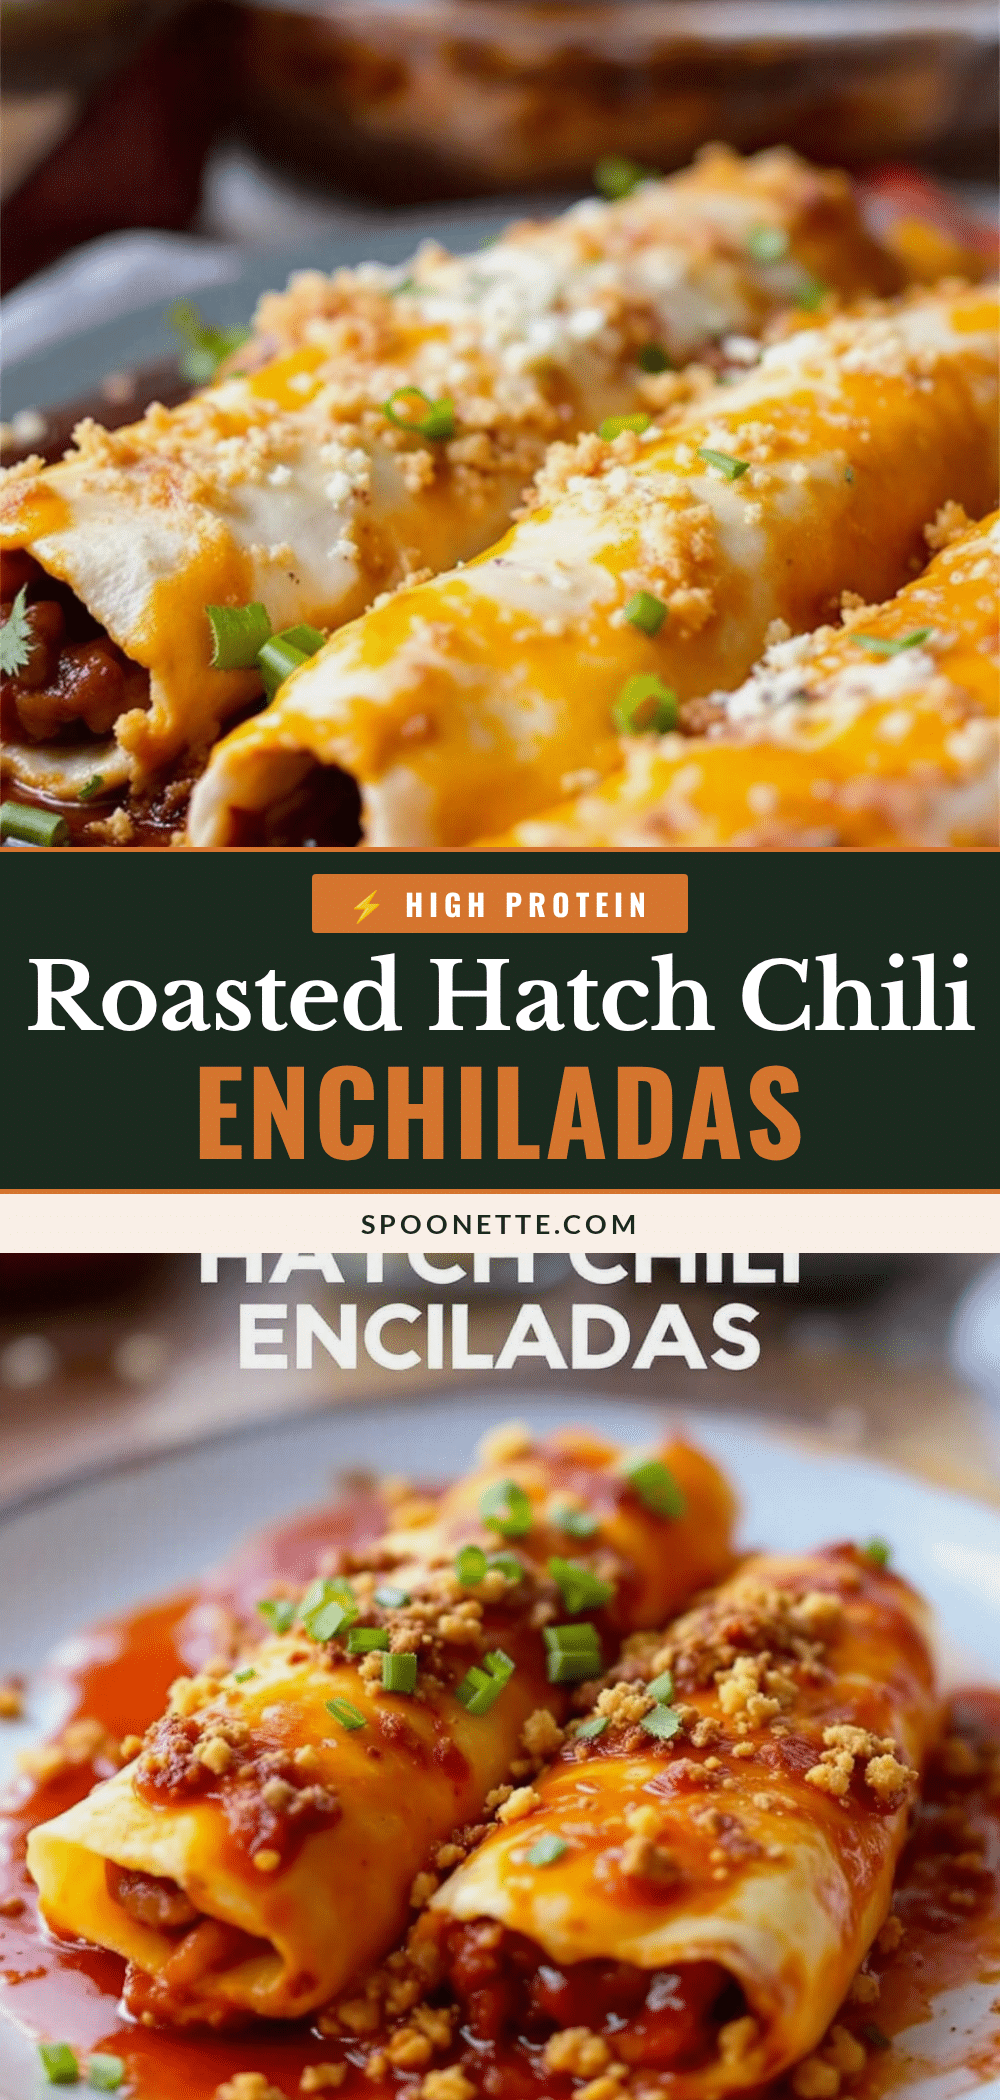
Best Roasted Hatch Chili Enchiladas: Easy 30-Min Dinner

These roasted Hatch chili enchiladas are quick, forgiving, and packed with smoky, creamy flavor. Perfect for weeknights or potlucks, they come together in under 30 minutes with simple ingredients.
- Prep Time: 10 minutes
- Cook Time: 20 minutes
- Total Time: 30 minutes
- Yield: 4 servings 1x
- Category: Main Course
- Cuisine: Mexican
Ingredients
- 2 tablespoons unsalted butter
- 2 tablespoons all-purpose flour
- 1 cup chicken or vegetable broth
- 1 cup roasted Hatch chiles, chopped (fresh, frozen, or canned)
- 1/2 teaspoon ground cumin
- 1/2 teaspoon garlic powder
- Salt and black pepper to taste
- 1/2 cup sour cream or Mexican crema
- 2 cups cooked, shredded chicken (rotisserie chicken works great)
- 1 cup shredded cheddar cheese (or Monterey Jack)
- 1/2 cup roasted Hatch chiles, chopped (for filling)
- 1/4 cup chopped fresh cilantro
- 1/4 cup diced onion (white or yellow)
- 1/2 teaspoon smoked paprika
- 8–10 corn tortillas
- 1 cup shredded cheese for topping (cheddar or Mexican blend)
- Optional: sliced jalapeños, extra cilantro, diced avocado for garnish
Instructions
- Preheat your oven to 375°F (190°C).
- In a medium saucepan over medium heat, melt the butter. Whisk in the flour and cook for about 1 minute, stirring constantly.
- Slowly pour in the broth, whisking continuously to avoid lumps. Cook until the sauce thickens slightly, about 2-3 minutes. Stir in the chopped Hatch chiles, cumin, garlic powder, salt, and pepper. Simmer for 2 minutes.
- Remove the sauce from heat and stir in the sour cream or crema. Taste and adjust seasoning. Set aside.
- In a mixing bowl, combine the shredded chicken, 1 cup of shredded cheese, the remaining 1/2 cup of chopped Hatch chiles, cilantro, diced onion, and smoked paprika. Mix well.
- Warm the tortillas in a dry skillet over medium-high heat for 15-20 seconds per side, until pliable. Stack and cover with a towel.
- Spread about 1/2 cup of the sauce on the bottom of a 9×13-inch baking dish. Place about 2-3 tablespoons of filling down the center of each tortilla, roll tightly, and place seam-side down in the dish.
- Pour the remaining sauce evenly over the enchiladas. Sprinkle the remaining 1 cup of shredded cheese on top.
- Bake for 20-25 minutes, until the cheese is melted and bubbly. Optionally, broil for the last 2 minutes for a deeper color. Let rest for 5 minutes before serving.
Notes
Warm tortillas are essential to prevent cracking. The sauce can be made up to 3 days ahead. Let enchiladas rest for 5 minutes before serving to set. For a vegetarian version, swap chicken for black beans or roasted sweet potatoes.
Nutrition
- Serving Size: 2 enchiladas
- Calories: 450
- Sugar: 4
- Sodium: 800
- Fat: 22
- Saturated Fat: 12
- Carbohydrates: 35
- Fiber: 5
- Protein: 28
Keywords: Hatch chili enchiladas, roasted Hatch chiles, easy enchiladas, 30-minute dinner, chicken enchiladas, green chile enchiladas



