Love this? Save it for later!
Share the inspiration with your friends
The first time I attempted this, I was staring at a sad, clumpy mess in a thermos that cost me thirty bucks. I was already running late for the school run, the dog had just knocked over a bag of flour, and I was pretty sure I’d forgotten to pack the kid’s water bottle. This was supposed to be my big win—a hot, homemade lunch that would make my daughter the envy of the cafeteria. Instead, I had a sticky, pasta-like glue that looked more like a science experiment gone wrong than lunch. I almost tossed the whole thing in the trash and grabbed a granola bar.
But I didn’t. I scraped the gunk into a bowl, tasted it, and realized the flavor was actually spot on. The texture was the problem. Honestly, I was so frustrated I almost cried. I mean, you know that feeling when a simple thing just refuses to cooperate? That was me, standing in a messy kitchen, holding a spoonful of what could have been greatness. So I did what any stubborn person would do: I made it again the next day, and the day after that, tweaking every single variable until I got it right.
What came out of that week of failures is this recipe for Easy Thermos Mac and Cheese for School Lunch. It’s not just a recipe; it’s a rescue mission. It’s the one that stays creamy, stays hot, and actually makes it to lunchtime without turning into a brick. Now, my daughter tells me it’s the best thing in her lunchbox, and honestly, that makes all those sticky messes worth it. I keep making it because it’s one less thing to worry about on a chaotic morning.
Why You’ll Love This Recipe
Let me tell you why this Easy Thermos Mac and Cheese for School Lunch is a total game-changer. I’ve tested this more times than I care to admit, and I can say with confidence that it solves the biggest problem with packed hot lunches: the dreaded temperature drop and texture breakdown.
- Stays Creamy for Hours: The secret is in the preparation. This mac and cheese doesn’t get dry or clumpy by noon. It stays luscious and scoopable, just like it came out of the pot.
- Super Quick Morning Prep: You can make the pasta the night before and just reheat it in the sauce. We are talking about 10 minutes of active work in the morning. Perfect for those hectic weekdays.
- Kid-Approved Flavor: It’s cheesy without being greasy, and the mild cheddar blend is a hit with even the pickiest eaters. My own kids fought over the leftovers.
- Simple Pantry Ingredients: You probably have everything you need right now. No fancy cheese blocks or imported pasta. Just good, honest ingredients.
- No More Soggy Lunch: The thermos keeps the heat in and the moisture locked in the cheese sauce, not the pasta. It’s a scientific win for your lunch packing routine.
This isn’t just another mac and cheese recipe. It is the one that finally works for the lunchbox. I’ve tweaked the sauce-to-pasta ratio and the heating method so you don’t have to. It’s the kind of recipe that makes you feel like a super-parent, even when you’re running on three hours of sleep. Trust me, when your kid comes home and says their lunch was the best, you’ll know this was worth every test batch.
What Ingredients You Will Need
This recipe uses simple, humble ingredients to create a rich, creamy sauce that holds up perfectly in a thermos. The magic is in how they work together, not in anything fancy.
- For the Pasta:
– 2 cups (200g) of small pasta shapes (elbow macaroni, shells, or ditalini are best). They fit nicely in a spoon and heat evenly. I prefer Barilla or De Cecco for their sturdy texture.
– 1 tablespoon of salt for the pasta water. This is your only chance to season the pasta from the inside out. - For the Cheese Sauce:
– 2 tablespoons (28g) of unsalted butter. It adds a richness that oil just can’t match.
– 2 tablespoons (16g) of all-purpose flour. This thickens the sauce without making it gluey.
– 1 cup (240ml) of whole milk. The fat content is crucial for creaminess. You can use 2%, but avoid skim milk here.
– 1/2 cup (120ml) of heavy cream. This is the secret to a sauce that doesn’t break down in the thermos. Don’t skip it!
– 1 1/2 cups (170g) of sharp cheddar cheese, freshly grated. Pre-shredded cheese has anti-caking agents that make the sauce grainy. Block cheese melts like a dream.
– 1/2 cup (55g) of Monterey Jack cheese, freshly grated. This adds a buttery melt that cheddar alone can’t provide.
– 1/4 teaspoon of garlic powder. It adds a savory depth without being garlicky.
– 1/4 teaspoon of mustard powder. This is a non-negotiable for me. It brightens the cheese flavor and helps with emulsification.
– 1/8 teaspoon of paprika (smoked or sweet). For a hint of color and warmth.
– Salt and white pepper to taste. White pepper keeps the sauce looking pristine.
Ingredient Selection Tips: Look for a block of sharp cheddar that feels firm, not crumbly. For the Monterey Jack, a standard block from the grocery store works perfectly. If you want a little heat, swap in some pepper jack for the Monterey Jack. For a gluten-free version, use a 1:1 gluten-free flour blend in the roux and your favorite gluten-free pasta. Just be careful not to overcook it.
Equipment Needed
You don’t need a professional kitchen to nail this Easy Thermos Mac and Cheese for School Lunch. Here’s what you’ll need:
- A Large Pot: For boiling the pasta. A 4-quart pot is perfect.
- A Medium Saucepan: For making the cheese sauce. A heavy-bottomed one prevents scorching.
- A Whisk: A good whisk is your best friend for a lump-free roux and smooth sauce.
- A Colander: For draining the pasta.
- A Cutting Board and Knife: For grating the cheese (if you’re not using a box grater).
- A Box Grater or Food Processor: Grating block cheese is a must. The food processor makes it a 10-second job.
- A Measuring Cup and Spoons: Accuracy matters here.
- A Wide-Mouth Thermos: This is the star of the show. A 10-ounce or 16-ounce thermos works best. I’ve used Thermos brand and Stanley, and both work great. Pre-heating the thermos with hot water is key.
- A Rubber Spatula: For scraping every last bit of cheesy goodness into the thermos.
Budget-Friendly Tip: You don’t need a fancy thermos. A good, insulated stainless steel one from a discount store works just as well as the expensive brands. Just make sure it has a wide mouth for easy eating and cleaning.
Preparation Method
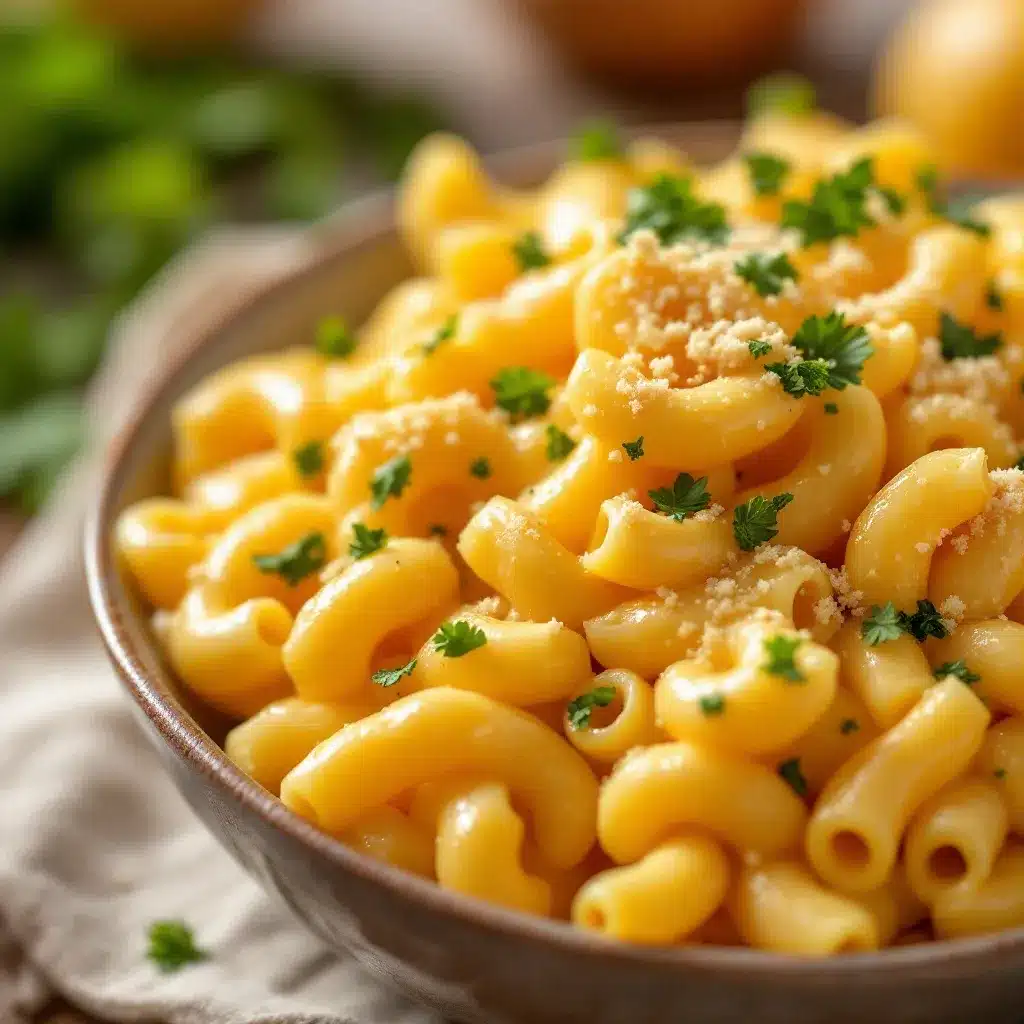
Follow these steps, and you will have a perfect thermos lunch every single time. The timing is everything, so I’ve broken it down for you.
- Prep the Thermos (5 minutes before cooking): Fill your thermos with boiling water. Close the lid and let it sit while you cook. This step is non-negotiable—it pre-heats the walls so your mac doesn’t cool down instantly.
- Cook the Pasta (8-10 minutes): Bring a large pot of salted water to a rolling boil. Add the pasta and cook it 1 minute less than the package directions for al dente. You want it firm because it will continue to cook slightly when you mix it with the hot sauce. Drain it in a colander and set it aside. Do not rinse it!
- Make the Roux (3 minutes): In a medium saucepan, melt the butter over medium heat. Once it’s foamy, whisk in the flour. Cook this mixture for about 1 minute, stirring constantly. It should smell a little nutty and look like a thick paste. This cooks out the raw flour taste.
- Build the Sauce (3-4 minutes): Slowly pour in the milk while whisking constantly. Then add the heavy cream. Keep whisking until the mixture is smooth. Bring it to a gentle simmer—you’ll see small bubbles around the edges. Let it cook for 2 minutes, whisking often, until it thickens enough to coat the back of a spoon.
- Melt the Cheese (2 minutes): Turn the heat to low. Add the grated cheddar and Monterey Jack cheese by the handful, whisking until each addition is completely melted before adding the next. This prevents a grainy sauce. Stir in the garlic powder, mustard powder, paprika, salt, and white pepper.
- Combine the Pasta and Sauce (1 minute): Pour the drained pasta into the saucepan with the cheese sauce. Stir gently with a rubber spatula until every piece of pasta is coated. The sauce will be quite loose—that’s perfect.
- Fill the Thermos (2 minutes): Empty the hot water from your thermos. Immediately spoon the hot mac and cheese into the thermos, packing it down gently with a spoon to eliminate air pockets. Seal the lid tightly. The residual heat will keep everything warm for hours.
- Pack for Lunch: Wrap the thermos in a kitchen towel or place it in an insulated lunch bag. It will stay hot (above 140°F) for at least 4-5 hours. I usually pack it right before we leave the house.
Personal Tip: I always make a little extra sauce. A slightly wetter mac and cheese holds up better in the thermos than a dry one. Don’t be scared if it looks a little soupy when you put it in—the pasta will absorb some of the liquid as it sits.
Cooking Tips & Techniques
I learned these tips the hard way, so you don’t have to. The first few times I made this, I ended up with a thermos full of pasta mush. Here’s how to avoid that.
- The Undercook Rule: This is the most important tip. Cook your pasta a full minute less than al dente. It will finish cooking in the hot sauce and then again in the warm thermos. If you cook it fully, you’ll have a mushy mess by noon.
- Grate Your Own Cheese: I know it’s tempting to buy the bagged stuff, but it’s a trap. The anti-caking agents in pre-shredded cheese (like potato starch and cellulose) prevent the cheese from melting smoothly. Your sauce will be gritty. Spend the extra 2 minutes grating a block of cheese. Your taste buds will thank you.
- Hot Thermos, Happy Lunch: Never, ever skip pre-heating the thermos. A cold thermos acts like a heat sink, dropping the temperature of your food immediately. Boiling water for 5 minutes is the secret to a hot lunch 4 hours later. I even do this in the summer.
- Don’t Overfill: Leave about a half-inch of space at the top of the thermos. This allows the steam to circulate and keeps the food hot. Packing it too tight can actually insulate the center and prevent it from staying hot.
- The Sauce Consistency: Your sauce should be a little thinner than you think it needs to be when you add it to the pasta. It will thicken as it sits in the thermos. Think of it like a gravy that needs to coat, not a paste.
A Failure I Learned From: I once tried to reheat leftover mac and cheese in the microwave and then put it in the thermos. The texture was rubbery and the sauce broke. Always make the sauce fresh for the thermos. It’s the only way to guarantee that silky, creamy result.
Variations & Adaptations
This base recipe is a blank canvas. Here are some ways I’ve played with it to keep things interesting for the kids (and for myself).
- Broccoli & Cheddar: Steam some small broccoli florets until just tender (about 3 minutes). Stir them into the mac and cheese before packing. It adds a pop of color and a veggie serving that the kids barely notice. I call it “tree cheese” and it works every time.
- Spicy Southwest Mac: Swap the Monterey Jack for pepper jack cheese. Add 1/4 cup of canned, drained corn and a tablespoon of chopped pickled jalapeños. It gives a subtle kick without being overwhelming. My husband packs this for his lunch too.
- Gluten-Free Version: Use a 1:1 gluten-free all-purpose flour blend (like Bob’s Red Mill) for the roux. For the pasta, I love using brown rice pasta or chickpea pasta. Just be extra careful not to overcook it—gluten-free pasta gets mushy very quickly. Cook it 2 minutes less than the package says.
- Bacon & Chive: Cook 4 slices of bacon until crispy, crumble them, and stir into the finished mac and cheese. Add a tablespoon of chopped fresh chives. This is a weekend lunch favorite in our house. It feels decadent but is so simple.
- Dairy-Free Adaptation: Use a good quality plant-based butter (I like Miyoko’s), unsweetened oat milk for the milk, and a full-fat canned coconut cream for the heavy cream. For the cheese, use a vegan cheddar shred that melts well, like Violife or Daiya. The texture will be slightly different, but it’s still creamy and delicious.
Serving & Storage Suggestions
The beauty of this recipe is that it’s designed to be eaten later, but here’s how to handle the leftovers if you have any (which is rare in my house).
Serving Temperature: This mac and cheese is meant to be served hot from the thermos. When your child opens it at lunchtime, it should still be steaming. If you’re serving it at home, eat it immediately after mixing the pasta and sauce.
Storage: If you have leftover mac and cheese after packing the thermos, let it cool completely to room temperature. Transfer it to an airtight container and store it in the refrigerator for up to 3 days. The texture will change—it will be much thicker and denser.
Reheating: To reheat leftovers, add a splash of milk (about a tablespoon per serving) to the mac and cheese in a small saucepan. Warm it over low heat, stirring constantly, until it’s hot and creamy again. You can also microwave it in 30-second bursts, stirring in between, but the stovetop method gives a better texture. Do not reheat it in the thermos—it won’t work.
Flavor Development: Honestly, this mac and cheese tastes even better the next day. The flavors meld together overnight, and the cheese sauce becomes even more cohesive. It’s a great make-ahead option for a busy week. Just reheat it gently with a little milk before packing.
Nutritional Information & Benefits
This isn’t health food, but it’s a wholesome, filling lunch that provides real energy for a school day. Here’s a rough estimate per serving (about 1.5 cups):
- Calories: ~580
- Protein: 22g
- Fat: 32g
- Carbohydrates: 48g
- Fiber: 2g
- Calcium: 450mg (about 35% of daily value)
Health Benefits: The cheese provides a good amount of calcium and protein, which are essential for growing kids. The whole milk and heavy cream add healthy fats that help keep them full and focused through the afternoon. Using whole grain pasta can boost the fiber content. I feel good knowing this is a real food lunch, not something from a box with a list of preservatives.
Dietary Considerations: This recipe is vegetarian. It contains dairy and gluten. For a gluten-free option, see the variations above. For a dairy-free option, the plant-based adaptation works well. I always check with other parents about allergies if I’m packing for a playdate.
Conclusion
This Easy Thermos Mac and Cheese for School Lunch is the result of a lot of messy kitchen failures, but it’s become one of my most reliable recipes. It’s the one that makes packing lunch feel less like a chore and more like a small act of love. I love it because it’s proof that a little patience and a few tweaks can turn a frustrating situation into a daily win.
I really encourage you to make this your own. Add your kid’s favorite mix-ins, swap the cheese blend, or double the batch for the whole family. The formula is forgiving, and the result is always a warm, comforting meal that travels perfectly. If you try it, I’d love to hear how it goes. Drop a comment below and let me know if your kids gave it the thumbs up. And if you have a thermos trick I haven’t tried, please share it!
Here’s to hot lunches and happy kids. You’ve got this.
Frequently Asked Questions
Can I use pre-shredded cheese for this recipe?
I really don’t recommend it. Pre-shredded cheese has additives that stop it from melting smoothly, which can make your sauce grainy. Grating a block of cheese takes just a couple of minutes and makes a huge difference in the final texture.
How long will the mac and cheese stay hot in the thermos?
When you pre-heat the thermos with boiling water and pack the mac and cheese while it’s piping hot, it will stay above 140°F for about 4-5 hours. That’s plenty of time for a school lunch. I’ve even tested it after 6 hours, and it was still warm.
Can I make this recipe the night before?
Yes, you can! Cook the pasta and make the sauce the night before. Store them separately in the refrigerator. In the morning, reheat the sauce gently on the stove with a splash of milk, then reheat the pasta in the microwave or with hot water, and combine them. Then pack it into a pre-heated thermos.
What kind of pasta works best for a thermos?
Small, sturdy shapes work best. Elbow macaroni, shells, ditalini, or even small rotini are great. They fit easily on a spoon and hold the sauce well. Avoid long, thin pasta like spaghetti, as it can clump together.
My mac and cheese was dry at lunch. What went wrong?
This usually happens for one of two reasons. First, the sauce was too thick when you packed it—remember, it should be a little loose. Second, the thermos wasn’t pre-heated properly, causing the food to cool down and the sauce to break. Make sure to use enough cream and undercook the pasta slightly.
Pin This Recipe!

Easy Thermos Mac and Cheese: The Best School Lunch

This Easy Thermos Mac and Cheese for School Lunch stays creamy and hot for hours, making it the perfect packed lunch. It’s a kid-approved recipe that solves the common problem of dry, clumpy thermos pasta.
- Prep Time: 10 minutes
- Cook Time: 15 minutes
- Total Time: 25 minutes
- Yield: 4 servings 1x
- Category: Main Course
- Cuisine: American
Ingredients
- 2 cups (200g) small pasta shapes (elbow macaroni, shells, or ditalini)
- 1 tablespoon salt (for pasta water)
- 2 tablespoons (28g) unsalted butter
- 2 tablespoons (16g) all-purpose flour
- 1 cup (240ml) whole milk
- 1/2 cup (120ml) heavy cream
- 1 1/2 cups (170g) sharp cheddar cheese, freshly grated
- 1/2 cup (55g) Monterey Jack cheese, freshly grated
- 1/4 teaspoon garlic powder
- 1/4 teaspoon mustard powder
- 1/8 teaspoon paprika (smoked or sweet)
- Salt and white pepper to taste
Instructions
- Prep the Thermos: Fill your thermos with boiling water, close the lid, and let it sit while you cook.
- Cook the Pasta: Bring a large pot of salted water to a rolling boil. Add the pasta and cook it 1 minute less than the package directions for al dente. Drain in a colander and set aside. Do not rinse.
- Make the Roux: In a medium saucepan, melt the butter over medium heat. Once foamy, whisk in the flour and cook for about 1 minute, stirring constantly, until it smells nutty.
- Build the Sauce: Slowly pour in the milk while whisking constantly, then add the heavy cream. Keep whisking until smooth. Bring to a gentle simmer and cook for 2 minutes, whisking often, until thickened enough to coat the back of a spoon.
- Melt the Cheese: Turn the heat to low. Add the grated cheddar and Monterey Jack cheese by the handful, whisking until each addition is completely melted before adding the next. Stir in garlic powder, mustard powder, paprika, salt, and white pepper.
- Combine: Pour the drained pasta into the saucepan with the cheese sauce. Stir gently with a rubber spatula until every piece of pasta is coated.
- Fill the Thermos: Empty the hot water from the thermos. Immediately spoon the hot mac and cheese into the thermos, packing it down gently to eliminate air pockets. Seal the lid tightly.
- Pack for Lunch: Wrap the thermos in a kitchen towel or place it in an insulated lunch bag. It will stay hot for at least 4-5 hours.
Notes
Cook pasta 1 minute less than al dente to prevent mushiness. Always grate your own cheese for a smooth sauce. Pre-heat the thermos with boiling water for 5 minutes. The sauce should be slightly loose when packing; it will thicken as it sits. Leave about half an inch of space at the top of the thermos.
Nutrition
- Serving Size: 1.5 cups
- Calories: 580
- Sugar: 6
- Sodium: 680
- Fat: 32
- Saturated Fat: 18
- Carbohydrates: 48
- Fiber: 2
- Protein: 22
Keywords: thermos mac and cheese, school lunch, easy mac and cheese, creamy mac and cheese, kid-friendly lunch, packed lunch, homemade mac and cheese