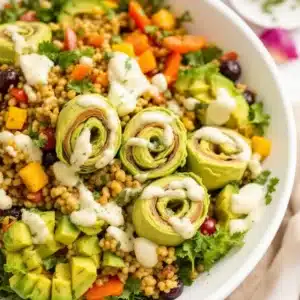
Love this? Save it for later!
Share the inspiration with your friends
There used to be a tiny sandwich shop tucked inside an old gas station on Route 9 that made the best pinwheels I have ever eaten. When they closed—suddenly, with a handwritten sign taped to the door that just said “Gone Fishin'”—I honestly felt a little lost. My kids had grown up on those pinwheels. They were the lunchbox gold standard, the thing that made other kids peer enviously over their cafeteria trays. After twelve tries—twelve, let me tell you, some of them were truly sad, floppy disasters—I finally got it. This is that recipe.
These Easy Sunbutter and Jelly Pinwheels are my answer to the lunchbox blues. I mean, we all know the struggle. You pack a sandwich, and by noon it’s a soggy, sad mess. Not these. They stay tight, they stay colorful, and they disappear faster than you can say “peanut-free zone.” Honestly, the first time I packed these for my daughter, she came home and asked if I could make them for the whole class. That’s when I knew I had cracked the code.
Maybe you’ve been there—staring into the pantry at 7 AM, wondering what on earth you can send that won’t come back half-eaten. These pinwheels are that answer. They are soft, a little sweet, and just fun to eat. The first time I made them, I accidentally overfilled one and it burst open like a little sunbutter volcano. My son called it “the delicious one.” So you know, perfection is overrated anyway.
Why You’ll Love This Recipe
I have tested this recipe more times than I care to admit, and I can tell you with total confidence—it works. These Easy Sunbutter and Jelly Pinwheels are the lunchbox hero you didn’t know you needed. They are simple, they are safe for nut-free schools, and they taste like a little celebration in every bite.
- Quick & Easy: You can whip these up in under 10 minutes. Seriously. It takes longer to find your kid’s missing water bottle than it does to make a whole batch of these.
- Simple Ingredients: You need exactly four things—sunbutter, jelly, tortillas, and a little patience. No fancy grocery trips required.
- Perfect for School Lunches: These are nut-free by design, so they are safe for most classrooms. Plus, they hold up beautifully in a lunchbox.
- Crowd-Pleaser: I have yet to meet a kid—or an adult, honestly—who doesn’t love these. They are like a sandwich and a dessert had a baby.
- Unbelievably Delicious: The creamy sunbutter paired with sweet, fruity jelly wrapped in a soft tortilla? It is comfort food at its finest.
What makes these different from every other pinwheel recipe? It’s the technique. I learned the hard way that if you spread the sunbutter too thick, everything squishes out. And if you roll too tight, the tortilla cracks. This method gives you perfect, photogenic pinwheels every single time. No stress, no mess, just lunchbox magic.
This recipe is the kind that makes you close your eyes after the first bite. It’s simple, sure, but it is also the thing that makes lunchtime feel special. And honestly, isn’t that what we all want?
What Ingredients You Will Need
This recipe uses only a handful of ingredients, and every single one of them plays an important role. The beauty is that they are all pantry staples, so you probably have them already.
- Sunbutter (sunflower seed butter): This is the star of the show. I recommend using a creamy, no-stir variety for the smoothest spread. My personal favorite is the SunButter brand original creamy—it has a nice, mild flavor that kids love. If your sunbutter has been sitting in the fridge, let it come to room temperature so it spreads without tearing the tortilla.
- Grape jelly or strawberry jam: You can use any flavor you like, but grape is the classic school lunch choice. I prefer a jam with visible fruit chunks because it looks prettier when sliced. If your jelly is very thick, give it a quick stir to loosen it up.
- Large flour tortillas (burrito size): You want the big ones—about 10 inches across. The smaller taco-sized tortillas just don’t roll well and give you tiny, sad pinwheels. Look for soft, pliable tortillas. I like the Mission brand burrito-sized flour tortillas, but any brand works as long as they are fresh.
- Cream cheese (optional but recommended): This is my secret weapon. A thin layer of cream cheese acts as a barrier between the sunbutter and the tortilla. It keeps the tortilla from getting soggy and adds a lovely tangy flavor. Use full-fat for the best texture, but low-fat works in a pinch.
That is literally it. Four ingredients, and you are on your way to lunchbox greatness. If you want to get fancy, you can add a sprinkle of cinnamon or a drizzle of honey, but honestly, the classic version is perfect as is.
Equipment Needed
You do not need any fancy gadgets for this recipe. Here is what you will need:
- A butter knife or offset spatula: For spreading the cream cheese and sunbutter evenly. I prefer an offset spatula because it gives you more control, but a regular butter knife works just fine.
- A large cutting board: You need a clean, flat surface to work on. I use a wooden cutting board, but plastic works too.
- A sharp serrated knife: This is important. A dull knife will squish your pinwheels and make a mess. Use a bread knife or any serrated knife to get clean, neat slices.
- Plastic wrap or beeswax wrap: For wrapping the rolled tortillas before chilling. This step is essential for keeping everything tight.
- A small bowl or plate: For holding your jelly or jam while you work.
If you don’t have a serrated knife, you can use a very sharp chef’s knife, but be gentle. I once used a dull knife and ended up with pinwheels that looked like they had been attacked by a small animal. Learn from my mistakes!
Preparation Method
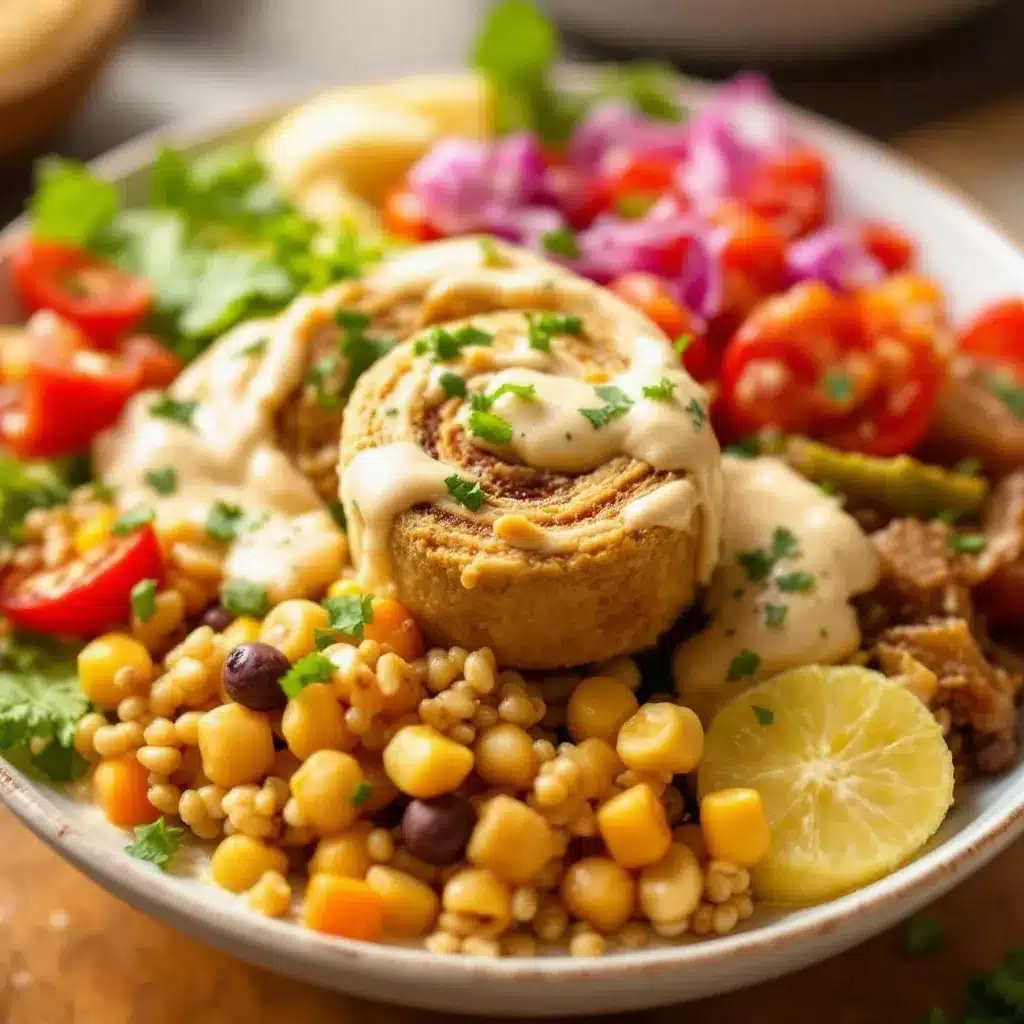
Follow these steps carefully, and you will have perfect pinwheels every single time. I have included all the little tricks I learned through trial and error.
- Soften the cream cheese. Take your cream cheese out of the fridge about 15 minutes before you start. You want it to be spreadable but not runny. If you are in a hurry, microwave it for 5 to 10 seconds—just watch it carefully so it doesn’t melt.
- Lay out your tortilla. Place one large flour tortilla flat on your cutting board. Make sure it is at room temperature. Cold tortillas crack when you roll them, so if yours were in the fridge, let them sit out for a few minutes.
- Spread the cream cheese. Using your butter knife or offset spatula, spread a very thin, even layer of cream cheese over the entire surface of the tortilla. Go all the way to the edges—this is what seals the pinwheel and prevents sogginess. You only need about 1 to 2 tablespoons per tortilla.
- Spread the sunbutter. Now spread a thin layer of sunbutter over the cream cheese. Again, thin is key here. You want about 2 to 3 tablespoons, spread evenly. If you go too thick, the pinwheels will be hard to roll and the filling will squish out the sides.
- Add the jelly. Spoon about 2 tablespoons of jelly or jam onto the sunbutter layer. Use the back of your spoon to spread it gently. Don’t press too hard or you will mix the jelly into the sunbutter. Leave a half-inch border around the edges clean.
- Roll it up tight. Starting at one edge, roll the tortilla into a tight log. Use your fingers to keep the filling in place as you roll. Roll firmly but gently—you want it snug, not squished. The cream cheese layer will help everything stick together.
- Wrap and chill. Wrap the rolled tortilla tightly in plastic wrap or beeswax wrap. Twist the ends like a candy wrapper to keep it secure. Place it in the fridge for at least 30 minutes. This step is non-negotiable—chilling sets the filling and makes slicing possible without a disaster.
- Slice into pinwheels. After chilling, unwrap the roll and place it on your cutting board. Using a sharp serrated knife, slice the roll into 1-inch thick rounds. Use a gentle sawing motion—don’t press straight down. You should get about 6 to 8 pinwheels per tortilla.
- Pack and serve. Arrange the pinwheels in your lunchbox. They can be stacked slightly, but try not to squish them. If you are packing them the night before, keep them in an airtight container in the fridge.
A quick note: if your pinwheels look a little messy on the first slice, don’t worry. The first and last slices are always the ugliest. I call those the “chef’s tax” and eat them immediately. Quality control, you know.
Cooking Tips & Techniques
Over the course of my twelve failed attempts, I learned a few things that I wish someone had told me from the start. Here are my best tips for pinwheel perfection.
Don’t skip the cream cheese. I know it seems like an extra step, but it is the difference between a soggy lunchbox disaster and a perfect, photogenic pinwheel. The cream cheese creates a moisture barrier that keeps the tortilla from absorbing the jelly. Trust me on this one.
Use room temperature ingredients. Cold sunbutter does not spread—it tears. Cold tortillas crack. Cold cream cheese leaves lumps. Take everything out of the fridge 15 minutes before you start. Your future self will thank you.
Roll from the outside in. Start your roll at the edge closest to you and roll away from your body. This gives you more control and keeps the filling from escaping out the sides. I learned this trick from a sushi-making video, of all places.
Slice with a sawing motion. This is the number one mistake people make. If you press straight down with a dull knife, you will squish all the filling out. Use a serrated knife and gently saw back and forth. It takes an extra five seconds per slice, but the results are worth it.
Chill for at least 30 minutes. I know you are in a hurry. We are all in a hurry. But if you skip the chilling step, your pinwheels will fall apart. The filling needs time to set and the tortilla needs time to relax into its new shape. Thirty minutes is the minimum. An hour is better.
I once made these for a school field trip and forgot to chill them. I packed them anyway, thinking they would be fine. They were not fine. The bus driver found sunbutter on the ceiling. Learn from my shame.
Variations & Adaptations
One of the best things about this recipe is how easy it is to customize. Here are some of my favorite variations.
Berry Blast Pinwheels: Swap the grape jelly for a mixed berry jam or even fresh mashed berries mixed with a little honey. The color is gorgeous and the flavor is bright and fresh. My daughter calls these “unicorn pinwheels” because they are so pretty.
Apple Cinnamon Pinwheels: Spread the sunbutter, then add a thin layer of apple butter or finely diced apples tossed in cinnamon sugar. Omit the jelly. These taste like fall in a lunchbox and are amazing for the first day of school.
Nut-Free Chocolate Dream: Use a chocolate-hazelnut spread that is nut-free (like WowButter chocolate spread) in place of the jelly. It tastes like dessert, but it is still school-safe. My son calls these “the good ones” and tries to trade his friends for them.
Gluten-Free Option: Use gluten-free tortillas. I like the ones from Siete Foods—they are made with cassava flour and roll beautifully. Just be extra gentle because they can be a bit more fragile than wheat tortillas.
Savory Surprise: Skip the jelly and add a thin layer of honey or maple syrup instead. Then sprinkle with a little cinnamon. It is less sweet but still delicious. I make these for myself when I want a quick breakfast.
Honestly, the possibilities are endless. I have even made these with pumpkin butter in the fall and they were a huge hit. Don’t be afraid to experiment.
Serving & Storage Suggestions
These pinwheels are best served cold or at room temperature. I usually pack them straight from the fridge into the lunchbox, and by lunchtime they are perfectly soft and delicious.
For presentation, I like to arrange them in a circle in a bento box or small container. You can add a few berries or apple slices in the center for a pop of color. Kids eat with their eyes first, you know.
Storage: Keep leftover pinwheels in an airtight container in the refrigerator for up to 3 days. They are actually better on day two—the flavors have time to meld and the tortilla softens just a bit.
Freezing: You can freeze the rolled, unsliced tortillas for up to a month. Wrap them tightly in plastic wrap, then place them in a freezer bag. When you are ready to use them, thaw them in the fridge overnight, then slice and pack. This is a lifesaver for busy mornings.
Reheating: Do not microwave these. They are meant to be eaten cold. If you want to warm them slightly, let them sit at room temperature for 10 minutes before serving.
One thing I love about these pinwheels is that the flavors actually get better over time. The sunbutter and jelly sort of settle into each other, and the cream cheese keeps everything creamy. By day two, they are absolutely perfect.
Nutritional Information & Benefits
Here is an approximate nutritional breakdown for one pinwheel (based on using a 10-inch flour tortilla, 2 tablespoons sunbutter, 2 tablespoons jelly, and 1 tablespoon cream cheese per roll, yielding 8 pinwheels):
| Nutrient | Amount per Pinwheel |
|---|---|
| Calories | 110 |
| Total Fat | 6g |
| Saturated Fat | 1.5g |
| Carbohydrates | 12g |
| Sugar | 6g |
| Protein | 3g |
| Fiber | 1g |
| Sodium | 120mg |
These pinwheels are a good source of vitamin E from the sunflower seeds in the sunbutter. Sunflower seeds are also rich in healthy fats and magnesium, which is great for energy and focus. The cream cheese adds a small amount of calcium, and the jelly provides a quick burst of natural energy.
This recipe is naturally nut-free, making it a safe choice for most classrooms. It is also vegetarian. If you use gluten-free tortillas, it can be made gluten-free as well. Just check your sunbutter label—some brands are processed in facilities that also handle nuts, so look for a certified nut-free brand if that is a concern.
I love that these pinwheels feel like a treat but are actually pretty balanced. They have protein, healthy fats, and carbs—everything a growing kid needs to power through a day of learning and recess.
Conclusion
These Easy Sunbutter and Jelly Pinwheels are the lunchbox solution I wish I had found years ago. They are simple enough for a busy Tuesday morning, but special enough that your kids will actually look forward to opening their lunch. Honestly, that alone is a win in my book.
I love that this recipe is flexible—you can switch up the jelly, add a sprinkle of cinnamon, or even go savory with honey. It is a canvas for your creativity. And the best part? It takes less than 10 minutes of active work. You can make a whole week’s worth in one go and just grab them from the fridge each morning.
I would love to hear how these turn out for you. Did your kids love them? Did you try a fun variation? Drop a comment below and let me know. And if you share them on social media, tag me—I love seeing your lunchbox creations. Happy packing, friends!
Frequently Asked Questions
Can I use peanut butter instead of sunbutter?
Absolutely! If your school allows peanut butter, you can swap it in one-to-one. Just keep in mind that peanut butter is thicker than sunbutter, so you may need to spread it a little thinner. The flavor will be different, but equally delicious.
How do I keep the pinwheels from unrolling in the lunchbox?
The cream cheese layer is the key. It acts like glue and holds everything together. Also, make sure you wrap the rolled tortilla tightly in plastic wrap while it chills. This sets the shape and prevents unrolling.
Can I make these the night before?
Yes! In fact, they are even better the next day. Just follow the recipe all the way through slicing, then store the pinwheels in an airtight container in the fridge. Pack them in the lunchbox in the morning and you are good to go.
My tortillas keep cracking when I roll them. What am I doing wrong?
This usually happens when the tortillas are too cold or too dry. Let them come to room temperature before you start. If they still crack, try warming them in the microwave for 10 seconds—this makes them pliable and easy to roll without breaking.
Can I use homemade tortillas for this recipe?
Absolutely! Homemade flour tortillas work beautifully. Just make sure they are rolled thin and evenly. Thicker tortillas are harder to roll and may give you fewer pinwheels per wrap. If you have a go-to tortilla recipe, this is a great way to use it.
Pin This Recipe!

Easy Sunbutter and Jelly Pinwheels: Best School Lunch Idea
These Easy Sunbutter and Jelly Pinwheels are the perfect nut-free school lunch idea. Made with creamy sunbutter, sweet jelly, and a secret layer of cream cheese, they stay tight and colorful, never soggy.
- Prep Time: 10 minutes
- Cook Time: 0 minutes
- Total Time: 40 minutes (includes 30 minutes chilling)
- Yield: 4 servings (about 6-8 pinwheels per tortilla, 24-32 total) 1x
- Category: Lunch
- Cuisine: American
Ingredients
- 4 large flour tortillas (burrito size, about 10 inches)
- 4 tablespoons cream cheese, softened
- 8 tablespoons sunbutter (sunflower seed butter), creamy no-stir variety
- 8 tablespoons grape jelly or strawberry jam
Instructions
- Soften the cream cheese by letting it sit at room temperature for 15 minutes, or microwave for 5-10 seconds.
- Lay one large flour tortilla flat on a cutting board. Ensure it is at room temperature.
- Spread a very thin, even layer of cream cheese (about 1-2 tablespoons) over the entire surface of the tortilla, all the way to the edges.
- Spread a thin layer of sunbutter (about 2-3 tablespoons) over the cream cheese.
- Spoon about 2 tablespoons of jelly or jam onto the sunbutter layer and spread gently, leaving a half-inch border around the edges.
- Starting at one edge, roll the tortilla into a tight log, using your fingers to keep the filling in place. Roll firmly but gently.
- Wrap the rolled tortilla tightly in plastic wrap or beeswax wrap, twisting the ends like a candy wrapper. Refrigerate for at least 30 minutes.
- After chilling, unwrap the roll and place it on a cutting board. Using a sharp serrated knife, slice the roll into 1-inch thick rounds using a gentle sawing motion.
- Arrange the pinwheels in a lunchbox or airtight container. They can be stacked slightly but avoid squishing.
Notes
Do not skip the cream cheese layer—it prevents sogginess. Use room temperature ingredients for best results. Chill for at least 30 minutes before slicing. The first and last slices are often messy; eat them as ‘chef’s tax.’ For gluten-free, use gluten-free tortillas. For freezing, wrap the rolled unsliced tortillas tightly and freeze for up to a month; thaw overnight in the fridge before slicing.
Nutrition
- Serving Size: 1 pinwheel
- Calories: 110
- Sugar: 6
- Sodium: 120
- Fat: 6
- Saturated Fat: 1.5
- Carbohydrates: 12
- Fiber: 1
- Protein: 3
Keywords: sunbutter and jelly pinwheels, nut-free lunch, school lunch ideas, easy pinwheels, sunflower seed butter recipe, kid-friendly lunch