Love this? Save it for later!
Share the inspiration with your friends
“I never thought a few minutes could make such a difference,” my friend Mark confessed one rainy Saturday afternoon. We were elbow-deep in flour, attempting to whip up a batch of rustic bread for his impromptu dinner party. Mark, like many of us in a rush, skipped the dough resting step—thinking it was just a suggestion, not a rule. What followed was a tough, stubborn dough that refused to cooperate, and a bread that was dense and disappointing. That moment stuck with me because it perfectly captures the mystery behind one of baking’s most overlooked secrets: letting the dough rest.
Honestly, I’ve been there too—impatiently trying to rush through the process, only to end up regretting it. But the science behind why dough resting is essential is fascinating, and understanding it can completely change how you bake. Maybe you’ve been there, staring at a dough that just won’t stretch or a crust that’s way too chewy. The difference isn’t just in the flour or yeast; it’s in those minutes you give your dough to relax and develop.
So, let’s talk about what really happens when you don’t let dough rest, why it matters, and how this simple step affects your baking outcomes. Whether you’re a weekend baker or a curious kitchen experimenter, unraveling this essential baking science will give you the confidence to bake better bread, pizza, and pastries. Plus, it might just save you from the same kitchen frustration Mark and I faced that soggy afternoon.
Why You’ll Love This Recipe
Understanding the impact of skipping dough resting steps isn’t just for professional bakers. I’ve tested these insights repeatedly in my kitchen, and here’s why you’ll appreciate this explanation as much as the recipe itself:
- Quick & Easy: Knowing when to rest dough and when not to saves you time without sacrificing quality—perfect for busy cooks who want good bread fast.
- Simple Ingredients: No fancy additives here—just flour, water, yeast, and salt that work best when given a little patience.
- Perfect for All Bakers: Whether you’re baking crusty loaves or tender pastries, these tips fit every skill level.
- Crowd-Pleaser: Your bread will have the right chew and crumb to impress family and friends alike.
- Unbelievably Delicious: Properly rested dough means better flavor, texture, and aroma—trust me, it’s a game-changer.
This isn’t just another baking tip; it’s the core of making dough behave the way you want it to. The resting phase lets gluten strands relax and yeast work its magic, creating a perfect balance of elasticity and flavor. You might think skipping it saves time, but honestly, it usually means more work and a less satisfying result. Once you get the hang of this essential baking science, your kitchen adventures will feel less like guesswork and more like a rewarding craft.
What Ingredients You Will Need
This science applies primarily to basic yeast dough recipes, which use a handful of simple ingredients that work together to create magic when properly rested:
- All-purpose flour or bread flour (for structure; bread flour gives a chewier texture)
- Water (lukewarm, about 100-110°F / 38-43°C, to activate yeast)
- Active dry yeast or instant yeast (for fermentation and rise; brands like Fleischmann’s or Red Star are reliable)
- Salt (adds flavor and controls yeast activity)
- Sugar (optional, feeds yeast and enhances browning)
- Olive oil or butter (optional, adds tenderness and richness)
These ingredients are pantry staples you likely already own, making this a low-barrier experiment in baking science. If you want to play around, try whole wheat flour for earthier flavor or swap out water for milk to enrich the dough. Also, if you’re gluten-sensitive, using a gluten-free flour blend will change the dough’s resting needs entirely—so this science mainly applies to wheat-based doughs.
Equipment Needed
To explore this essential baking science, you don’t need anything fancy, but a few tools will make the process smoother:
- Mixing bowl: A large, preferably glass or stainless steel bowl for mixing and resting dough.
- Kitchen scale: Highly recommended for precise flour and water measurement, though measuring cups will do.
- Thermometer: For checking water temperature, especially if you want perfect yeast activation.
- Dough scraper: Handy for handling sticky dough and cleaning surfaces.
- Plastic wrap or clean kitchen towel: To cover the dough during resting and prevent drying out.
- Baking sheet or loaf pan: Depending on what you’re making.
I personally prefer a digital kitchen scale—it’s a little investment that pays off in consistency. If you lack a thermometer, test water warmth by touch; it should feel warm but not hot enough to burn your finger. For budget-conscious bakers, even a simple glass bowl and a damp towel will get the job done.
Preparation Method
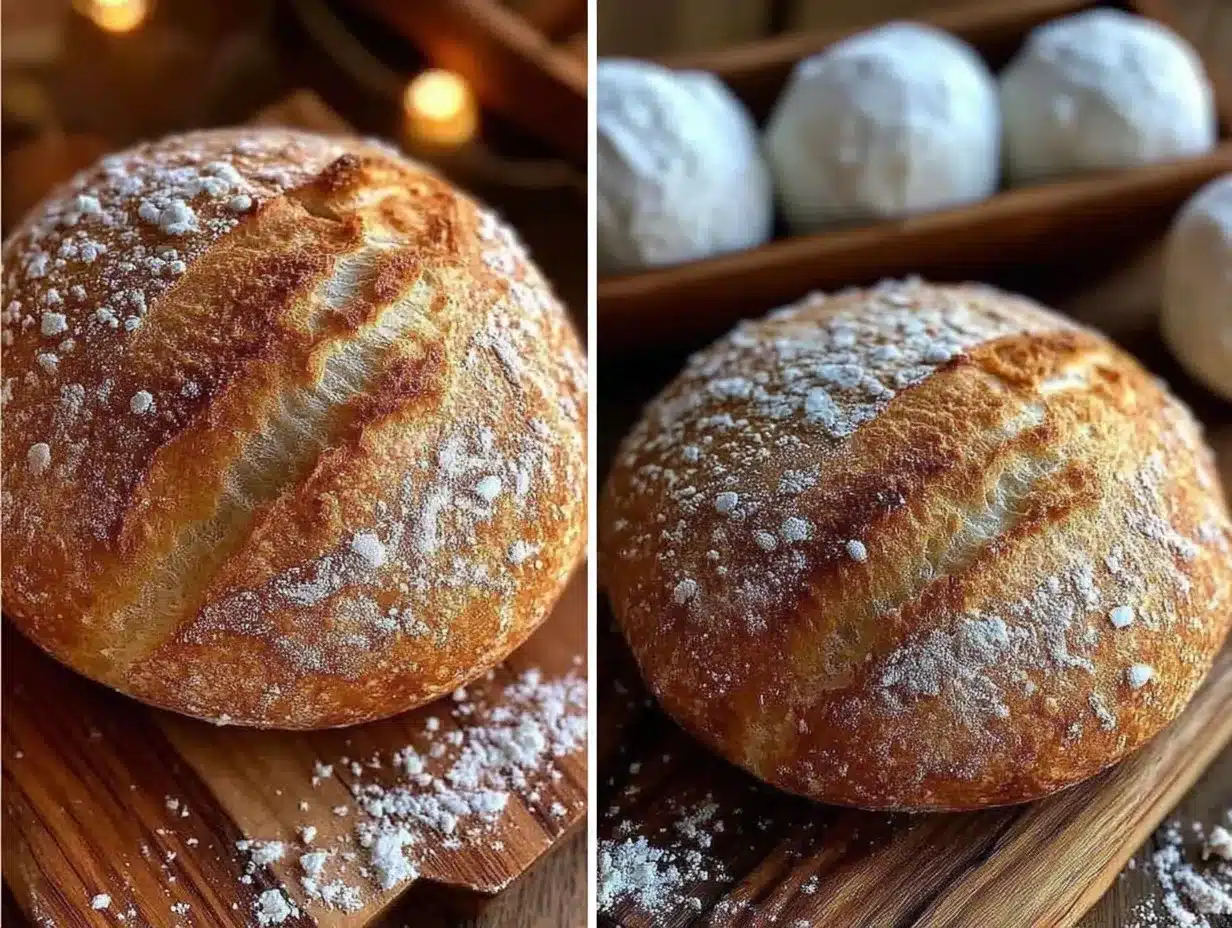
- Mix your ingredients: Combine 500g (about 4 cups) of flour, 325ml (1 1/3 cups) lukewarm water, 7g (2 1/4 teaspoons) active dry yeast, 10g (1 1/2 teaspoons) salt, and 15ml (1 tablespoon) olive oil if using. Stir until a shaggy dough forms. This usually takes about 5 minutes.
- Knead the dough: On a lightly floured surface, knead the dough for 8-10 minutes until it’s smooth and elastic. If the dough is too sticky, add a bit more flour, but keep it soft. Kneading develops gluten, which is essential for good structure.
- First rest (bulk fermentation): Place the dough in a lightly oiled bowl, cover it with plastic wrap or a damp towel, and let it rest at room temperature for 1 to 2 hours, or until it doubles in size. This lets the yeast ferment, producing gas bubbles and flavor compounds.
- Punch down and shape: Gently deflate the dough by pressing it down with your fist—this releases large gas bubbles. Then shape it into your desired form (loaf, rolls, pizza base). This step relaxes the dough after fermentation.
- Second rest (proofing): Let the shaped dough rest again, covered, for 30 to 60 minutes. This final rise is crucial to get that airy texture. Skipping or shortening this step will make bread dense and tight.
- Bake: Preheat your oven to 220°C (425°F). Bake the dough for 20-30 minutes depending on size, or until the crust is golden and sounds hollow when tapped. Let cool before slicing.
Common pitfall: rushing through resting means the gluten stays tight, the dough resists shaping, and the crumb turns tough. When you allow proper resting, the dough becomes easier to handle and bakes into a tender, flavorful bread. You might find that it’s worth setting a timer to remind yourself to be patient—the difference is undeniable.
Cooking Tips & Techniques
Mastering dough resting is a skill that improves with experience. Here’s some practical advice from my own kitchen blunders and wins:
- Temperature matters: Too cold, and the dough barely rises; too hot, and yeast dies. Aim for a cozy, draft-free spot around 70-75°F (21-24°C).
- Don’t skip the punch down: It might feel counterintuitive to deflate your dough after it’s risen, but this step redistributes yeast and sugars, leading to better flavor and texture after the second rise.
- Use a damp towel: Dough can dry out easily during resting, forming a crust that ruins texture. Cover it well.
- Practice gentle shaping: Rough handling can tear gluten strands, making the dough tough. Use light, confident motions.
- Multitask wisely: Use resting times to prep other parts of your meal or clean up—this keeps the process efficient without stress.
- Learn from failures: I’ve made bricks of bread skipping these steps, and honestly, it taught me more than any perfect loaf ever did.
Variations & Adaptations
This essential baking science applies broadly but can be tailored to fit different needs and tastes:
- Gluten-free variation: Resting is less about gluten and more about hydration and yeast activity. Use a gluten-free flour blend and adjust resting times accordingly.
- Whole wheat dough: Requires longer resting to let bran soften and gluten relax; you might need to add extra water.
- Flavor infusion: Add herbs, garlic, or olives during mixing, but be mindful—they can affect yeast activity and dough texture, so resting times might need tweaking.
- Cold fermentation: Rest dough overnight in the fridge for deeper flavor development. Bring it back to room temp before shaping.
- Quick baking: For pizza dough, a shorter rest (30-45 minutes) can work if you’re pressed for time, but the texture will be less chewy and airy.
I once tried adding roasted garlic into my dough during mixing without adjusting resting times—it was tasty but dense. Lesson learned: dough resting is flexible, but it needs respect.
Serving & Storage Suggestions
Freshly baked dough that’s been properly rested tastes best warm, right out of the oven. Serve it with butter, olive oil, or your favorite spreads. It pairs beautifully with soups, salads, or cheese boards.
Leftover bread should be stored in an airtight container at room temperature for up to two days. For longer storage, freeze slices wrapped in plastic wrap and foil. To reheat, pop slices in the oven at 180°C (350°F) for 5-10 minutes to revive that crusty texture.
You’ll notice the flavor deepens after resting dough and baking, but bread can stale quickly, so enjoying it fresh is always best. For pizza dough or rolls, refrigerated dough can be kept for 24-48 hours before baking, which enhances flavor but requires longer warming before shaping.
Nutritional Information & Benefits
Basic yeast dough made with flour, water, yeast, salt, and a bit of oil is simple and versatile. Here’s an approximate breakdown per 100g of baked bread:
- Calories: 250-280 kcal
- Carbohydrates: 45-50g
- Protein: 7-9g
- Fat: 2-3g (depending on added oil/butter)
- Fiber: 2-3g (higher with whole wheat)
Resting dough allows yeast to ferment sugars, which can improve digestibility and flavor. Using whole grains boosts fiber and nutrients, making your bread a healthier choice. Just watch sodium if you’re sensitive to salt.
Conclusion
Skipping dough resting might seem like a small shortcut, but trust me, it’s a step that makes a huge difference in your baking. When you give your dough time to relax and ferment, you’re setting yourself up for success—better texture, richer flavor, and a more enjoyable baking experience.
This essential baking science has changed how I approach making bread and pizza dough. It’s not about rushing but about patience and understanding. Try it for yourself—you might just find that waiting a little longer is the secret ingredient you didn’t know you needed.
Feel free to experiment and make this knowledge your own. And if you have stories or questions about dough resting, drop a comment below—I love hearing about your baking adventures!
FAQs
What exactly happens to dough when it rests?
Resting allows gluten strands to relax and yeast to ferment, producing gas that makes the dough rise and develops flavor.
Can I skip dough resting if I’m in a hurry?
You can, but your dough might be tough and less flavorful. Shorter rests work for pizza but not for bread that needs a light, airy crumb.
How long should dough rest for best results?
Typically, 1-2 hours for initial fermentation and 30-60 minutes after shaping, but times vary by recipe and room temperature.
What if my dough dries out during resting?
Cover it tightly with plastic wrap or a damp towel to keep moisture in and prevent a crust from forming.
Does resting dough affect the nutritional value?
Yes, fermentation can improve digestibility and flavor but doesn’t significantly change calorie content.
Pin This Recipe!

Essential Baking Science: What Happens If You Skip Dough Resting Steps

This recipe explains the importance of dough resting in baking, detailing how skipping this step affects bread texture and flavor. It provides a basic yeast dough recipe with tips for perfect results.
- Prep Time: 15 minutes
- Cook Time: 20-30 minutes
- Total Time: 2 hours 45 minutes
- Yield: 1 loaf (about 8 servings) 1x
- Category: Main Course
- Cuisine: American
Ingredients
- 4 cups (500g) all-purpose flour or bread flour
- 1 1/3 cups (325ml) lukewarm water (100-110°F / 38-43°C)
- 2 1/4 teaspoons (7g) active dry yeast
- 1 1/2 teaspoons (10g) salt
- 1 tablespoon (15ml) olive oil (optional)
- 1 teaspoon sugar (optional)
Instructions
- Combine flour, lukewarm water, active dry yeast, salt, and olive oil if using in a mixing bowl. Stir until a shaggy dough forms, about 5 minutes.
- Knead the dough on a lightly floured surface for 8-10 minutes until smooth and elastic. Add flour if too sticky but keep dough soft.
- Place dough in a lightly oiled bowl, cover with plastic wrap or a damp towel, and let rest at room temperature for 1 to 2 hours until doubled in size.
- Punch down the dough gently to release large gas bubbles, then shape into desired form (loaf, rolls, pizza base).
- Let the shaped dough rest again, covered, for 30 to 60 minutes for the final rise.
- Preheat oven to 425°F (220°C). Bake dough for 20-30 minutes until crust is golden and sounds hollow when tapped. Let cool before slicing.
Notes
Use a cozy, draft-free spot around 70-75°F (21-24°C) for resting dough. Cover dough well to prevent drying out. Punch down dough after first rise to redistribute yeast and sugars. Adjust resting times for whole wheat or gluten-free flours. Cold ferment overnight for deeper flavor.
Nutrition
- Serving Size: 1 slice (about 50g)
- Calories: 125140
- Sugar: 0.51
- Sodium: 150200
- Fat: 11.5
- Saturated Fat: 0.2
- Carbohydrates: 22.525
- Fiber: 11.5
- Protein: 3.54
Keywords: bread, dough resting, baking science, yeast dough, homemade bread, bread recipe, pizza dough, baking tips