Love this? Save it for later!
Share the inspiration with your friends
My neighbor’s annual “Chile Fiesta” was in three hours and I’d completely forgotten. Everyone else would be bringing their grandmother’s recipes passed down through generations, or elaborate chile-smothered dishes that took all day. I had a block of cheddar, some elbow macaroni, and a bag of frozen Hatch green chiles I’d stashed away last September. Honestly, I almost just grabbed a bottle of wine and called it a day. But the potluck pressure was real, and I needed something that looked like I planned it. So I started boiling water, figuring I’d just make a simple mac and cheese and toss in the chiles for a little New Mexico flair. I didn’t expect much—I mean, it was a pantry rescue mission, not a culinary statement. The power actually flickered once while I was stirring the cheese sauce, which felt like the universe telling me to quit while I was ahead. But I kept going, and when I walked into that party with my plain-looking casserole dish, I felt a little sheepish next to the spread of green chile enchiladas and slow-roasted pork. Then people started eating. And coming back for seconds. And asking for the recipe. It was the most popular dish there, and I couldn’t even take credit for planning it—it was just the creamy stovetop Hatch green chile mac and cheese I threw together in a panic. That’s the thing about this recipe, you know? It doesn’t need a fancy backstory or a day of prep. It just needs to be made. Maybe you’ve been in a similar spot, staring at your pantry and wondering if you can pull off a miracle. This is that miracle.
Why You’ll Love This Recipe
This isn’t just another mac and cheese recipe. It’s the one that will make you forget about the boxed stuff forever. I’ve tested this version at least a dozen times, tweaking the cheese ratio and the chile heat level until it was just right. It’s the kind of recipe that feels like a warm hug on a chilly evening, but it’s also impressive enough to bring to a potluck without feeling embarrassed.
- Quick & Easy: From start to finish, this comes together in about 30 minutes. That’s faster than ordering takeout, and honestly, it tastes better.
- Simple Ingredients: You probably already have most of these in your kitchen. The star ingredient—Hatch green chiles—can be found frozen or canned in most grocery stores these days.
- Perfect for Any Occasion: It works for a cozy weeknight dinner, a game day party, or a holiday side dish. It’s versatile like that.
- Crowd-Pleaser: I’ve served this to kids, picky eaters, and serious foodies. Every single time, it gets rave reviews. The smoky heat from the chiles is just enough to be interesting without overwhelming anyone.
- Unbelievably Delicious: The texture is the real star here. It’s creamy without being gloopy, and the cheese sauce clings to every piece of pasta perfectly. The Hatch chiles add this subtle, earthy warmth that you just can’t get from any other pepper.
What makes this recipe different is the technique. Instead of a traditional roux, I use a combination of evaporated milk and a touch of cream cheese to create an ultra-smooth, stable sauce that won’t break or get grainy. It’s a trick I learned from a chef friend, and it’s a game-changer. This isn’t just another version of mac and cheese—it’s the best version. It’s comfort food reimagined: faster, easier, but with the same soul-soothing satisfaction that makes you close your eyes after the first bite.
What Ingredients You Will Need
This recipe uses simple, wholesome ingredients to deliver bold flavor and satisfying texture without the fuss. Most of these are pantry staples, and the Hatch green chiles are the only “special” ingredient you might need to track down.
- For the Pasta:
- 1 pound (454g) elbow macaroni (or any short pasta like cavatappi or shells)
- Salt for the pasta water (don’t skimp—this is your only chance to season the pasta itself)
- For the Cheese Sauce:
- 2 tablespoons (28g) unsalted butter
- 1 small yellow onion, finely diced (about 1/2 cup)
- 2 cloves garlic, minced
- 1 can (12 oz/354ml) evaporated milk (this is the secret to a smooth sauce)
- 4 ounces (113g) cream cheese, softened and cut into cubes
- 2 cups (226g) sharp cheddar cheese, freshly shredded (I recommend Tillamook or Cabot for best melting)
- 1 cup (113g) Monterey Jack cheese, freshly shredded
- 1/2 cup (120ml) whole milk (or more, to adjust consistency)
- 1/2 teaspoon smoked paprika
- 1/4 teaspoon cayenne pepper (optional, for extra heat)
- Salt and black pepper to taste
- For the Hatch Green Chile:
- 1 cup (about 8 oz/227g) roasted Hatch green chiles, chopped (frozen or canned, drained well)
- If you can’t find Hatch chiles, you can substitute with Anaheim or Poblano peppers, but the flavor won’t be quite the same.
- For the Topping (optional but recommended):
- 1/2 cup (60g) panko breadcrumbs
- 2 tablespoons (28g) unsalted butter, melted
- 1/4 cup (28g) Parmesan cheese, grated
When choosing your Hatch chiles, look for the “hot” variety if you want a little kick, or “mild” if you’re serving a crowd. I personally prefer the medium heat level—it adds a nice warmth without overpowering the cheese. For the cheese, always shred it yourself from a block. Pre-shredded cheese has anti-caking agents that prevent it from melting smoothly, and nobody wants a grainy mac and cheese.
Equipment Needed
You don’t need any fancy gadgets for this recipe, which is part of its charm. Here’s what you’ll need:
- Large pot: For boiling the pasta. A 6-quart pot works perfectly.
- Large skillet or Dutch oven: For making the cheese sauce. I use a 12-inch skillet with high sides, but a Dutch oven works great too.
- Colander: For draining the pasta.
- Box grater or food processor: For shredding the cheese. I prefer a box grater because it gives me more control, but a food processor with a shredding disc is faster.
- Wooden spoon or silicone spatula: For stirring the sauce. A whisk can also work, but a spoon is less likely to scratch your pan.
- Small skillet: If you’re making the panko topping, you’ll need this to toast the breadcrumbs.
If you don’t have a Dutch oven, any heavy-bottomed pot will do. The key is even heat distribution to prevent the sauce from scorching. I’ve made this in a cheap non-stick skillet before, and it worked fine—just keep the heat on medium-low and stir constantly. For the breadcrumbs, you can skip the toasting step if you’re in a hurry, but the crunchy topping really does take this dish to the next level.
Preparation Method
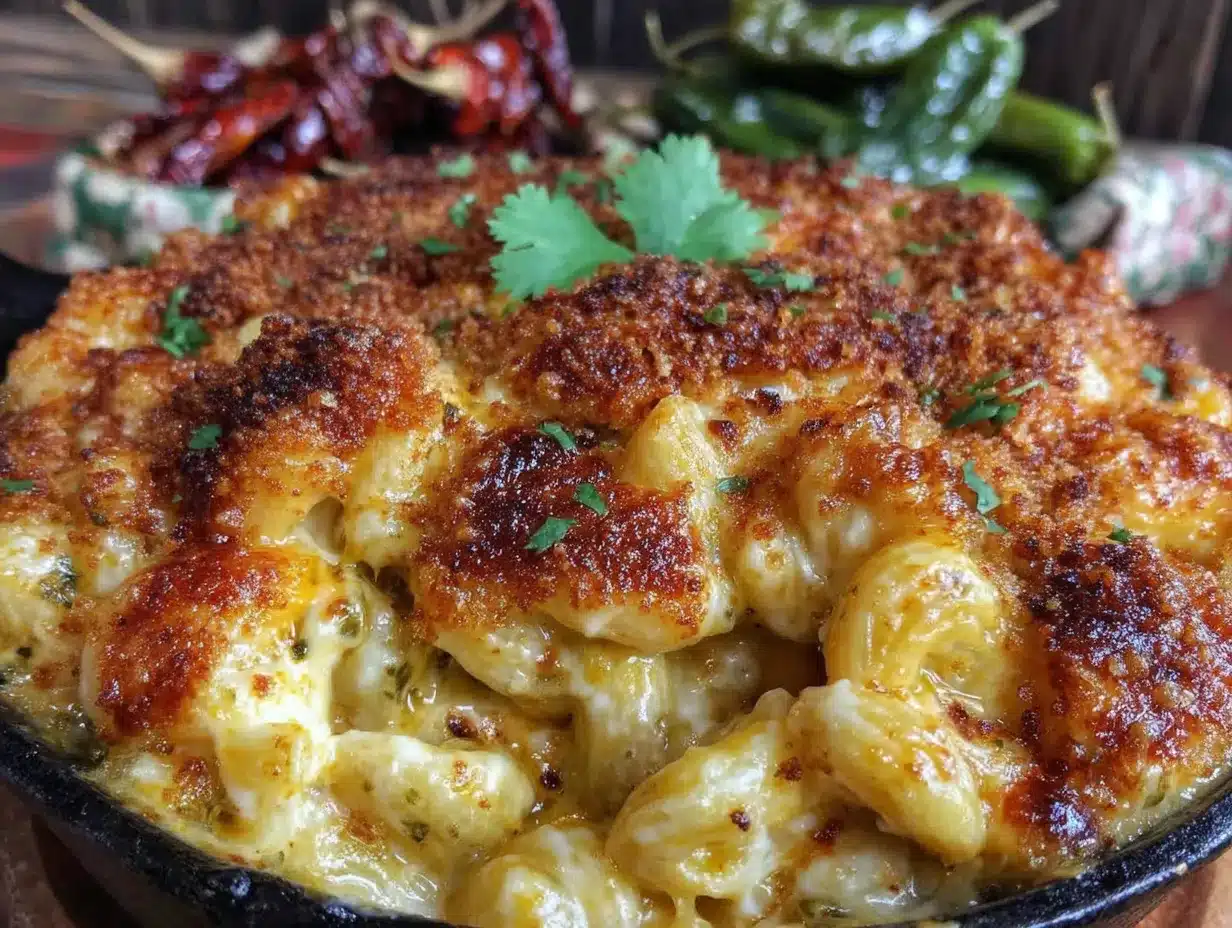
- Bring a large pot of salted water to a boil. Add the pasta and cook according to package directions until al dente. This usually takes about 7-9 minutes for elbow macaroni. Drain the pasta in a colander, but don’t rinse it—you want the starch to help the sauce stick. Set it aside.
- While the pasta cooks, start the sauce. In a large skillet or Dutch oven, melt the butter over medium heat. Add the diced onion and cook for 3-4 minutes, until it’s soft and translucent. You’ll know it’s ready when it smells sweet and starts to turn golden at the edges. Add the minced garlic and cook for another 30 seconds, until fragrant. Be careful not to burn the garlic—it can turn bitter quickly.
- Reduce the heat to medium-low. Pour in the evaporated milk and add the cubed cream cheese. Stir constantly with a wooden spoon until the cream cheese is fully melted and the mixture is smooth. This should take about 2-3 minutes. The sauce will look thin at this point, but don’t worry—it will thicken as you add the cheese.
- Add the shredded cheeses gradually. Start with the cheddar, stirring until it’s fully melted before adding the Monterey Jack. Keep the heat on medium-low and stir constantly. If you add the cheese too fast or the heat is too high, the sauce can break and become grainy. Take your time here—it’s worth it. The sauce should be smooth, glossy, and thick enough to coat the back of a spoon.
- Stir in the chopped Hatch green chiles. Add the smoked paprika, cayenne (if using), and a pinch of salt and pepper. Taste the sauce and adjust the seasoning. Remember, the pasta will dilute the flavor a bit, so the sauce should be slightly more seasoned than you think it needs to be.
- Add the cooked pasta to the sauce. Use a spatula to fold the pasta into the cheese sauce until every piece is well coated. If the sauce seems too thick, add the whole milk a little at a time until it reaches your desired consistency. I usually add about 1/4 cup, but you might want more or less depending on your preference.
- If making the panko topping, do it now. In a small skillet, melt the 2 tablespoons of butter over medium heat. Add the panko breadcrumbs and stir constantly for 2-3 minutes, until they’re golden brown and toasted. Remove from the heat and stir in the grated Parmesan. Sprinkle this over the mac and cheese just before serving.
- Serve immediately. This mac and cheese is best enjoyed right away, while it’s hot and creamy. Spoon it into bowls and watch it disappear.
A quick note: if you’re planning to bake this (see the variations section below), stop after step 6 and transfer the mixture to a greased baking dish. Top with the panko mixture and bake at 375°F (190°C) for 15-20 minutes, until bubbly and golden on top.
Cooking Tips & Techniques
I’ve made this recipe more times than I can count, and I’ve learned a few things the hard way. Here are my best tips for success:
- Don’t overcook the pasta. Al dente is the goal here. The pasta will continue to cook slightly when you mix it with the hot sauce, so if you cook it until it’s fully tender, it will end up mushy. Trust me, I’ve made that mistake before.
- Low and slow is the way to go. Cheese sauce is temperamental. High heat can cause the proteins in the cheese to seize up, leaving you with a grainy, separated mess. Keep the heat on medium-low and be patient. Your reward will be a silky, creamy sauce.
- Shred your own cheese. I know I’ve said this before, but it bears repeating. Pre-shredded cheese is coated in starch and cellulose to prevent clumping, which also prevents it from melting smoothly. A block of good cheddar and a box grater are your best friends here.
- Use room temperature cream cheese. Cold cream cheese is harder to melt and can leave lumps in your sauce. Let it sit on the counter for about 30 minutes before you start cooking. If you forget, you can microwave it in 10-second bursts until it’s soft.
- Taste as you go. The flavor of Hatch chiles can vary depending on the brand and the batch. Some are mild and fruity, while others have a serious kick. Add the chiles gradually and taste the sauce before you add all of them. You can always add more, but you can’t take them out.
- Don’t skip the smoked paprika. It adds a subtle smokiness that complements the Hatch chiles beautifully. It’s a small detail, but it makes a big difference in the overall flavor profile.
One of my biggest failures with this recipe happened when I tried to double it for a party. I used a pot that was too small, the sauce took forever to come together, and by the time I added the pasta, the sauce had broken and turned into a greasy mess. Lesson learned: don’t overcrowd the pan. If you need to make a larger batch, do it in two separate batches. It’s more work, but the results are worth it.
Variations & Adaptations
This recipe is incredibly adaptable, and I’ve tried several variations over the years. Here are a few of my favorites:
- Baked Mac and Cheese: If you prefer a baked version with a golden, crunchy top, transfer the mac and cheese to a greased 9×13-inch baking dish after mixing in the pasta. Top with the panko mixture and bake at 375°F (190°C) for 15-20 minutes. The top will be crispy, and the inside will stay creamy. I actually prefer this version for holiday dinners because it holds its shape better on a buffet table.
- Add Protein: Stir in 2 cups of shredded rotisserie chicken, cooked and crumbled bacon, or diced smoked sausage to make it a complete meal. I’ve done this with leftover grilled chicken, and it was fantastic. The smoky flavor from the sausage also pairs beautifully with the Hatch chiles.
- Spice it Up: If you like things hot, add an extra 1/2 teaspoon of cayenne pepper or a diced jalapeño (seeds removed unless you want serious heat). You can also use hot Hatch chiles instead of mild. My brother-in-law, who loves spicy food, adds a splash of hot sauce to his bowl. I think that’s overkill, but to each their own.
- Make it Gluten-Free: Use gluten-free pasta and ensure your panko breadcrumbs are gluten-free. The rest of the recipe is naturally gluten-free, so this is an easy swap. I’ve tried this with brown rice pasta, and it worked well—just be careful not to overcook it, as gluten-free pasta tends to get mushy faster.
- Vegetable Loaded: Sauté a cup of diced bell peppers, corn kernels, or chopped spinach along with the onion. This adds color, texture, and a little extra nutrition. I like to add roasted corn when it’s in season—it adds a sweetness that balances the heat of the chiles.
- Different Cheese Blends: Feel free to experiment with the cheese. Smoked Gouda, Gruyère, or pepper jack would all work beautifully. I once made a version with half cheddar and half smoked Gouda, and it was incredible. The smokiness from the Gouda amplified the Hatch chiles in a way I didn’t expect.
Serving & Storage Suggestions
This mac and cheese is best served hot, straight from the stovetop. Spoon it into bowls and top with the toasted panko mixture if you’re using it. I like to garnish with a little chopped fresh cilantro or green onion for a pop of color, but that’s optional.
For a complete meal, serve it alongside a simple green salad with a tangy vinaigrette—the acidity cuts through the richness of the cheese. It also pairs beautifully with grilled meats like steak, chicken, or pork chops. If you’re serving it at a potluck or barbecue, it holds up well on a buffet table for about an hour. Just give it a stir before serving to redistribute the sauce.
Storage: Leftovers can be stored in an airtight container in the refrigerator for up to 4 days. The pasta will absorb some of the sauce as it sits, so it won’t be as creamy as when it was fresh. To reheat, add a splash of milk and warm it in a skillet over medium-low heat, stirring gently. You can also microwave it in 30-second bursts, stirring between each, but the stovetop method gives better results.
Freezing: This mac and cheese freezes surprisingly well. Transfer it to a freezer-safe container and freeze for up to 3 months. Thaw it overnight in the refrigerator before reheating. I’ve done this several times, and it’s a great way to have a quick meal on hand. Just be aware that the texture will be slightly softer after freezing and reheating, but the flavor will still be fantastic.
One thing I’ve noticed is that the flavors actually deepen after a day in the fridge. The Hatch chiles meld with the cheese, and the smokiness becomes more pronounced. So if you have leftovers, consider yourself lucky—they might be even better the next day.
Nutritional Information & Benefits
While this is definitely a comfort food indulgence, it does have some redeeming qualities. Here’s the estimated nutritional breakdown per serving (based on 8 servings):
| Nutrient | Amount per Serving |
|---|---|
| Calories | 485 |
| Total Fat | 28g |
| Saturated Fat | 16g |
| Cholesterol | 80mg |
| Sodium | 620mg |
| Total Carbohydrates | 40g |
| Dietary Fiber | 2g |
| Sugars | 6g |
| Protein | 20g |
| Calcium | 380mg |
| Vitamin A | 450 IU |
| Vitamin C | 8mg |
Hatch green chiles are a good source of vitamin C and capsaicin, which has anti-inflammatory properties. The cheese provides calcium and protein, and the pasta offers carbohydrates for energy. Of course, this isn’t a health food—it’s a comfort food—but it’s made with real ingredients, which is always a good thing. If you’re looking to lighten it up, you can use reduced-fat cheese and milk, but I find that the full-fat version has the best texture and flavor.
This recipe is not gluten-free (unless you use gluten-free pasta), and it contains dairy. For a dairy-free version, you can try using plant-based butter, cream cheese, and shredded cheese, but I haven’t tested that myself, so I can’t guarantee the results.
Conclusion
This creamy stovetop Hatch green chile mac and cheese is the kind of recipe that becomes a staple. It’s quick enough for a busy weeknight, but impressive enough for company. The combination of sharp cheddar, creamy Monterey Jack, and smoky Hatch chiles is just irresistible—I mean, honestly, it’s hard to stop eating it once you start.
I love this recipe because it’s forgiving. You can tweak it to suit your taste, add whatever you have on hand, and it almost always turns out great. It’s the kind of dish that makes you look like a rockstar in the kitchen, even when you’re just trying to use up leftovers. That’s the magic of a good mac and cheese, you know?
So go ahead—give it a try. Make it for your family, bring it to a party, or just make it for yourself on a cozy night in. And when you do, I’d love to hear about it. Leave a comment below and let me know how it turned out, or share your own twist on the recipe. Did you add bacon? Swap the cheese? Make it extra spicy? I want to know! Your adaptations might just inspire someone else to try something new. Happy cooking!
Frequently Asked Questions
Can I use canned Hatch chiles instead of frozen?
Absolutely. Canned Hatch chiles are a great option, especially if you can’t find frozen ones. Just make sure to drain them well before adding them to the sauce. I’ve used both, and the flavor is very similar. The main difference is that canned chiles tend to be a bit softer, but that doesn’t affect the final dish.
What if I can’t find Hatch chiles in my area?
If you can’t find Hatch chiles, you can substitute with Anaheim or Poblano peppers. They won’t have the exact same smoky, earthy flavor, but they’ll still add a nice mild heat. You can also use canned green chiles from any brand—they’re usually made from Anaheim peppers anyway. The flavor will be slightly different, but the recipe will still be delicious.
Can I make this recipe dairy-free?
I haven’t tested a dairy-free version myself, but many readers have had success using plant-based butter, cream cheese, and shredded cheese. Just keep in mind that the texture and melting properties will be different. I recommend using a brand specifically designed for melting, like Daiya or Violife. The sauce might not be as creamy, but it should still be tasty.
How do I prevent the cheese sauce from becoming grainy?
Grainy cheese sauce is usually caused by high heat or adding the cheese too quickly. Keep the heat on medium-low and add the shredded cheese gradually, stirring constantly until each addition is fully melted. Also, always shred your own cheese—pre-shredded cheese has anti-caking agents that can cause graininess. If your sauce does start to look grainy, try whisking in a splash of cold milk or cream to bring it back together.
Can I make this ahead of time for a party?
Yes, you can make this mac and cheese a day ahead. Prepare it up to the point of adding the panko topping, then let it cool completely. Cover and refrigerate for up to 24 hours. When you’re ready to serve, top with the panko mixture and bake at 375°F (190°C) for 20-25 minutes, until hot and bubbly. You might need to add a splash of milk before baking to restore the creamy texture.
Pin This Recipe!
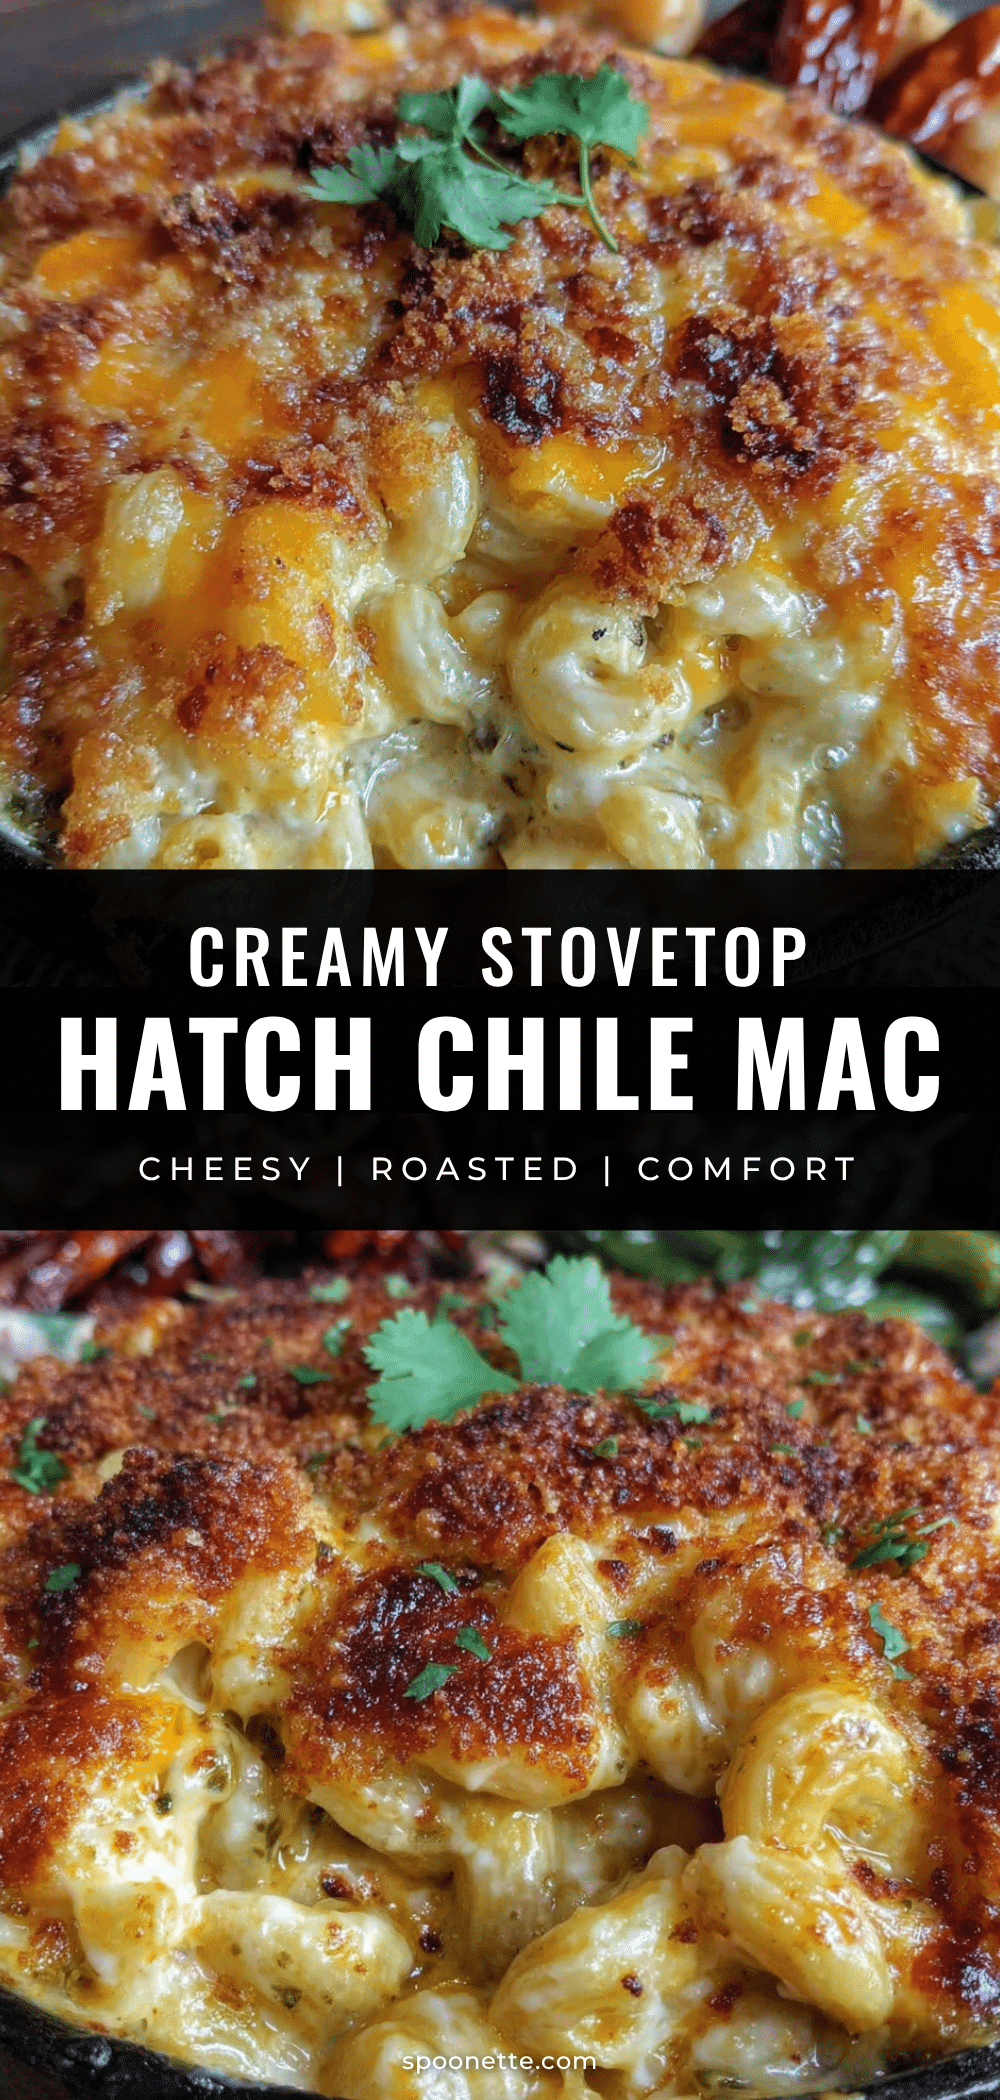
Best Creamy Hatch Green Chile Mac and Cheese
This creamy stovetop Hatch green chile mac and cheese is quick, easy, and perfect for any occasion. The combination of sharp cheddar, creamy Monterey Jack, and smoky Hatch chiles creates an irresistible comfort food that’s ready in about 30 minutes.
- Prep Time: 10 minutes
- Cook Time: 20 minutes
- Total Time: 30 minutes
- Yield: 8 servings 1x
- Category: Main Course
- Cuisine: American
Ingredients
- 1 pound (454g) elbow macaroni (or any short pasta like cavatappi or shells)
- Salt for the pasta water
- 2 tablespoons (28g) unsalted butter
- 1 small yellow onion, finely diced (about 1/2 cup)
- 2 cloves garlic, minced
- 1 can (12 oz/354ml) evaporated milk
- 4 ounces (113g) cream cheese, softened and cut into cubes
- 2 cups (226g) sharp cheddar cheese, freshly shredded
- 1 cup (113g) Monterey Jack cheese, freshly shredded
- 1/2 cup (120ml) whole milk (or more, to adjust consistency)
- 1/2 teaspoon smoked paprika
- 1/4 teaspoon cayenne pepper (optional, for extra heat)
- Salt and black pepper to taste
- 1 cup (about 8 oz/227g) roasted Hatch green chiles, chopped (frozen or canned, drained well)
- 1/2 cup (60g) panko breadcrumbs
- 2 tablespoons (28g) unsalted butter, melted
- 1/4 cup (28g) Parmesan cheese, grated
Instructions
- Bring a large pot of salted water to a boil. Add the pasta and cook according to package directions until al dente. Drain the pasta in a colander, but don’t rinse it. Set it aside.
- While the pasta cooks, start the sauce. In a large skillet or Dutch oven, melt the butter over medium heat. Add the diced onion and cook for 3-4 minutes, until soft and translucent. Add the minced garlic and cook for another 30 seconds, until fragrant.
- Reduce the heat to medium-low. Pour in the evaporated milk and add the cubed cream cheese. Stir constantly until the cream cheese is fully melted and the mixture is smooth, about 2-3 minutes.
- Add the shredded cheeses gradually. Start with the cheddar, stirring until fully melted before adding the Monterey Jack. Keep the heat on medium-low and stir constantly. The sauce should be smooth, glossy, and thick enough to coat the back of a spoon.
- Stir in the chopped Hatch green chiles. Add the smoked paprika, cayenne (if using), and a pinch of salt and pepper. Taste and adjust seasoning.
- Add the cooked pasta to the sauce. Fold until every piece is well coated. If the sauce seems too thick, add the whole milk a little at a time until it reaches your desired consistency.
- If making the panko topping, do it now. In a small skillet, melt the 2 tablespoons of butter over medium heat. Add the panko breadcrumbs and stir constantly for 2-3 minutes, until golden brown and toasted. Remove from heat and stir in the grated Parmesan. Sprinkle over the mac and cheese just before serving.
- Serve immediately.
Notes
For a baked version, transfer the mac and cheese to a greased 9×13-inch baking dish after mixing in the pasta, top with panko mixture, and bake at 375°F (190°C) for 15-20 minutes. Leftovers can be stored in an airtight container in the refrigerator for up to 4 days. To reheat, add a splash of milk and warm in a skillet over medium-low heat. This recipe freezes well for up to 3 months.
Nutrition
- Serving Size: 1 serving (about 1 c
- Calories: 485
- Sugar: 6
- Sodium: 620
- Fat: 28
- Saturated Fat: 16
- Carbohydrates: 40
- Fiber: 2
- Protein: 20
Keywords: Hatch green chile, mac and cheese, creamy, stovetop, comfort food, quick, easy, potluck, New Mexico



