Love this? Save it for later!
Share the inspiration with your friends
“I swear, this cake was supposed to be the star of the party,” I muttered to myself last Saturday afternoon. The kind of cake that promised fluffy clouds of sweetness but ended up looking like a sad crater instead. You know that feeling when you open the oven, your heart does a little flip—and then sinks as fast as your cake’s middle? Yeah, been there more times than I care to admit. Honestly, this sinking cake saga started on a rainy afternoon when I was trying to bake a simple vanilla layer cake for a friend’s birthday. The recipe was straightforward, the ingredients fresh, but the moment of truth revealed a sunken mess right in the center. What went wrong?
Turns out, the mystery of the sunken cake isn’t some dark culinary curse, but a combination of science, timing, and sometimes just plain old kitchen chaos. I mean, I forgot to preheat the oven that day (rookie move), and my mixing bowl was a tad too small—classic mistakes that anyone could make. Maybe you’ve been there too, staring at a cake that just won’t rise, wondering if your oven’s secretly sabotaging you. But don’t throw in the towel yet! Let me walk you through the why and how of classic cake sinking, and share some easy fixes so your next cake comes out looking just as dreamy as it tastes.
Why You’ll Love This Recipe
After countless trials (and a few sunken disasters), I’ve nailed down what makes a cake sink and how you can stop it in its tracks. This guide isn’t just theory—it’s driven by kitchen-tested tips and honest experiences that save you time and frustration. Here’s why you’re going to appreciate this cake sinking explanation:
- Quick & Easy: Understanding the root causes means you can fix your batter and baking process fast—no endless Googling or wasted ingredients.
- Simple Ingredients: No exotic fixes required; just good old pantry staples and smart baking habits.
- Perfect for Any Occasion: Whether it’s a birthday, a casual weekend treat, or a potluck, you’ll finally get that perfect rise and crumb.
- Crowd-Pleaser: Once you master these tips, your cakes will impress friends and family every time, no matter the recipe.
- Unbelievably Delicious: A well-risen cake isn’t just about looks—it’s about that tender crumb and melt-in-your-mouth texture that makes you close your eyes after the first bite.
This isn’t just another baking lecture; these are the exact tweaks that transformed my baking game from “meh” to “wow.” It’s about understanding your oven, your ingredients, and a few little tricks that make a big difference. So if you’ve ever stared at your cake and thought, “Why did it sink in the middle?”—let’s get that sorted once and for all.
What Ingredients You Will Need
This classic cake sinking explanation revolves around common ingredients, but how you use them matters just as much as what you use. Here’s a quick rundown of the essentials for a standard cake batter, along with some tips to keep your cake puffed and proud.
- All-purpose flour: Use fresh flour for best results. Avoid over-sifting which can lead to a denser cake.
- Baking powder or baking soda: The leavening agents that give your cake its rise. Make sure they’re fresh—expired baking powder is the sneaky villain in many sunken cakes.
- Sugar: Granulated sugar is classic, but brown sugar can add moisture and depth.
- Butter: Unsalted and softened to room temperature. Butter quality impacts flavor, so I usually grab Land O’Lakes or Kerrygold when I can.
- Eggs: Large and at room temperature. Cold eggs can shock the batter and affect rise.
- Milk or buttermilk: Adds moisture and tenderness. Buttermilk’s acidity also reacts with baking soda to help lift the cake.
- Vanilla extract: For that classic warm flavor.
- Salt: Just a pinch to balance sweetness and enhance flavor.
Optional but handy:
- Almond flour or coconut flour: For gluten-free options, but be mindful—they behave differently and usually require more leavening.
- Yogurt or sour cream: Can be swapped with milk for extra moisture and a tender crumb.
Keep in mind: measuring ingredients accurately is key. I always recommend weighing flour if you can (about 120 grams per cup) for consistent results. By respecting these ingredients and their roles, you’re halfway to a cake that won’t sink.
Equipment Needed
- Mixing bowls: At least two—one for wet ingredients and one for dry. Glass or metal bowls work well; plastic can hold onto oils and affect mixing.
- Electric mixer or whisk: Hand mixers are great for controlled mixing; overmixing by hand is easier to avoid.
- Measuring cups and spoons: Essential for precise measurements, especially for leavening agents.
- Kitchen scale: Optional but highly recommended for accurate flour and sugar measurements.
- Baking pan: Usually an 8- or 9-inch round pan. Make sure it’s the right size—too small means batter overflow, too big can cause sinking.
- Oven thermometer: A must-have if your oven temperature is unpredictable. Oven temps can vary wildly and cause sinking.
- Cooling rack: Allows air circulation to prevent soggy bottoms after baking.
Pro tip: If you don’t have an electric mixer, a sturdy whisk and some elbow grease work fine, but mixing times will be longer. Also, non-stick pans or pans lined with parchment paper help prevent sticking and uneven baking.
Preparation Method
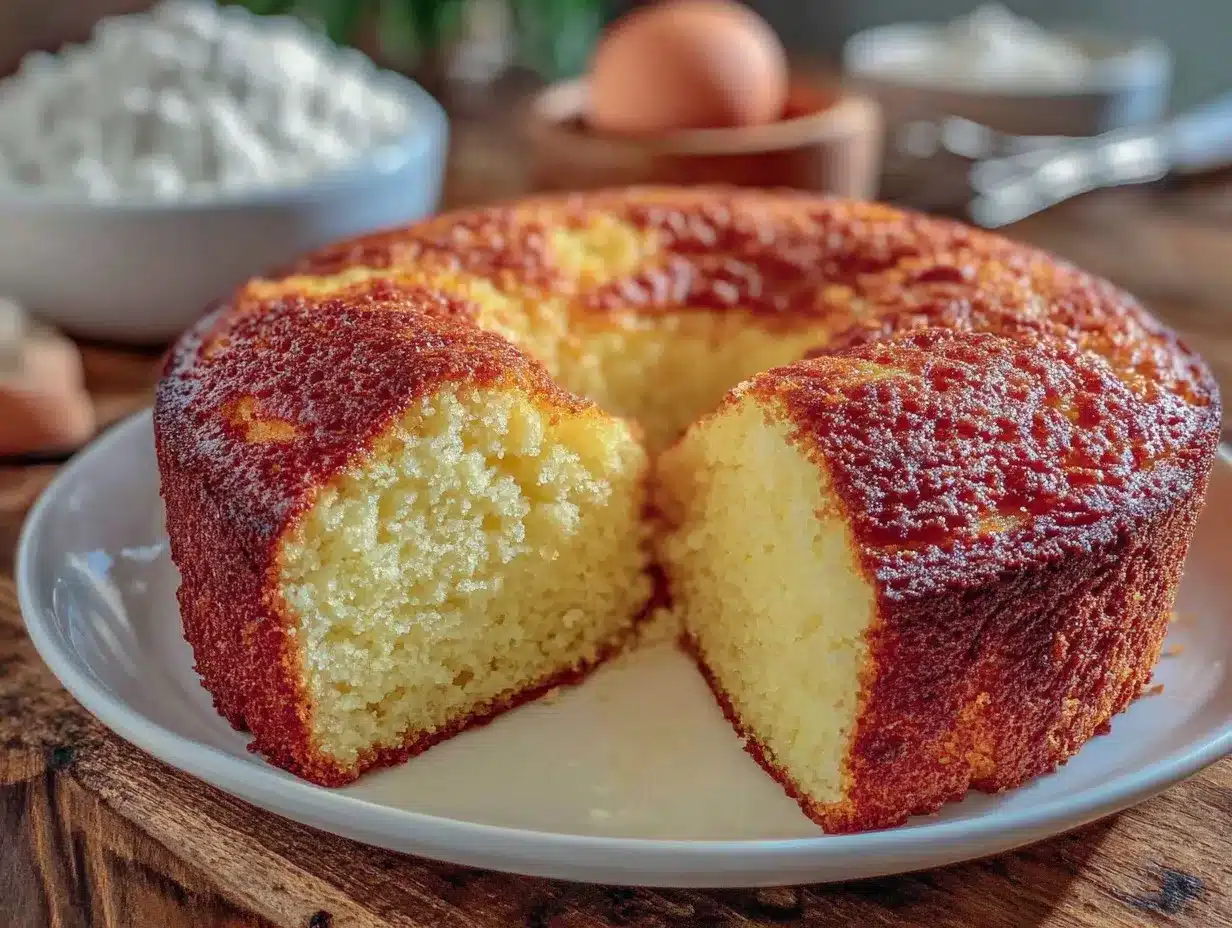
- Preheat the oven: Set your oven to the temperature specified in your cake recipe, usually around 350°F (175°C). Use an oven thermometer to confirm. Preheating takes about 10-15 minutes and is crucial—starting with a cold oven can cause sinking.
- Prepare your pan: Grease the baking pan with butter or non-stick spray, then lightly flour it or line it with parchment paper. This prevents sticking and promotes even baking.
- Sift dry ingredients: In a bowl, whisk together flour, baking powder, and salt. Sifting helps distribute the leavening evenly. Set aside.
- Cream butter and sugar: In a separate bowl, beat softened butter and sugar together until light and fluffy. This usually takes about 3-5 minutes with an electric mixer. The fluffiness traps air, which helps the cake rise.
- Add eggs one at a time: Beat in eggs individually, mixing well after each addition. This ensures proper emulsification. If eggs are too cold, they may cause the batter to curdle—room temperature is best.
- Mix in vanilla extract: Stir in vanilla or other flavorings.
- Alternate adding dry ingredients and milk: Add the flour mixture and milk in three parts, starting and ending with the flour. Mix gently after each addition—overmixing can develop gluten and make the cake dense or cause sinking.
- Pour batter into pan: Scrape the batter into your prepared pan. Smooth the top with a spatula. Avoid overfilling the pan; it should be about 2/3 full.
- Bake: Place in the middle rack and bake for 30-40 minutes or until a toothpick inserted comes out clean. Avoid opening the oven door frequently—temperature drops can cause the cake to collapse.
- Cool properly: Let the cake cool in the pan for 10 minutes, then transfer to a cooling rack. Cooling upside down or on the side can cause sinking or cracking.
Note: If your cake still sinks, check the freshness of your baking powder and soda, oven temperature accuracy, and mixing techniques. Sometimes, moisture content or altitude can also play a surprising role.
Cooking Tips & Techniques
When it comes to preventing cake sinking, a few little tricks go a long way. First, always check your leavening agents—baking powder loses its oomph after about six months. I learned the hard way when my cake sunk, and I realized my baking powder had expired ages ago. Don’t skip the step of sifting dry ingredients together; it helps distribute everything evenly.
Mixing technique is another culprit. You want to combine ingredients until just blended—overmixing develops gluten, which makes the cake tough and prone to sinking. When adding eggs or liquid, fold gently to keep the batter light. I sometimes fold in whipped egg whites separately for an extra fluffy texture, but that’s for another day.
Oven temperature matters hugely. Invest in a cheap oven thermometer if you don’t have one. I once baked two cakes at the same temperature; one oven rack was hotter, causing uneven rising and a sunken middle. Also, avoid opening the oven door during baking; the sudden temperature drop can cause the cake to fall.
Finally, don’t rush the cooling process. Let the cake set for a bit before removing it from the pan. Cooling too fast or upside down can cause collapse.
Variations & Adaptations
Not every cake batter behaves the same, but these tips work well across many styles. Here are some ways you can adapt if you want to experiment:
- Gluten-free version: Use almond or oat flour and increase eggs slightly. Add xanthan gum for structure.
- Vegan adaptation: Replace eggs with flax eggs (1 tbsp ground flax + 3 tbsp water per egg). Use plant-based milk and vegan butter.
- Flavor twists: Add citrus zest, espresso powder, or spices like cinnamon to the batter for extra character.
- Altitude adjustments: If you live above 3,000 feet, reduce baking powder slightly and increase oven temperature by 25°F (about 15°C) to prevent sinking.
Personally, I once swapped half the flour with ground oats for a nuttier cake. It needed a little extra baking time but came out moist and held its shape beautifully. Experimenting with these variations can be fun as long as you keep an eye on baking times and textures.
Serving & Storage Suggestions
Serve your perfectly risen cake at room temperature for the best texture and flavor. Pair with fresh berries, whipped cream, or a simple glaze. For brunch, a dollop of mascarpone and a drizzle of honey works wonders.
To store, wrap the cake tightly in plastic wrap or keep it in an airtight container. It’ll last about 3-4 days at room temperature or up to a week refrigerated. For longer storage, freeze slices individually wrapped in plastic and foil—defrost overnight in the fridge before serving.
Reheating gently in a microwave for 10-15 seconds can refresh day-old cake without drying it out. Flavors often settle and deepen over a day or two, so sometimes a day-old cake tastes even better!
Nutritional Information & Benefits
A typical slice of classic cake (about 1/12th of a 9-inch cake) contains roughly 250-300 calories, depending on ingredients. Key ingredients like eggs provide protein and vitamins, while milk adds calcium. Using butter adds richness but also saturated fat, so moderation is key.
For healthier tweaks, swap some butter for applesauce or Greek yogurt, and use whole wheat or oat flour for added fiber. This recipe can be gluten-free with proper substitutions and is adaptable for dairy-free diets. Just be mindful of allergens like eggs, dairy, and nuts if you modify.
From a wellness perspective, baking your own cake allows control over sugar and fat content, making it a better treat option than many store-bought varieties.
Conclusion
Understanding why cakes sink in the middle takes the frustration out of baking and turns it into fun experimentation. With the right ingredients, careful mixing, accurate oven temps, and a little patience, you’ll get a tender, fluffy cake every time. I love coming back to this classic cake because it reminds me that baking is as much science as it is art—and sometimes the best lessons come from watching a cake rise (or fall) unexpectedly.
Give these tips a try next time you bake, and don’t be shy about making the recipe your own. If your cake still sinks, it’s just another step closer to mastering the perfect bake. Let me know how it goes, and share your own kitchen stories—I’m all ears!
FAQs About Cakes Sinking in the Middle
Why does my cake sink in the middle after baking?
Common reasons include underbaking, too much leavening agent, oven temperature issues, or overmixing the batter. These factors cause the cake to rise quickly then collapse.
Can opening the oven door cause my cake to sink?
Yes, opening the oven door during baking drops the temperature suddenly, which can cause the cake to fall in the center.
How do I know if my baking powder is still good?
Mix a teaspoon with hot water—if it bubbles vigorously, it’s fresh. If not, it’s time to replace it.
Is it okay to substitute oil for butter to prevent sinking?
Oil adds moisture but can make cakes denser. Butter helps with structure and flavor, so substitutions may affect texture and rise.
What’s the ideal oven temperature for baking cakes?
Most cakes bake well at 350°F (175°C). However, ovens vary, so using an oven thermometer to check is best for consistent results.
Pin This Recipe!
Classic Cake Sinking Explained Easy Fixes for Cakes That Sink in the Middle
This guide explains the common causes of cakes sinking in the middle and provides easy fixes to achieve a perfectly risen, tender, and fluffy cake every time.
- Prep Time: 15 minutes
- Cook Time: 30-40 minutes
- Total Time: 45-55 minutes
- Yield: 12 servings
- Category: Dessert
- Cuisine: American
Ingredients
- All-purpose flour (about 1 cup or 120 grams per cup)
- Baking powder or baking soda (fresh)
- Granulated sugar or brown sugar
- Unsalted butter, softened to room temperature
- Large eggs, at room temperature
- Milk or buttermilk
- Vanilla extract
- Salt (a pinch)
- Optional: Almond flour or coconut flour for gluten-free options
- Optional: Yogurt or sour cream as a milk substitute
Instructions
- Preheat the oven to 350°F (175°C) using an oven thermometer to confirm the temperature. Preheating takes about 10-15 minutes.
- Grease an 8- or 9-inch round baking pan with butter or non-stick spray, then lightly flour it or line it with parchment paper.
- Sift together the flour, baking powder, and salt in a bowl to distribute the leavening agents evenly. Set aside.
- In a separate bowl, cream the softened butter and sugar together until light and fluffy, about 3-5 minutes with an electric mixer.
- Beat in eggs one at a time, mixing well after each addition to ensure proper emulsification.
- Stir in vanilla extract or other flavorings.
- Alternate adding the flour mixture and milk in three parts, starting and ending with the flour. Mix gently after each addition to avoid overmixing.
- Pour the batter into the prepared pan, filling it about 2/3 full. Smooth the top with a spatula.
- Bake on the middle rack for 30-40 minutes or until a toothpick inserted comes out clean. Avoid opening the oven door during baking.
- Let the cake cool in the pan for 10 minutes, then transfer to a cooling rack to cool completely. Avoid cooling upside down or on the side.
Notes
Use fresh baking powder or baking soda to ensure proper rise. Avoid overmixing the batter to prevent gluten development which causes sinking. Preheat the oven fully before baking and avoid opening the oven door during baking. Cool the cake properly to prevent collapse. For gluten-free versions, use almond or oat flour with xanthan gum. For vegan adaptations, replace eggs with flax eggs and use plant-based milk and butter.
Nutrition
- Serving Size: 1 slice (1/12th of a
- Calories: 275
- Sugar: 22
- Sodium: 180
- Fat: 12
- Saturated Fat: 7
- Carbohydrates: 38
- Fiber: 1
- Protein: 4
Keywords: cake sinking, cake sinking fix, why cakes sink, baking tips, classic cake recipe, cake troubleshooting, fluffy cake, baking science