Love this? Save it for later!
Share the inspiration with your friends
I was standing in the checkout line at the hardware store last Tuesday, holding a bag of washers and a new garden hose, when the woman behind me started talking about lunch. Not small talk about the weather—she was describing, in precise detail, how she makes sandwiches for her grandson. “He won’t eat them unless the crust is gone,” she said, shaking her head. “And forget about peanut butter—schools won’t allow it.” I nodded along, half-listening, until she mentioned she’d figured out a way to make those frozen store-bought sandwiches at home, but better. And cheaper. And without any of the weird preservatives. I put down my washers and asked her to start over.
That chance conversation is the only reason I’m writing this post today. This recipe for Easy Copycat Sunbutter and Strawberry Jam Uncrustables came from a stranger in a crowded aisle, and honestly, it’s changed my weekday mornings completely. Maybe you’ve been there—staring at the freezer section, doing the math on how much those pre-made sandwiches cost per box, and feeling a little defeated. I mean, they’re convenient, sure, but the ingredient list reads like a chemistry experiment, and the price tag? Let’s just say I’ve spent less on actual meals.
So I went home, grabbed a loaf of bread, a jar of sunbutter, and some strawberry jam, and I got to work. The first batch was a mess—the edges didn’t seal, the jam leaked out, and I ended up with sticky fingers and a grumpy attitude. But by the third try, I had it. A perfect little pocket of sunbutter and jam, crimped shut, crustless, and absolutely delicious. This recipe stayed with me because it solved a real problem: how to pack a school-safe, nut-free lunch that my kids actually eat without negotiating. And it only takes about ten minutes to make a whole batch.
Why You’ll Love This Recipe
Let me tell you why these homemade uncrustables have become a staple in my kitchen. I’ve tested this recipe at least a dozen times, tweaking the bread thickness, the amount of filling, and the sealing method until I got it just right. My kids have been my official taste testers, and they’ve given it a unanimous thumbs-up—which, honestly, is harder to get than a Michelin star.
- Quick & Easy: You can make a week’s worth of lunches in under 15 minutes. Seriously, it takes longer to decide what to watch on Netflix than it does to whip up a batch of these.
- Simple Ingredients: No fancy grocery trips needed. You likely already have bread, sunbutter, and jam in your pantry right now. No weird additives, no high-fructose corn syrup, nothing you can’t pronounce.
- Perfect for School Lunches: Sunbutter is nut-free and school-safe, so you can pack these without worrying about allergy policies. They’re also great for picnics, road trips, or just a quick snack at home.
- Crowd-Pleaser: I’ve served these at playdates, birthday parties, and even a few adult gatherings (don’t judge—everyone loves a good sandwich). Kids and adults alike gobble them up.
- Unbelievably Delicious: The combination of creamy sunbutter and sweet strawberry jam sealed inside soft bread is pure comfort. The texture is soft, the flavors balance perfectly, and there’s something deeply satisfying about biting into a perfectly sealed pocket.
What makes this recipe different from all the other copycat versions out there? It’s the sealing technique. Instead of using a fancy gadget or struggling with a fork, I use a simple glass cup to crimp the edges. It creates a perfect seal every time, no leaking, no mess. Plus, I’ve figured out the exact ratio of sunbutter to jam so you get a little of both in every bite without one overpowering the other.
This isn’t just another recipe—it’s the kind that makes you close your eyes after the first bite. It’s convenience food made with love, and it’ll save you money, time, and a whole lot of stress on busy mornings.
What Ingredients You Will Need
This recipe uses simple, everyday ingredients to create something that tastes far more special than it should. The beauty of these copycat uncrustables is that you probably already have everything you need in your kitchen right now. Let’s break down what you’ll need and why each ingredient matters.
- 8 slices of soft white bread (I prefer Sara Lee or Wonder Bread for their soft texture—they seal better and stay fresh longer. Avoid artisan or crusty breads; they crack when you press them.)
- 1/2 cup creamy sunflower seed butter (sunbutter) (Look for a brand with no added sugar if possible. I like SunButter Natural Creamy—it spreads smoothly and has a mild, nutty flavor that kids love. Stir it well before using because the oil separates.)
- 1/3 cup strawberry jam or preserves (Seedless jam works best for a smoother texture, but if you like the little seeds, go for it. Bonne Maman or Smucker’s are both excellent choices. Avoid jelly—it’s too runny and will leak out during sealing.)
- Optional: 1 tablespoon butter, melted (Brushing the outside of the sandwiches with melted butter before toasting gives them a golden, crispy exterior. Skip this if you’re packing them for lunch later—they’ll get soggy.)
That’s it. Four ingredients, and you’re ready to go. The key here is the bread—it needs to be soft and slightly squishy, the kind that compresses easily without tearing. If your bread is too dense or dry, the edges won’t seal properly, and you’ll end up with jam leaking everywhere. Trust me, I learned this the hard way after ruining half a loaf of whole wheat.
For the sunbutter, I recommend sticking with a creamy variety. Crunchy sunbutter has little pieces that can poke through the bread and cause leaks. If you’re allergic to sunflower seeds, you can substitute with soy nut butter or WowButter, which are also nut-free and school-safe. Just make sure whatever you use has a similar consistency to peanut butter—thin, runny spreads won’t work.
The strawberry jam is where you can get creative. I’ve used raspberry, grape, and even apricot preserves with great results. My personal favorite is a mix of strawberry and raspberry—it gives the sandwiches a slightly tart edge that balances the sweetness. If you’re feeling fancy, you can even make your own jam, but store-bought works perfectly fine.
Equipment Needed
You don’t need any fancy gadgets to make these copycat uncrustables, which is part of the beauty. Here’s what you’ll need:
- A rolling pin (or a clean wine bottle if you don’t have one—I’ve used both, and they work the same way. You just need something to flatten the bread slightly.)
- A round cookie cutter or a glass cup (I use a standard drinking glass with a 3-inch diameter rim. It’s the perfect size for a sandwich that fits nicely in little hands. A biscuit cutter works too.)
- A fork (for crimping the edges, though I prefer the glass method—more on that below)
- A small offset spatula or butter knife (for spreading the sunbutter and jam evenly)
- A baking sheet (if you’re making a batch to freeze—line it with parchment paper for easy removal)
- Parchment paper or wax paper (for separating layers when freezing)
- A zip-top freezer bag (for storing the finished sandwiches)
I’ve tried using an actual Uncrustables maker (yes, they sell them), and honestly, the glass method works just as well and costs nothing. The key is to make sure your glass has a thin, even rim—thick rims don’t press the bread enough to create a good seal. I found my perfect glass at a thrift store for fifty cents. It’s slightly chipped, but it works like a charm.
If you’re making these regularly, I’d recommend investing in a good rolling pin. I have a wooden one that’s been in my family for years, and it’s perfect for this job. But honestly, a wine bottle or even a smooth water bottle will do the trick. The important thing is to apply even pressure so the bread flattens uniformly.
Preparation Method
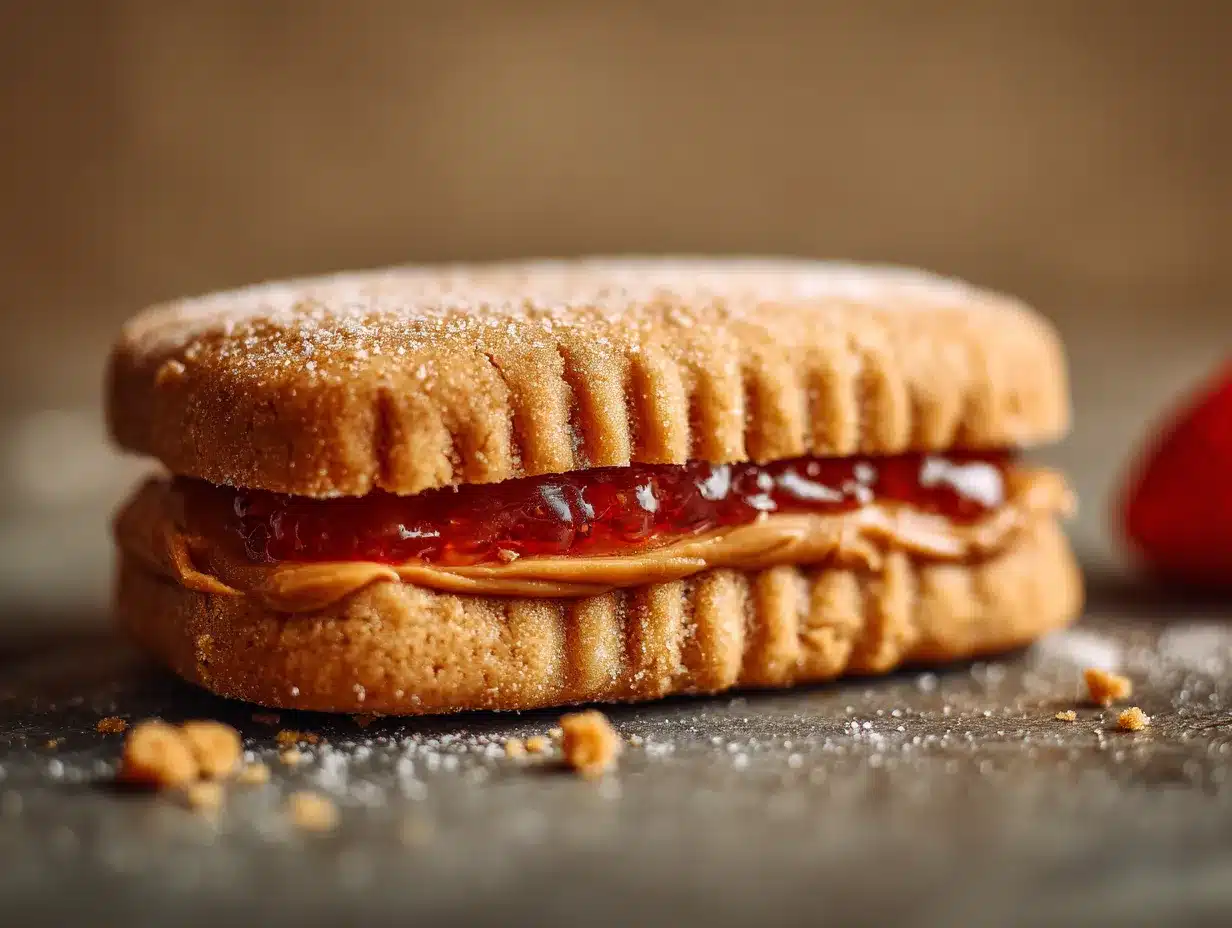
Let’s get to the good part—making these sandwiches. I’ll walk you through every step so you get perfect results the first time, no leaks, no mess, just delicious little pockets of sunbutter and jam.
- Flatten the bread slices. Take one slice of bread and gently roll over it with your rolling pin or wine bottle. Apply even pressure until the bread is about 1/4 inch thick. Don’t press too hard or you’ll tear the bread—you want it thin enough to seal but thick enough to hold the filling. Repeat with all 8 slices. (Pro tip: If the bread is fresh, it’s easier to flatten. Day-old bread tends to crack, so use fresh bread if possible.)
- Spread the sunbutter. Take 4 of the flattened bread slices and spread about 2 tablespoons of sunbutter on each one. Leave a 1/2-inch border around the edges—this is crucial for sealing. The border should be completely clean, no sunbutter at all, or your sandwich won’t seal properly. I use a small offset spatula for this because it gives me more control, but a butter knife works fine.
- Add the jam. On top of the sunbutter, spread about 1 heaping tablespoon of strawberry jam. Again, keep it away from the edges. You want the jam to be centered so it doesn’t leak out when you press the sandwiches. If your jam is particularly runny, you can use a little less—about 2 teaspoons instead of a full tablespoon.
- Top with the remaining bread. Take the remaining 4 flattened bread slices and place them on top of the jam-covered slices. Press down gently so the top bread sticks to the filling. Don’t squish too hard or the jam will ooze out the sides.
- Cut and seal the sandwiches. Here’s where the magic happens. Take your glass or round cookie cutter and press it down firmly in the center of each sandwich. You want to cut through all the layers and press the edges together. Rock the glass slightly from side to side as you press—this helps create a better seal. You should see the edges of the bread compress and fuse together. If you’re using a cookie cutter, press it down and twist slightly to seal.
- Remove the crusts. Lift the glass or cutter, and you’ll have a perfect round sandwich with the crusts still attached around it. Gently pull away the crust scraps—they should come off easily. Don’t worry if a little filling sticks to the crust; that’s normal. Save the crust scraps for breadcrumbs or just snack on them while you work (no judgment here).
- Crimp the edges (optional but recommended). If you want extra security against leaks, take a fork and press the tines around the edge of each sandwich. This creates a decorative crimp and reinforces the seal. I only do this if I’m packing the sandwiches for later—if we’re eating them right away, the glass seal is usually enough.
- Serve immediately or freeze. If you’re eating them now, you can toast them lightly in a dry skillet for 1-2 minutes per side for a warm, crispy exterior. For freezing, place the sandwiches on a parchment-lined baking sheet in a single layer and freeze for 1-2 hours until solid. Then transfer them to a zip-top freezer bag. They’ll keep for up to 3 months.
One thing I learned through trial and error: don’t overfill the sandwiches. It’s tempting to add extra jam or sunbutter, but too much filling will cause leaks. The perfect ratio is about 2 tablespoons of sunbutter to 1 tablespoon of jam per sandwich. Trust the process—less is more here.
Also, pay attention to the bread. If you notice the edges aren’t sealing well, your bread might be too dry. Try microwaving the bread for 5-10 seconds before flattening—it makes it more pliable and easier to seal. I discovered this trick after a particularly frustrating batch where every single sandwich leaked. Now I do it every time, and my seal rate is 100%.
Cooking Tips & Techniques
After making these sandwiches more times than I can count, I’ve picked up a few tricks that make the process smoother and the results more consistent. Let me share what I’ve learned—including the mistakes I’ve made so you don’t have to repeat them.
The bread matters more than you think. I’ve tried this recipe with whole wheat, sourdough, brioche, and even gluten-free bread. The only one that consistently works is soft white bread. Whole wheat is too dense and cracks when you press it. Sourdough is too crusty and doesn’t seal. Gluten-free bread is too fragile and falls apart. Save yourself the frustration and stick with plain old white bread. It’s not the healthiest option, but for this recipe, it’s non-negotiable.
Don’t skip the flattening step. I know it seems like an extra, unnecessary step, but flattening the bread is what makes the seal possible. Without it, the bread is too thick and the edges won’t compress enough to stick together. Plus, flattening creates a larger surface area, so you get a more even distribution of filling in every bite. I once made a batch without flattening just to see what would happen, and the sandwiches fell apart completely. Never again.
Keep the filling away from the edges. This is the most common mistake I see people make. If any sunbutter or jam touches the edge of the bread, the seal won’t hold. It’s like trying to glue two pieces of paper together with wet glue on the edges—it just won’t work. Leave a clean 1/2-inch border around the entire slice, and you’ll get perfect seals every time.
Work in batches if you’re making a lot. If you’re making a month’s worth of lunches, don’t try to do all 8 sandwiches at once. Work in batches of 4—flatten 4 slices, spread the filling, top with the remaining 4 flattened slices, then cut and seal. This keeps the bread from drying out while you work. I learned this the hard way when I tried to flatten all 8 slices at once and the first ones got stale before I could use them.
Freeze them flat, then bag them. If you’re freezing these for later, don’t just throw them in a bag. Place them in a single layer on a baking sheet and freeze until solid (about 1-2 hours). Then transfer them to a freezer bag. This prevents them from sticking together and getting squished. I usually make a double batch on Sunday and freeze them for the week. They thaw by lunchtime if you pack them in a lunchbox in the morning.
One failure I’ll never forget: I once tried to make these with homemade sunbutter that was too oily. The sandwiches were a disaster—the oil soaked through the bread, the seals didn’t hold, and I ended up with a sticky mess that looked like a science experiment gone wrong. Now I always use store-bought sunbutter for this recipe because the consistency is more reliable. If you want to make your own, make sure it’s thick and spreadable, not runny.
Variations & Adaptations
One of the best things about this recipe is how easy it is to customize. I’ve experimented with all sorts of variations over the years, and here are some of my favorites.
Flavor Variations: Swap the strawberry jam for any flavor you like. Raspberry, grape, apricot, and blackberry all work beautifully. My kids love a combination of strawberry and blueberry jam—it turns the filling a pretty purple color that they find exciting. For a grown-up version, try fig jam or orange marmalade with a sprinkle of cinnamon. The possibilities are endless, and honestly, I’ve never met a combination I didn’t like.
Dietary Adaptations: For a gluten-free version, use your favorite gluten-free white bread. I’ve had good luck with Canyon Bakehouse and Schar brands—they’re soft enough to flatten and seal without cracking. For a lower-sugar option, use sugar-free jam and unsweetened sunbutter. The texture will be slightly different, but the taste is still great. For a vegan version, this recipe is already vegan as long as you use vegan bread (most white bread is, but check the label).
Different Cooking Methods: While I usually serve these cold or at room temperature, they’re also delicious toasted. Heat a dry non-stick skillet over medium heat and cook the sandwiches for 1-2 minutes per side until golden brown and crispy. The sunbutter gets warm and melty, and the jam becomes almost like a filling in a little pie. You can also air fry them at 350°F for 3-4 minutes, flipping halfway through. Just don’t microwave them—the bread gets rubbery and the jam turns into lava.
Seasonal Twists: In the summer, I sometimes add thin slices of fresh strawberry on top of the jam for an extra burst of flavor. In the fall, I mix a pinch of pumpkin pie spice into the sunbutter before spreading. Around the holidays, I use peppermint jam (yes, it exists, and it’s amazing) for a festive treat. These little seasonal touches make the sandwiches feel special without adding much effort.
My personal favorite variation: I once made a batch with sunbutter, strawberry jam, and a thin layer of cream cheese. It was an accident—I was trying to use up some leftover cream cheese—but it turned out so good that now I do it on purpose. The cream cheese adds a tangy richness that balances the sweetness of the jam perfectly. Just spread a thin layer on the bread before adding the sunbutter and jam. It’s a game-changer, I promise.
Serving & Storage Suggestions
These copycat uncrustables are incredibly versatile when it comes to serving and storing. Here’s everything you need to know to get the most out of them.
Serving Temperature: These sandwiches are delicious at any temperature. My kids prefer them straight from the fridge—cold and firm, like the store-bought version. I like them at room temperature, where the flavors have a chance to meld together. If you’re serving them for a special occasion, try toasting them lightly in a skillet. The warm, crispy exterior with the soft, melty interior is absolutely irresistible.
Presentation Ideas: For lunchboxes, I wrap each sandwich in parchment paper and tie it with kitchen twine for a cute, rustic look. For parties, I arrange them on a platter with a bowl of extra jam for dipping (yes, dipping is a thing, and it’s amazing). For a fun breakfast, I serve them alongside a bowl of fresh fruit and a glass of milk. The round shape makes them feel special, even though they’re just sandwiches.
Storage Instructions: Store leftover sandwiches in an airtight container in the refrigerator for up to 5 days. Place a sheet of parchment paper between layers to prevent sticking. For longer storage, freeze them as described above. Frozen sandwiches will keep for up to 3 months. To thaw, simply place them in the refrigerator overnight or pack them in a lunchbox in the morning—they’ll be thawed and ready to eat by lunchtime.
Reheating Methods: If you want to serve these warm, the best method is a dry skillet over medium heat. Cook for 1-2 minutes per side until golden brown. You can also use a toaster oven at 350°F for 5 minutes. Avoid the microwave—it makes the bread soggy and the filling dangerously hot. If you’re in a hurry, you can eat them straight from the freezer; they’re perfectly fine frozen, though the texture is firmer.
How Flavors Develop Over Time: Here’s a secret: these sandwiches actually taste better the next day. The sunbutter and jam have time to meld together, and the bread absorbs some of the moisture from the filling, creating a more cohesive texture. I’ve found that sandwiches made on Sunday are at their peak on Tuesday. So don’t be afraid to make them ahead of time—they only get better.
Nutritional Information & Benefits
While these sandwiches are definitely a treat, they do offer some nutritional benefits, especially compared to the store-bought version. Here’s what you need to know.
Estimated Nutritional Values (per sandwich):
- Calories: 220
- Total Fat: 10g
- Saturated Fat: 1.5g
- Cholesterol: 0mg
- Sodium: 210mg
- Total Carbohydrates: 28g
- Dietary Fiber: 2g
- Sugars: 12g
- Protein: 6g
Health Benefits of Key Ingredients: Sunflower seed butter is an excellent source of vitamin E, which supports immune function and skin health. It’s also rich in healthy fats and protein, making these sandwiches more satisfying than a plain jam sandwich. Strawberries are packed with vitamin C and antioxidants, which help fight inflammation and support overall health. Even the bread provides some B vitamins and iron, especially if you choose enriched white bread.
Dietary Considerations: This recipe is naturally vegan, nut-free, and soy-free (check your bread label to be sure). It’s also free of dairy and eggs, making it suitable for most common dietary restrictions. For a lower-carb option, you can use low-carb bread, though the texture will be slightly different. For a gluten-free version, use your favorite gluten-free bread as mentioned above.
Potential Allergens: While sunbutter is nut-free, it is made from sunflower seeds, so anyone with seed allergies should avoid it. Always check the labels on your bread and jam for any hidden allergens. Some brands of sunbutter are processed in facilities that also handle nuts, so look for brands that specifically state they’re nut-free if that’s a concern.
My Personal Wellness Perspective: I believe in balance. These sandwiches aren’t health food, but they’re a far better option than the store-bought version, which contains preservatives, artificial flavors, and high-fructose corn syrup. By making them at home, you control exactly what goes into them. Plus, the act of making them yourself—flattening the bread, spreading the filling, pressing out the perfect rounds—is oddly meditative. It’s a small act of love that shows up in every lunchbox.
Conclusion
I know I’m biased, but these Easy Copycat Sunbutter and Strawberry Jam Uncrustables have genuinely made my life easier. They save me money, they save me time, and they save me from the guilt of feeding my kids processed freezer food. But more than that, they’ve become a little ritual—a Sunday afternoon assembly line with music playing and kids helping (or at least trying to help).
This recipe is worth trying because it works. It’s simple, it’s reliable, and it delivers exactly what it promises: a delicious, nut-free, school-safe sandwich that tastes better than anything you can buy. And the best part? You can customize it to your heart’s content. Swap the jam, change the bread, add a little cream cheese—make it your own. That’s the beauty of homemade food.
I’d love to hear how yours turn out. Did you try a different jam flavor? Did your kids help make them? Did you discover a trick I haven’t thought of? Drop a comment below and share your experience. And if you found this recipe helpful, please share it with a friend who’s tired of spending a fortune on frozen sandwiches. Let’s spread the love—one crustless sandwich at a time.
Happy cooking, friends. Your lunchboxes are about to get a whole lot better.
Frequently Asked Questions
Can I use regular peanut butter instead of sunbutter?
Absolutely, if nut allergies aren’t a concern. Peanut butter works perfectly in this recipe—just make sure it’s creamy and not too oily. The texture and flavor will be different, but the method stays the same. If you’re packing these for school lunches, though, stick with sunbutter or another nut-free alternative.
Why are my sandwiches leaking?
Leaking usually happens for one of three reasons: your filling is too close to the edges, your bread isn’t flattened enough, or your bread is too dry. Make sure you leave a clean 1/2-inch border around the filling, flatten the bread to about 1/4 inch thick, and use fresh, soft bread. If the problem persists, try microwaving the bread for 5-10 seconds before flattening to make it more pliable.
How long do these last in the freezer?
Properly stored, these sandwiches will keep in the freezer for up to 3 months. The key is to freeze them flat on a baking sheet first, then transfer them to a zip-top freezer bag. This prevents them from sticking together and keeps their shape. Label the bag with the date so you know when you made them.
Can I make these with gluten-free bread?
Yes, but you need to choose your bread carefully. Look for a soft, white gluten-free bread—I’ve had good results with Canyon Bakehouse and Schar. Avoid dense, grainy gluten-free breads; they crack when you try to flatten them. You may also need to press a little harder to get a good seal. It’s not quite as reliable as regular white bread, but it works.
Do I have to use a glass to cut the sandwiches?
Not at all. A round cookie cutter works great, and some people even use a biscuit cutter or a mason jar lid. The important thing is that whatever you use has a thin, even rim and is about 3 inches in diameter. You can also use a knife to cut the sandwiches into squares or triangles, but the round shape helps with sealing because there are no corners for the filling to escape from.
Pin This Recipe!
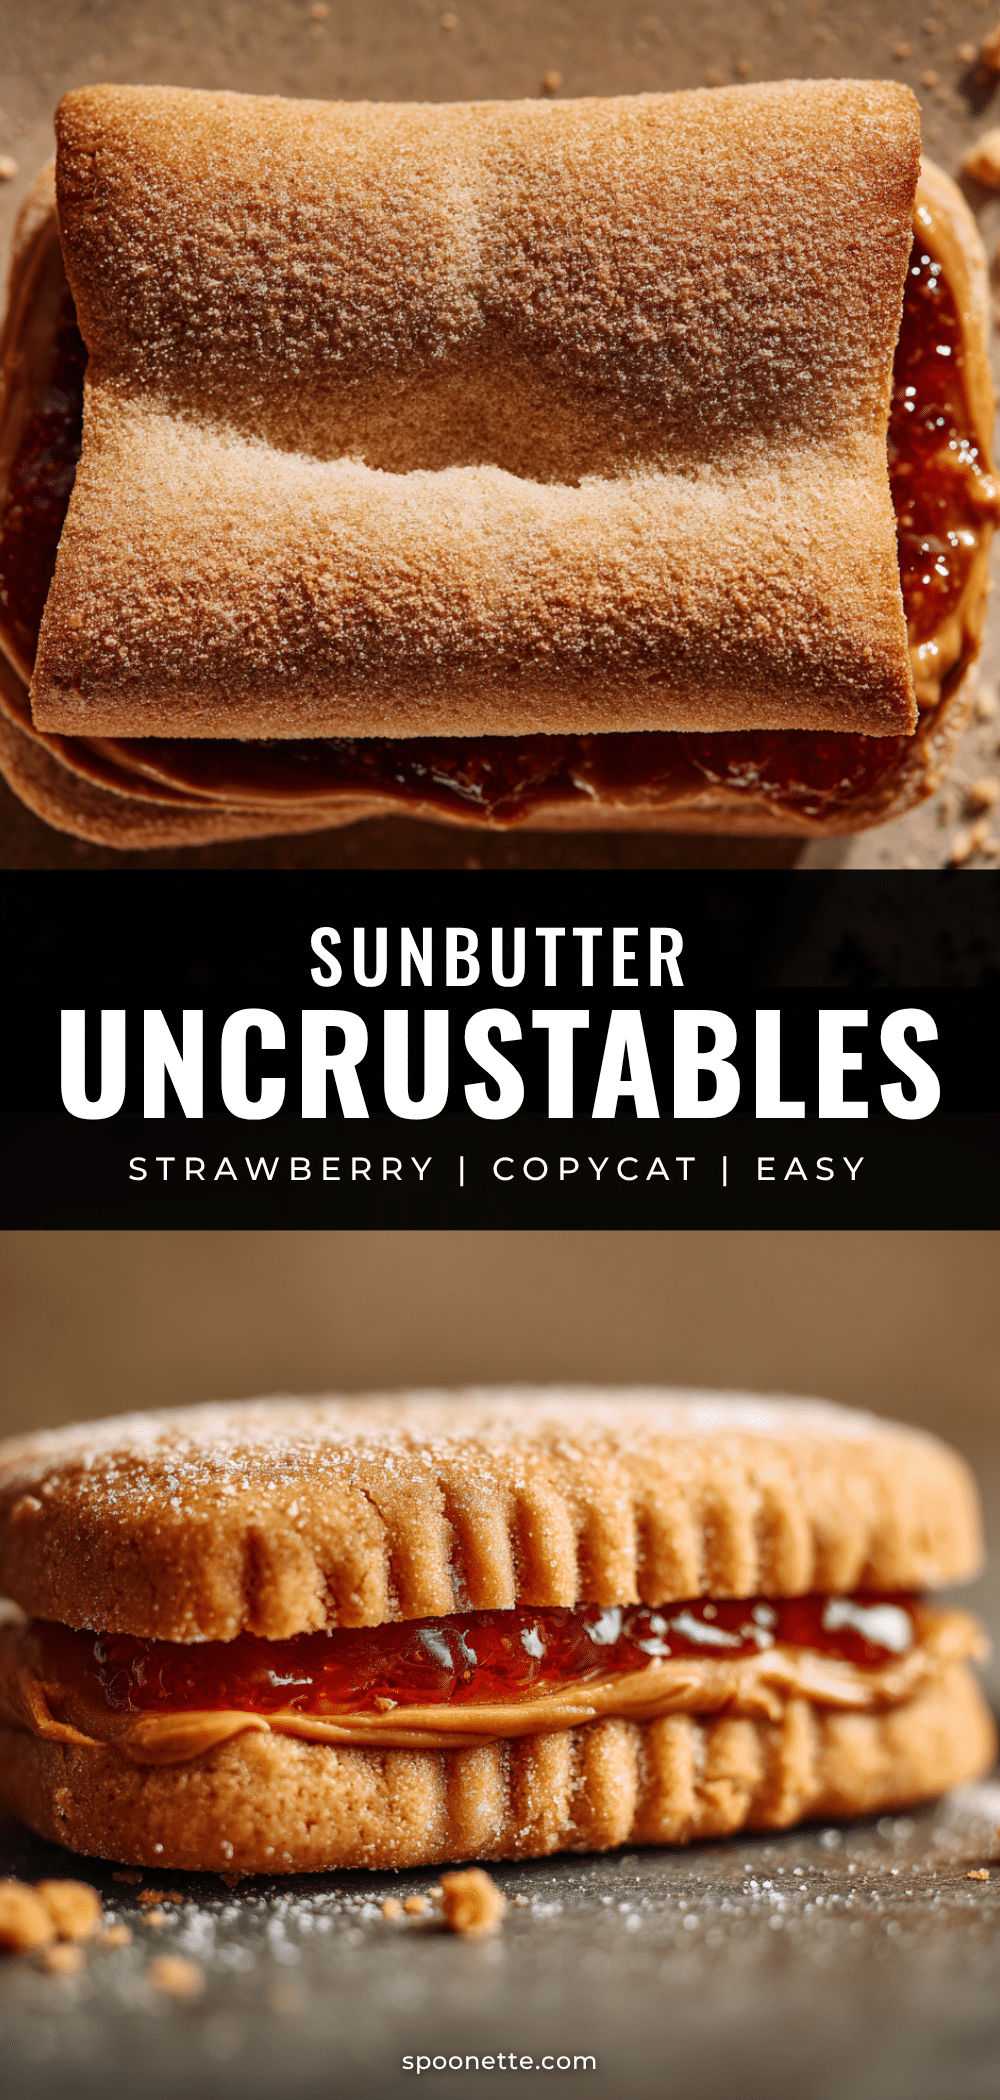
Easy Copycat Sunbutter and Strawberry Jam Uncrustables
These homemade, nut-free uncrustables are quick to make, use simple ingredients, and are perfect for school lunches. A chance encounter at a hardware store led to this recipe that saves money and time while delivering delicious, crustless sandwiches.
- Prep Time: 10 minutes
- Cook Time: 4 minutes (if toasting)
- Total Time: 14 minutes
- Yield: 4 servings 1x
- Category: Lunch
- Cuisine: American
Ingredients
- 8 slices of soft white bread (e.g., Sara Lee or Wonder Bread)
- 1/2 cup creamy sunflower seed butter (sunbutter), stirred well
- 1/3 cup strawberry jam or preserves (seedless preferred)
- Optional: 1 tablespoon butter, melted (for toasting)
Instructions
- Flatten the bread slices: Gently roll each slice of bread with a rolling pin or wine bottle until about 1/4 inch thick. Apply even pressure without tearing the bread.
- Spread the sunbutter: On 4 of the flattened bread slices, spread about 2 tablespoons of sunbutter each, leaving a 1/2-inch clean border around the edges.
- Add the jam: On top of the sunbutter, spread about 1 heaping tablespoon of strawberry jam per sandwich, keeping it centered and away from the edges.
- Top with remaining bread: Place the remaining 4 flattened bread slices on top of the jam-covered slices. Press down gently to adhere.
- Cut and seal the sandwiches: Using a glass or round cookie cutter (about 3 inches in diameter), press down firmly in the center of each sandwich to cut through all layers and seal the edges. Rock the glass slightly to create a better seal.
- Remove the crusts: Lift the glass or cutter and gently pull away the crust scraps from around the round sandwich.
- Crimp the edges (optional): For extra security against leaks, press the tines of a fork around the edge of each sandwich to create a decorative crimp.
- Serve immediately or freeze: For immediate serving, toast lightly in a dry skillet for 1-2 minutes per side. For freezing, place sandwiches on a parchment-lined baking sheet in a single layer and freeze for 1-2 hours until solid, then transfer to a zip-top freezer bag.
Notes
Use soft white bread for best results; avoid dense or crusty breads. Keep filling away from edges to ensure a good seal. For freezing, freeze flat on a baking sheet before bagging. Sandwiches taste even better the next day as flavors meld. For gluten-free, use soft gluten-free white bread like Canyon Bakehouse or Schar.
Nutrition
- Serving Size: 1 sandwich
- Calories: 220
- Sugar: 12
- Sodium: 210
- Fat: 10
- Saturated Fat: 1.5
- Carbohydrates: 28
- Fiber: 2
- Protein: 6
Keywords: uncrustables, sunbutter, strawberry jam, nut-free, school lunch, copycat, homemade, crustless sandwich



