Love this? Save it for later!
Share the inspiration with your friends
My seven-year-old nephew asked why I couldn’t just roll the sandwich instead of cutting it into triangles. I started to explain why that wouldn’t work — then stopped. Honestly, I had no good reason. I’d been making his lunch for three days straight during school break, and the truth is, I was just doing it the way I’d always done it. No thought, no creativity, just habit. He looked at me with that patient, slightly pitying look kids get when adults are being stubborn for no reason, and said, “Auntie, it’s just a sandwich. But rolled up, it’s more fun.”
So I tried it. I grabbed a tortilla, slapped on some cream cheese, layered turkey and cheddar, and rolled it tight. I sliced it into little pinwheels, and he looked at them like I’d just handed him a winning lottery ticket. The kid ate six. Six! And then he asked if we could make “roll-up sandwiches” every day. That was three years ago, and I’ve been making these Easy Turkey and Cheddar Pinwheel Lunchbox Roll-Ups ever since. I’ve refined them, tested them with different fillings, and learned exactly what works and what doesn’t. Let me tell you, there’s a trick to keeping them from falling apart — and I learned it the hard way, with a very sad, soggy lunchbox on a Tuesday morning.
Maybe you’ve been there — staring at the same lunch rotation, wondering if there’s a way to make it exciting without spending an hour in the kitchen. These roll-ups are that answer. They’re fast, they’re fun, and they actually stay together. I mean, what more could you ask for from a lunchbox recipe? This is the one that stuck, and I think it’ll stick for you too.
Why You’ll Love This Recipe
I’ve tested this recipe more times than I care to count — through soggy tortillas, overstuffed rolls, and one memorable incident where the cream cheese acted more like a slip-and-slide than a binder. But after all that trial and error, I can confidently say: this version is bulletproof. Here’s why it works.
- Quick & Easy: These come together in under 10 minutes. Seriously, by the time you’ve toasted a frozen waffle, these are done. Perfect for those mornings when you’re running late (which, let’s face it, is most mornings).
- Simple Ingredients: You probably have everything in your fridge right now. No fancy grocery trips, no obscure condiments. Just turkey, cheddar, cream cheese, and a tortilla. That’s it.
- Perfect for Lunchboxes: These hold up beautifully in a lunchbox. No sogginess, no falling apart, no sad, crushed sandwich at the bottom of the bag. They’re practically designed for school lunches, work lunches, picnics, or road trips.
- Crowd-Pleaser: Kids love them. Adults love them. I’ve served these at a playdate and watched parents sneak extras from the platter. They’re just… fun to eat.
- Unbelievably Delicious: The cream cheese adds this creamy tang that ties the turkey and cheddar together in a way that a plain sandwich just can’t match. Plus, the pinwheel shape makes every bite perfect — you get a little bit of everything in each piece.
What makes this recipe different from all the other pinwheel recipes out there? Two things. First, I use a specific cream cheese-to-turkey ratio that prevents the roll from getting soggy while keeping it moist enough to hold together. Second, I’ve found that spreading the cream cheese all the way to the edges — not leaving a border — is the secret to keeping the roll tight and the fillings in place. It sounds small, but it makes all the difference. This isn’t just another version of a turkey roll-up. It’s the version I’ve perfected through years of lunchbox packing, and it’s never let me down.
Honestly, this recipe is comfort food reimagined. It’s the kind of lunch that makes you close your eyes after the first bite and think, “Why haven’t I been making these my whole life?” It’s that good.
What Ingredients You Will Need
This recipe uses simple, everyday ingredients that work together to create something surprisingly satisfying. No complicated shopping list, no hard-to-find items — just honest, good food that comes together fast.
- Large flour tortillas (10-inch): These are your base. I prefer burrito-sized tortillas because they give you enough surface area for a good roll. Look for ones that are soft and pliable — if they’re too stiff, they’ll crack when you roll them. I usually go with Mission brand, but any soft flour tortilla works. For a whole wheat option, try the Ole brand — they hold up really well.
- 8 ounces cream cheese, softened: This is the glue that holds everything together. Make sure it’s softened to room temperature — cold cream cheese will tear the tortilla when you try to spread it. I leave mine out for about 20 minutes before starting. You can use full-fat, reduced-fat, or even dairy-free cream cheese; just know that reduced-fat versions can be a little thinner, so you might need to use slightly less.
- 1/2 teaspoon garlic powder: This adds a subtle savory note that makes the cream cheese taste like something special. It’s not overpowering — just a gentle background flavor that complements the turkey beautifully.
- 1/4 teaspoon onion powder: Works with the garlic powder to create that classic savory profile. If you don’t have onion powder, you can skip it, but it really does round out the flavor.
- 1/4 teaspoon black pepper: A little freshness and bite. I use freshly ground black pepper here because it makes a difference, but pre-ground works fine too.
- 8 slices deli turkey breast: Go for good-quality deli turkey — Boar’s Head or Applegate are my go-tos. Avoid the super-thin shaved turkey; you want slices that are sturdy enough to hold up when rolled. Oven-roasted or smoked turkey both work great here.
- 4 slices cheddar cheese: Sharp cheddar gives you the most flavor, but mild cheddar works too. Make sure the slices are large enough to cover most of the tortilla. If your cheese slices are small, just use two per tortilla and overlap them slightly.
- Optional add-ins: A handful of fresh spinach leaves, a few slices of avocado, or a thin layer of honey mustard can take these to the next level. I’ve tried all three, and they each bring something different. Spinach adds freshness, avocado adds creaminess, and honey mustard adds a tangy kick.
Equipment Needed
You don’t need much for this recipe — that’s part of the beauty. But having the right tools makes the process smoother and the results better.
- A sharp knife: This is non-negotiable. A dull knife will squish the roll and make messy, uneven slices. I use a serrated bread knife for the cleanest cuts, but a sharp chef’s knife works too. If your knife is dragging or tearing, stop and sharpen it.
- A cutting board: Any cutting board works, but I prefer a large wooden board because it gives you plenty of room to work. Avoid glass boards — they’re too slippery, and your tortilla will slide around.
- A butter knife or offset spatula: For spreading the cream cheese mixture evenly. An offset spatula is my favorite because it gives you more control, but a regular butter knife works perfectly fine.
- Plastic wrap or parchment paper: This is optional but highly recommended. Wrapping the rolled tortilla in plastic wrap before chilling helps it hold its shape and makes slicing much easier. If you’re in a hurry, you can skip this step, but the results won’t be as clean.
- A small bowl: For mixing the cream cheese with the seasonings. Any small bowl will do.
If you don’t have an offset spatula, don’t worry. I’ve made these with a regular butter knife for years before I got one. The key is just to spread the cream cheese evenly — whatever tool you use, take your time with this step.
Preparation Method
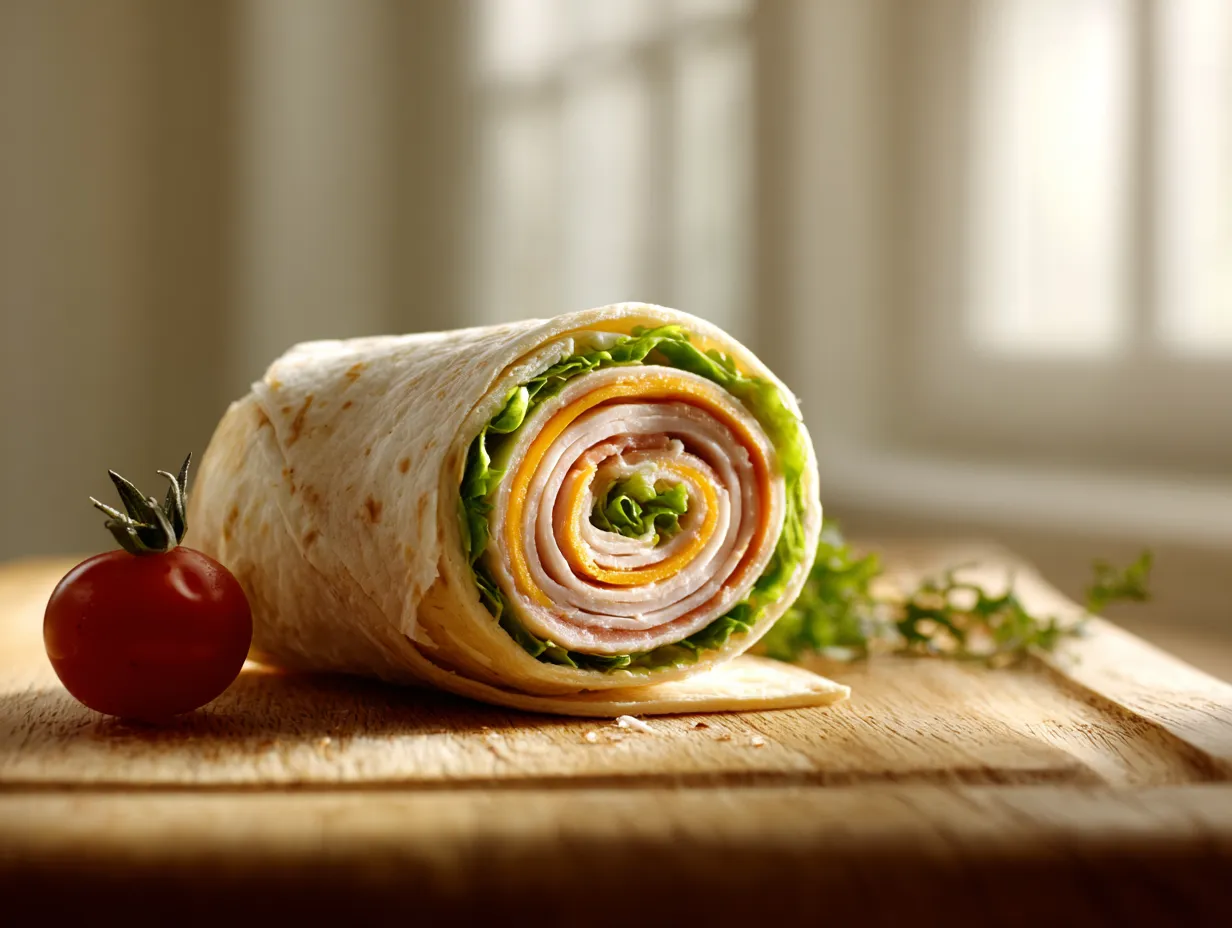
This is where the magic happens. Follow these steps, and you’ll have perfect pinwheels every time. I’ve included all the little details I’ve learned from my own mistakes — because honestly, nobody tells you that the cream cheese needs to be room temperature until you’ve already torn three tortillas.
- Prep the cream cheese mixture. In a small bowl, combine the softened cream cheese, garlic powder, onion powder, and black pepper. Stir until smooth and well combined. Taste it — you want the seasoning to be present but not overwhelming. If it tastes flat, add a pinch more garlic powder. (I learned this the hard way after making a batch that was just… boring.)
- Lay out your tortilla. Place one flour tortilla flat on your cutting board. Make sure it’s at room temperature — cold tortillas crack when you roll them. If your tortillas are cold, microwave them for 10 seconds to soften them up.
- Spread the cream cheese. Using your butter knife or offset spatula, spread about 2 tablespoons of the cream cheese mixture evenly over the entire surface of the tortilla. And I mean the entire surface — all the way to the edges. This is the secret to keeping everything in place. If you leave a border, the filling will shift when you roll. Trust me on this.
- Layer the turkey. Place 2 slices of deli turkey over the cream cheese, overlapping them slightly to cover the tortilla. Don’t pile them too thick — you want a single layer of turkey, not a mountain. If the slices are small, use three. The goal is even coverage.
- Add the cheese. Place 1 slice of cheddar cheese over the turkey. If your cheese slice doesn’t cover the whole tortilla, that’s okay — just position it in the center. The cream cheese and turkey will hold everything together.
- Optional add-ins: If you’re using spinach, avocado, or honey mustard, add them now. For spinach, lay a handful of leaves evenly over the cheese. For avocado, slice it thin and arrange in a single layer. For honey mustard, drizzle a thin line along the edge you’ll start rolling from.
- Roll it tight. Starting from the edge closest to you, roll the tortilla tightly away from you. Use your fingers to keep the filling tucked in as you go. Roll it like you mean it — a loose roll will fall apart when you slice it. When you reach the end, place it seam-side down. If the tortilla doesn’t stay closed, you can spread a tiny bit of cream cheese on the edge to seal it.
- Wrap and chill. Wrap the rolled tortilla tightly in plastic wrap or parchment paper. Twist the ends like a candy wrapper to keep it snug. Refrigerate for at least 30 minutes — this step is crucial. Chilling firms up the cream cheese and sets the roll, making it much easier to slice cleanly. If you skip this, you’ll end up with squished, messy pinwheels. I’ve done it. It’s not pretty.
- Slice into pinwheels. After chilling, unwrap the roll and place it on your cutting board. Using a sharp knife, slice the roll into 1-inch pieces. Use a gentle sawing motion rather than pressing straight down — this prevents squishing. You should get about 6-8 pinwheels per tortilla, depending on how tightly you rolled and how thick you slice.
- Serve or pack. Arrange the pinwheels on a plate for serving, or pack them directly into lunchboxes. They’re ready to go!
Cooking Tips & Techniques
I’ve made these pinwheels more times than I can count, and I’ve made every mistake in the book. Here’s what I’ve learned so you don’t have to make the same ones.
The biggest mistake people make is using cold cream cheese. I know, I know — you’re in a hurry, and the cream cheese just came out of the fridge. But spreading cold cream cheese on a tortilla is like trying to spread butter on toast with a spoon. It tears the tortilla, it doesn’t spread evenly, and your roll ends up lumpy. Let it sit on the counter for 20 minutes. While you wait, you can prep your other ingredients. It’s worth it.
Another common issue is overstuffing. I get it — more filling sounds better. But if you pile on too much turkey or cheese, the roll becomes impossible to close, and the filling spills out when you slice. Stick to the amounts I’ve listed. Two slices of turkey and one slice of cheese per tortilla is the sweet spot. You’ll get plenty of flavor without the mess.
Here’s a pro tip for perfect slices every time: Use a serrated knife and a gentle sawing motion. Don’t press straight down — that squishes the roll and pushes the filling out. Let the knife do the work. And wipe the blade clean between cuts for the neatest slices. This sounds fussy, but it takes two seconds and makes a huge difference.
Timing tip: Make these the night before. The chilling step is essential, so if you make them in the evening and let them chill overnight, you’ll have perfect pinwheels ready to pack in the morning. It’s a game-changer for busy mornings. Honestly, this is my favorite way to do it — I make a batch on Sunday night, and we have lunch ready for the next three days.
Variations & Adaptations
One of the best things about this recipe is how customizable it is. I’ve tried so many variations over the years, and here are my favorites.
- Vegetarian version: Swap the turkey for roasted vegetables — bell peppers, zucchini, and mushrooms work great. Or use hummus instead of cream cheese and add sliced cucumber and bell pepper for a fresh, crunchy roll-up. I made this for a vegetarian friend, and she asked for the recipe immediately.
- Gluten-free option: Use gluten-free tortillas. I’ve tested this with several brands, and the key is to warm them slightly before rolling — gluten-free tortillas are more brittle and crack easily. Mission makes a decent gluten-free flour tortilla that holds up well.
- Different cheese: Try pepper jack for a spicy kick, provolone for a milder flavor, or gouda for something smoky. Each cheese brings a different personality to the roll-up. My personal favorite is smoked gouda with oven-roasted turkey — it’s like a fancy lunch without any extra effort.
- Different protein: Swap the turkey for ham, roast beef, or even rotisserie chicken. Ham and Swiss is a classic combo, and roast beef with horseradish cream cheese is incredible if you like a little kick.
- Breakfast version: Use the same technique but fill with scrambled eggs, cheese, and cooked breakfast sausage. Slice into pinwheels for a fun, portable breakfast. I made these for a road trip once, and they were a hit.
Serving & Storage Suggestions
These pinwheels are best served cold or at room temperature — they’re designed for lunchboxes, after all. But they’re also great as an appetizer for parties, potlucks, or picnics. Arrange them on a platter with a small bowl of honey mustard or ranch dressing for dipping, and watch them disappear.
For storage: Place the pinwheels in an airtight container, layered between sheets of parchment paper to prevent sticking. They’ll keep in the refrigerator for up to 3 days. Don’t leave them at room temperature for more than 2 hours — the cream cheese needs to stay chilled.
For freezing: You can freeze the uncut rolls, wrapped tightly in plastic wrap and then foil, for up to 2 months. Thaw in the refrigerator overnight, then slice and serve. I don’t recommend freezing the sliced pinwheels — they get a bit sad and soggy. But the whole rolls freeze beautifully.
For reheating: These are best served cold, but if you prefer them warm, you can microwave them for 10-15 seconds. Just be careful — the cream cheese gets very hot very fast. Honestly, I think they’re better cold, but to each their own.
Flavor development note: These actually taste better after they’ve sat in the fridge for a few hours. The flavors meld together, and the cream cheese firms up to the perfect texture. So if you can, make them the night before. Your future self will thank you.
Nutritional Information & Benefits
Here’s the approximate nutritional breakdown for one serving (about 4 pinwheels):
| Nutrient | Amount |
|---|---|
| Calories | 320-350 |
| Protein | 22g |
| Carbohydrates | 28g |
| Fat | 16g |
| Saturated Fat | 8g |
| Fiber | 2g |
| Sodium | 680mg |
These pinwheels are a good source of protein from the turkey and cheese, which helps keep you full and satisfied. The cream cheese adds calcium and a little healthy fat. If you use whole wheat tortillas, you’ll also get some extra fiber. For a lower-sodium option, look for low-sodium deli turkey and reduced-fat cheese.
This recipe is naturally low-carb if you use low-carb tortillas — I’ve tested it with the Ole brand, and they work perfectly. It’s also easy to make gluten-free by swapping the tortilla. Just check your cream cheese and turkey labels if you have specific dietary needs.
Conclusion
These Easy Turkey and Cheddar Pinwheel Lunchbox Roll-Ups have become a staple in my kitchen, and I honestly can’t imagine going back to regular sandwiches. They’re faster, more fun, and somehow more satisfying — even though they’re made with the same ingredients. There’s just something about the pinwheel shape that makes lunch feel special, you know?
I hope you give these a try and make them your own. Add your favorite fillings, swap in different cheeses, or keep it simple with the classic turkey and cheddar. However you make them, I promise they’ll be a hit. And if you come up with a killer variation, I’d love to hear about it — drop a comment below and share your creation. Let’s make lunchboxes a little more exciting, one pinwheel at a time.
Frequently Asked Questions
Can I make these pinwheels ahead of time?
Absolutely! In fact, I recommend it. Make them the night before, wrap them tightly, and refrigerate. They’ll be perfectly set and ready to slice in the morning. They keep well for up to 3 days in the fridge.
Why are my pinwheels falling apart?
This usually happens for one of two reasons: either you didn’t chill them long enough before slicing, or you didn’t spread the cream cheese all the way to the edges. Make sure to chill for at least 30 minutes, and spread that cream cheese like you mean it.
Can I use tortilla wraps instead of flour tortillas?
Yes, any soft wrap works. Just avoid corn tortillas — they’re too small and brittle to roll properly. Spinach wraps, sun-dried tomato wraps, or whole wheat wraps are all great options.
How do I keep the pinwheels from getting soggy in a lunchbox?
Make sure the turkey isn’t too wet — pat it dry with a paper towel if it looks moist. Also, the cream cheese acts as a barrier that prevents the tortilla from absorbing moisture from the filling. If you’re adding wet ingredients like avocado or tomato, add them in moderation.
Can I use flavored cream cheese?
Definitely! Chive and onion cream cheese is fantastic with turkey and cheddar. Garden vegetable cream cheese works well too. Just keep in mind that flavored cream cheeses are usually softer, so you might need to use a little less to prevent the roll from getting too loose.
Pin This Recipe!

Easy Turkey Cheddar Pinwheel Lunchbox Roll-Ups

These quick and easy turkey and cheddar pinwheel roll-ups are perfect for lunchboxes, picnics, or a fun snack. Made with simple ingredients, they come together in under 10 minutes and stay fresh for days.
- Prep Time: 10 minutes
- Cook Time: 0 minutes
- Total Time: 40 minutes (includes 30 minutes chilling)
- Yield: 4 servings 1x
- Category: Lunch
- Cuisine: American
Ingredients
- 2 large flour tortillas (10-inch)
- 8 ounces cream cheese, softened
- 1/2 teaspoon garlic powder
- 1/4 teaspoon onion powder
- 1/4 teaspoon black pepper
- 8 slices deli turkey breast
- 4 slices cheddar cheese
- Optional: fresh spinach leaves, avocado slices, honey mustard
Instructions
- In a small bowl, combine softened cream cheese, garlic powder, onion powder, and black pepper. Stir until smooth.
- Place one flour tortilla flat on a cutting board.
- Spread about 2 tablespoons of the cream cheese mixture evenly over the entire surface of the tortilla, all the way to the edges.
- Layer 2 slices of deli turkey over the cream cheese, overlapping slightly to cover the tortilla.
- Place 1 slice of cheddar cheese over the turkey.
- If using optional add-ins (spinach, avocado, honey mustard), add them now.
- Starting from the edge closest to you, roll the tortilla tightly away from you, keeping the filling tucked in. Place seam-side down.
- Wrap the rolled tortilla tightly in plastic wrap or parchment paper. Refrigerate for at least 30 minutes.
- After chilling, unwrap the roll and slice into 1-inch pieces using a sharp knife with a gentle sawing motion.
- Serve immediately or pack in lunchboxes.
Notes
For best results, use room temperature cream cheese to avoid tearing the tortilla. Chilling the roll for at least 30 minutes before slicing is crucial for clean cuts. These can be made the night before and stored in the refrigerator for up to 3 days. For freezing, wrap uncut rolls tightly and freeze for up to 2 months; thaw overnight in the refrigerator before slicing.
Nutrition
- Serving Size: 4 pinwheels
- Calories: 335
- Sugar: 2
- Sodium: 680
- Fat: 16
- Saturated Fat: 8
- Carbohydrates: 28
- Fiber: 2
- Protein: 22
Keywords: turkey pinwheels, cheddar roll-ups, lunchbox recipe, easy lunch, kid-friendly, no-cook, make-ahead



