Love this? Save it for later!
Share the inspiration with your friends
“Last Sunday night, I found myself staring blankly into the fridge, surrounded by half-eaten meals and containers with mysterious leftovers. Honestly, I was a little overwhelmed—how do you keep all these bits tasting fresh without turning into a science experiment gone wrong?” That was the moment I realized I needed a better way to handle leftover food storage.
It wasn’t some fancy kitchen gadget or a brand-new recipe that changed the game—it was a simple system, born from a chaotic week of juggling work, family dinners, and the inevitable “what’s for lunch?” panic. Maybe you’ve been there too: opening the fridge door and wondering if those mashed potatoes from Thursday are still safe, or how to reheat the roast chicken without drying it out.
The truth is, leftover food storage is an underrated kitchen skill. I used to toss things in whatever container was handy, slap on a random lid, and hope for the best. But after a few too many trips to the trash and disappointing reheats, I got serious about learning the best ways to keep those meals fresh and tasty. Let me tell you, this guide has saved me time, money, and my sanity.
By the end, you’ll feel confident about storing, reheating, and even repurposing leftovers so they taste just as good (if not better) than when you first made them. So, if the idea of a cluttered fridge or soggy leftovers makes you cringe, stick around—I’ve got you covered with practical tips that really work.
Why You’ll Love This Recipe
Let me tell you why this leftover food storage guide isn’t just another list of “do this, don’t do that.” I’ve tested these tips in my own kitchen many times over, sometimes after forgetting to label a container or accidentally mixing flavors. Here’s what makes it stand out:
- Quick & Easy: These methods take just minutes to set up, perfect for busy weeknights or when you’re rushing out the door.
- Simple Ingredients & Tools: No need for fancy containers or special gadgets. Most of what you need is already in your kitchen.
- Perfect for Any Occasion: Whether you’re meal prepping, managing family dinners, or handling unexpected guests, these tips keep food fresh and ready.
- Crowd-Pleaser: Nobody likes dry leftovers. These techniques help keep flavors and textures intact, so your second meal tastes just as good.
- Unbelievably Effective: From labeling hacks to smart storage zones in your fridge, this guide is packed with easy-to-remember advice that actually works.
This isn’t just about saving food—it’s about making the most of every meal, reducing waste, and enjoying leftovers that you look forward to eating. Honestly, once you get the hang of these tips, you might even start planning meals around your leftovers (yes, it’s a thing!).
What Ingredients You Will Need
While this guide focuses on leftover food storage rather than cooking, having the right ingredients for packaging and preserving is key. Think of them as your storage “ingredients” that keep your meals fresh and tasty.
- Food Storage Containers – Opt for BPA-free plastic or glass containers with airtight lids. I personally trust Pyrex glass containers for durability and microwave safety.
- Plastic Wrap & Aluminum Foil – For wrapping delicate items or covering dishes without containers.
- Freezer Bags – Heavy-duty, zip-top bags work best for freezing portions. Look for brands like Ziploc that seal tightly and resist leaks.
- Labels & Markers – Use waterproof labels or masking tape with a permanent marker to date and identify your leftovers—trust me, this little step saves so much confusion later.
- Paper Towels & Wax Paper – Great for absorbing moisture and separating layers of food, especially baked goods.
- Vacuum Sealer (Optional) – If you want to get serious, a vacuum sealer extends storage life dramatically, but it’s not essential.
- Ice Packs or Cool Bags – Useful for transporting leftovers safely when you’re on the go.
These tools are pantry and kitchen staples that help you keep your meals organized, fresh, and easy to grab. If you’re missing any, start small—good containers and labels can make a huge difference right away.
Equipment Needed
- Refrigerator – Obviously, a properly working fridge with adjustable temperature settings (ideally between 35°F and 38°F / 1.6°C – 3.3°C).
- Freezer – For longer-term storage, your freezer should hold a steady 0°F (-18°C).
- Microwave or Oven – For reheating leftovers; glass containers work great here.
- Food Scale (Optional) – Handy for portioning leftovers evenly.
- Sharpie or Kitchen Marker – For labeling containers with dates and contents.
- Vacuum Sealer (Optional) – As mentioned, great for extending freshness but not required.
- Clean Dish Towels – For drying containers and keeping your prep area tidy.
I’ve found that investing in a few sturdy glass containers was a game-changer. They don’t stain or hold onto odors like plastic often does. Plus, they’re oven and microwave safe, which means less dish swapping when reheating. If you’re budget-conscious, there are plenty of affordable sets online that last for years.
Preparation Method
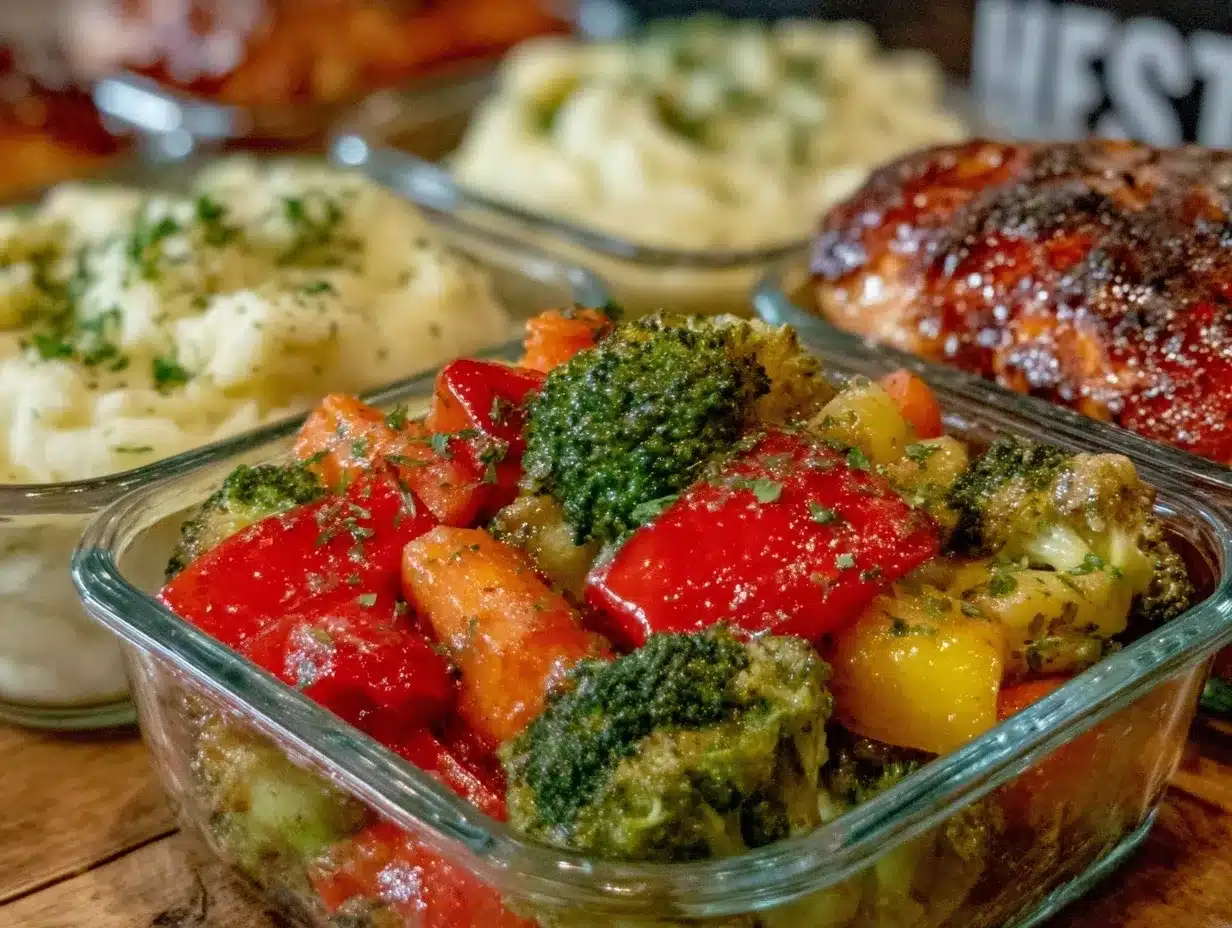
- Cool Food Before Storing: Let hot dishes cool down to room temperature (about 30-60 minutes) before putting them in the fridge. Storing hot food directly can raise fridge temperature and promote bacterial growth.
- Divide Into Portions: Separate large batches into smaller portions. This makes reheating easier and prevents repeatedly exposing the whole batch to air and heat.
- Choose the Right Container: Use airtight containers or freezer bags. For liquids or soups, glass jars with screw-on lids work well. Avoid containers that aren’t leak-proof if you plan to transport leftovers.
- Label Everything: Write the contents and date on each container. This simple step avoids mystery meals and helps you use food before it spoils.
- Organize Your Fridge: Store raw ingredients on the bottom shelves and cooked leftovers on higher shelves. Keep frequently used items at eye level for easy access.
- Use Moisture Control: For leafy greens or herbs, wrap in a paper towel before storing to absorb excess moisture and keep them crisp longer.
- Freeze When Necessary: Freeze leftovers you won’t use within 3-4 days. Label and date freezer bags, and press out as much air as possible before sealing.
- Reheat Properly: When reheating, bring food to an internal temperature of 165°F (74°C). Stir soups and casseroles halfway through reheating to ensure even warmth.
- Avoid Cross-Contamination: Keep leftovers separate from raw foods to prevent bacteria spread, especially in shared containers or fridge spaces.
- Practice the FIFO Method: First In, First Out. Use older leftovers before newer batches to minimize waste.
One time, I forgot to label a container and ended up with mystery curry that I wasn’t sure was safe to eat. Lesson learned—labeling is non-negotiable! Also, I recommend using containers that stack well; it saves fridge space and keeps things neat.
Cooking Tips & Techniques
Leftover food storage isn’t just about putting food in the fridge; it’s about knowing how to maintain flavor and texture. Here are some tips I’ve picked up over time:
- Cool Quickly: To speed up cooling, divide food into shallow containers instead of one deep dish. This reduces bacteria growth risk.
- Don’t Overpack: Give leftovers a little breathing room in the fridge. Cramped containers can trap moisture and cause sogginess.
- Use Airtight Seals: Containers with rubber gaskets or silicone seals work best at keeping air out and preventing freezer burn.
- Reheat Smartly: Avoid microwaving leftovers multiple times. Instead, reheat only the portion you’re going to eat to keep it fresh.
- Freeze in Portions: Freeze in meal-sized amounts so you don’t thaw more than needed, preventing waste.
- Keep Sauces Separate: For dishes with sauces or dressings, store those separately when possible. Sauces can make food soggy during storage.
- Know Your Food’s Shelf Life: Cooked meat usually lasts 3-4 days in the fridge, while soups and stews can last up to 5. When in doubt, smell and appearance are your best guides, but err on the side of caution.
- Label with Use-By Dates: Not just the date cooked; add a recommended use-by date to keep track.
Once, I tried reheating leftover fried chicken and ended up with a soggy mess. The fix? Reheat in the oven or air fryer to bring back crispiness. Trust me, it’s a small step that makes a big difference.
Variations & Adaptations
Leftover storage isn’t one-size-fits-all. Depending on your kitchen habits or dietary needs, you can tweak how you store your food:
- Gluten-Free Adaptation: Use silicone freezer bags and glass containers to avoid plastic that might contain gluten residues. Label gluten-free leftovers clearly to avoid mix-ups.
- Vegan-Friendly Tips: Store cooked beans, grains, and veggies in separate containers to mix and match meals throughout the week. Keep dressings and sauces vegan and store separately to maintain freshness.
- Seasonal Adjustments: In humid summers, use moisture-absorbing paper towels under leafy greens. In winter, leftovers tend to keep longer, but still monitor carefully.
- Freezer Meal Prep: Freeze complete meals in portioned containers for easy grab-and-go lunches or dinners.
- Personal Twist: I like to add a sprinkle of fresh herbs or a squeeze of lemon after reheating to brighten flavors and make leftovers feel new.
Serving & Storage Suggestions
Leftovers can be a treat if served right. Here’s how I usually handle it:
- Serving Temperature: Serve hot leftovers hot and cold items (like salads) chilled. For reheated dishes, let them rest for a minute after microwaving to evenly distribute heat.
- Presentation: Transfer leftovers to fresh plates and add a garnish like chopped herbs or a drizzle of olive oil to freshen the look.
- Storage Duration: Most cooked leftovers last 3-4 days refrigerated. Freeze any extras you won’t eat within that time.
- Freezing Tips: Label clearly with content and date. Use within 2-3 months for best quality.
- Reheating Tips: Use oven or stovetop for crispy foods. Microwave soups and stews, stirring halfway through.
- Flavor Development: Some stews and chili actually taste better after a day or two as flavors meld beautifully.
Nutritional Information & Benefits
Proper leftover storage helps keep your meals safe and nutritious. When food is stored correctly, vitamins and minerals are preserved better, reducing waste and saving money.
Key benefits:
- Reduces Food Waste: Keeping leftovers fresh means fewer trips to the trash and less environmental impact.
- Maintains Nutrient Quality: Proper storage slows nutrient loss, especially for sensitive vitamins in cooked veggies.
- Supports Budget-Friendly Eating: Saving leftovers stretches your grocery dollars further.
- Diet-Friendly: Great for portion control and meal planning, helping you stay on track with nutrition goals.
Just a heads-up: leftovers with dairy, eggs, or seafood require extra care to prevent spoilage and foodborne illness. When in doubt, trust your nose and when the food was stored.
Conclusion
Honestly, mastering leftover food storage feels like a kitchen superpower. It’s not just about keeping food safe—it’s about making your meals last longer, taste better, and saving you from the dreaded “what’s for lunch?” panic. This guide reflects years of trial, error, and happy surprises in my kitchen, and I hope it makes your meal routine easier and more enjoyable.
Feel free to tweak these tips based on your lifestyle and preferences. Maybe you’ll find a new favorite way to store that roast chicken or leftover pasta. I’d love to hear how you make leftovers work for you—drop a comment or share your own tips!
Here’s to fresher, tastier meals every day—and less food waste in the process. You’ve got this!
FAQs
How long can I keep leftovers safely in the fridge?
Most cooked leftovers are good for 3-4 days refrigerated. Always smell and check for any signs of spoilage before eating.
Can I freeze any type of leftover food?
Most leftovers can be frozen, but some items like creamy sauces or lettuce don’t freeze well. It’s best to freeze soups, cooked meats, and grains.
What’s the best way to reheat leftovers without drying them out?
Use the oven or stovetop for crispy foods, and microwave with a cover or damp paper towel to retain moisture for soups and casseroles.
Should I store leftovers in plastic or glass containers?
Glass containers are ideal because they don’t stain or hold odors and are oven-safe. Plastic containers are fine but can sometimes retain smells and aren’t always microwave-safe.
How do I prevent leftover food from tasting bland or boring?
Add fresh herbs, a splash of lemon juice, or a drizzle of olive oil after reheating. Sometimes, a little seasoning adjustment revives the flavors perfectly.
Pin This Recipe!
Ultimate Leftover Food Storage Guide: 10 Easy Tips for Fresh Tasty Meals
A comprehensive guide to storing, reheating, and repurposing leftovers to keep meals fresh, tasty, and reduce food waste.
- Prep Time: 10 minutes
- Cook Time: 0 minutes
- Total Time: 10 minutes
- Yield: Varies depending on leftovers
- Category: Food Storage Guide
- Cuisine: Universal
Ingredients
- Food Storage Containers (BPA-free plastic or glass with airtight lids)
- Plastic Wrap
- Aluminum Foil
- Freezer Bags (heavy-duty, zip-top)
- Labels & Markers (waterproof labels or masking tape with permanent marker)
- Paper Towels
- Wax Paper
- Vacuum Sealer (optional)
- Ice Packs or Cool Bags
Instructions
- Cool hot dishes to room temperature (about 30-60 minutes) before storing in the fridge.
- Divide large batches into smaller portions for easier reheating.
- Use airtight containers or freezer bags; glass jars with screw-on lids work well for liquids.
- Label each container with contents and date to avoid confusion.
- Organize the fridge by storing raw ingredients on bottom shelves and cooked leftovers on higher shelves.
- Wrap leafy greens or herbs in paper towels before storing to absorb moisture.
- Freeze leftovers you won’t use within 3-4 days, pressing out air before sealing freezer bags.
- Reheat leftovers to an internal temperature of 165°F (74°C), stirring soups and casseroles halfway through.
- Keep leftovers separate from raw foods to avoid cross-contamination.
- Practice FIFO (First In, First Out) to use older leftovers before newer ones.
Notes
Cool food before storing to prevent bacterial growth. Label containers with dates and contents. Use airtight containers to maintain freshness. Reheat only the portion you plan to eat to avoid drying out leftovers. Freeze leftovers you won’t consume within 3-4 days. Use oven or air fryer to reheat fried foods for crispiness. Practice FIFO to minimize waste.
Nutrition
- Serving Size: Varies depending on
Keywords: leftover food storage, food storage tips, reheating leftovers, reduce food waste, meal prep, food safety, leftover storage containers



